Signs for our village camp at Borderland


Our camp at Borderland festival is named “The Elements”, and a nice sign will make it stand out.


I laser cut out the letters out of plywood, and the mounting holes in the back plate as well. I screwed in the letters with a few centimeter spacers between.


I made a nice control interface for setting light levels and modes of the sign. I encapsulated it in a great looking aluminium case with rubber seals for weather protection.
The control interface was also engraved by a fiber laser.


WS2812 LED strip was attached to the underside of the letters, aimed to reflect the light towards a light background that would diffuse the light around the letters.
And lastly the letters painted with corresponding colors to make the sign visible in daytime as well at night.

Folkrace 187


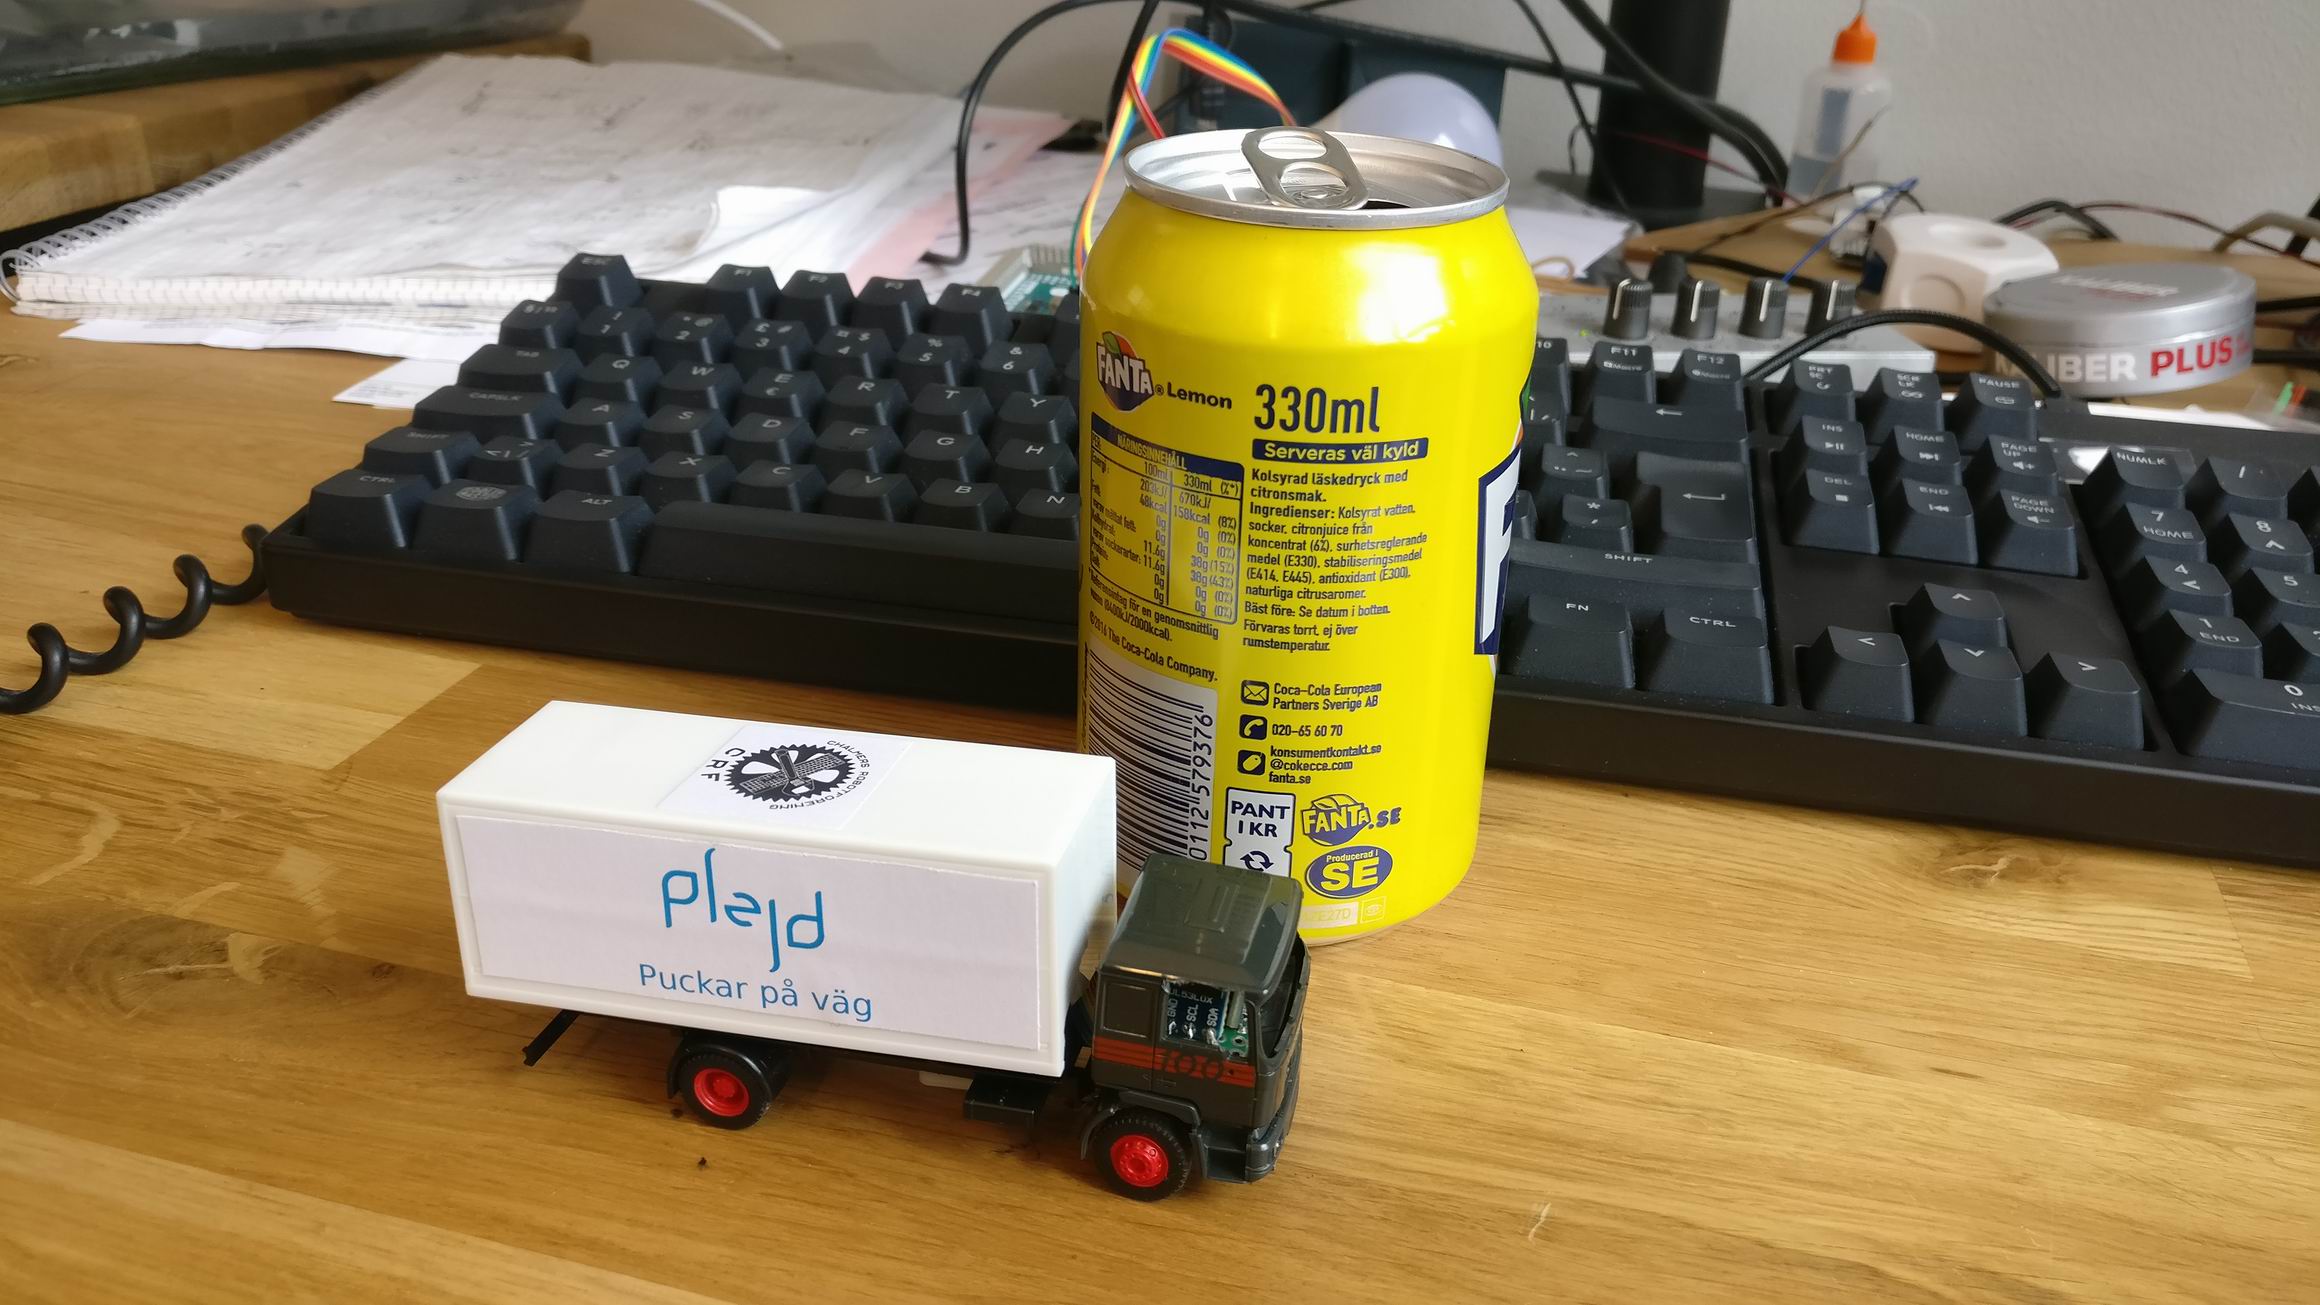
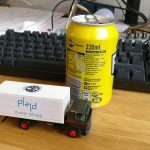
In Swedish Robot Championship there’s a tournament that is called Folkrace where autonomous cars is racing around a track. A sub class of this is a miniature race in scale 1:87.


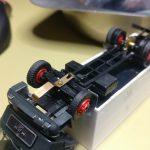
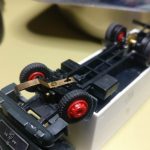
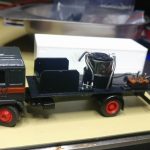
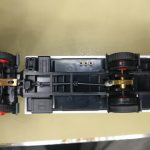
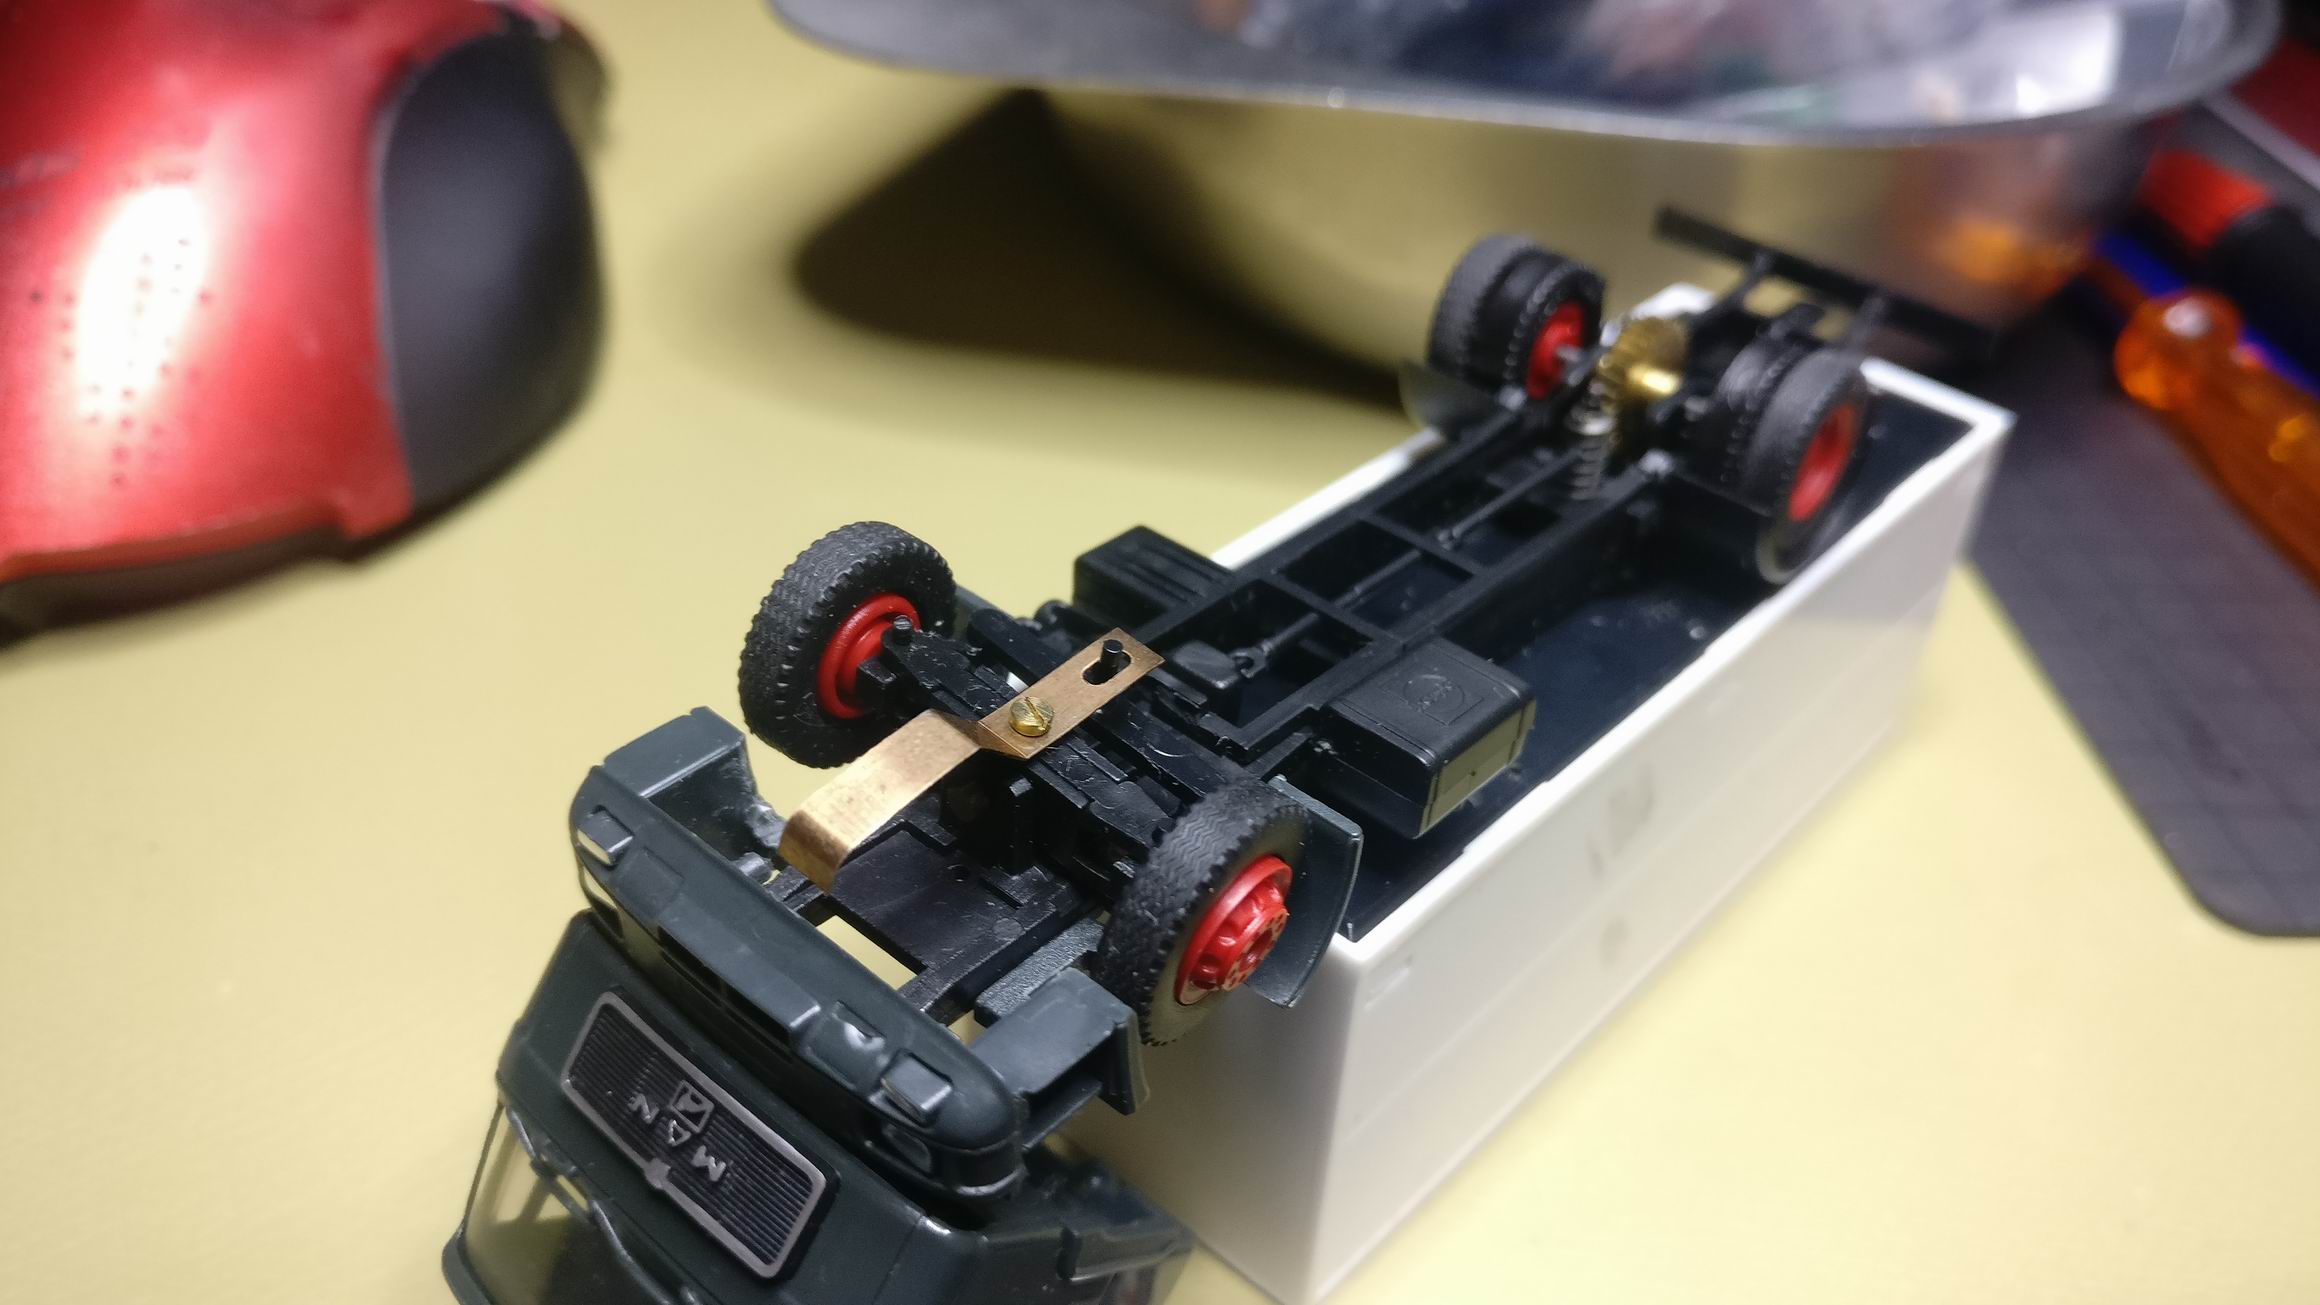
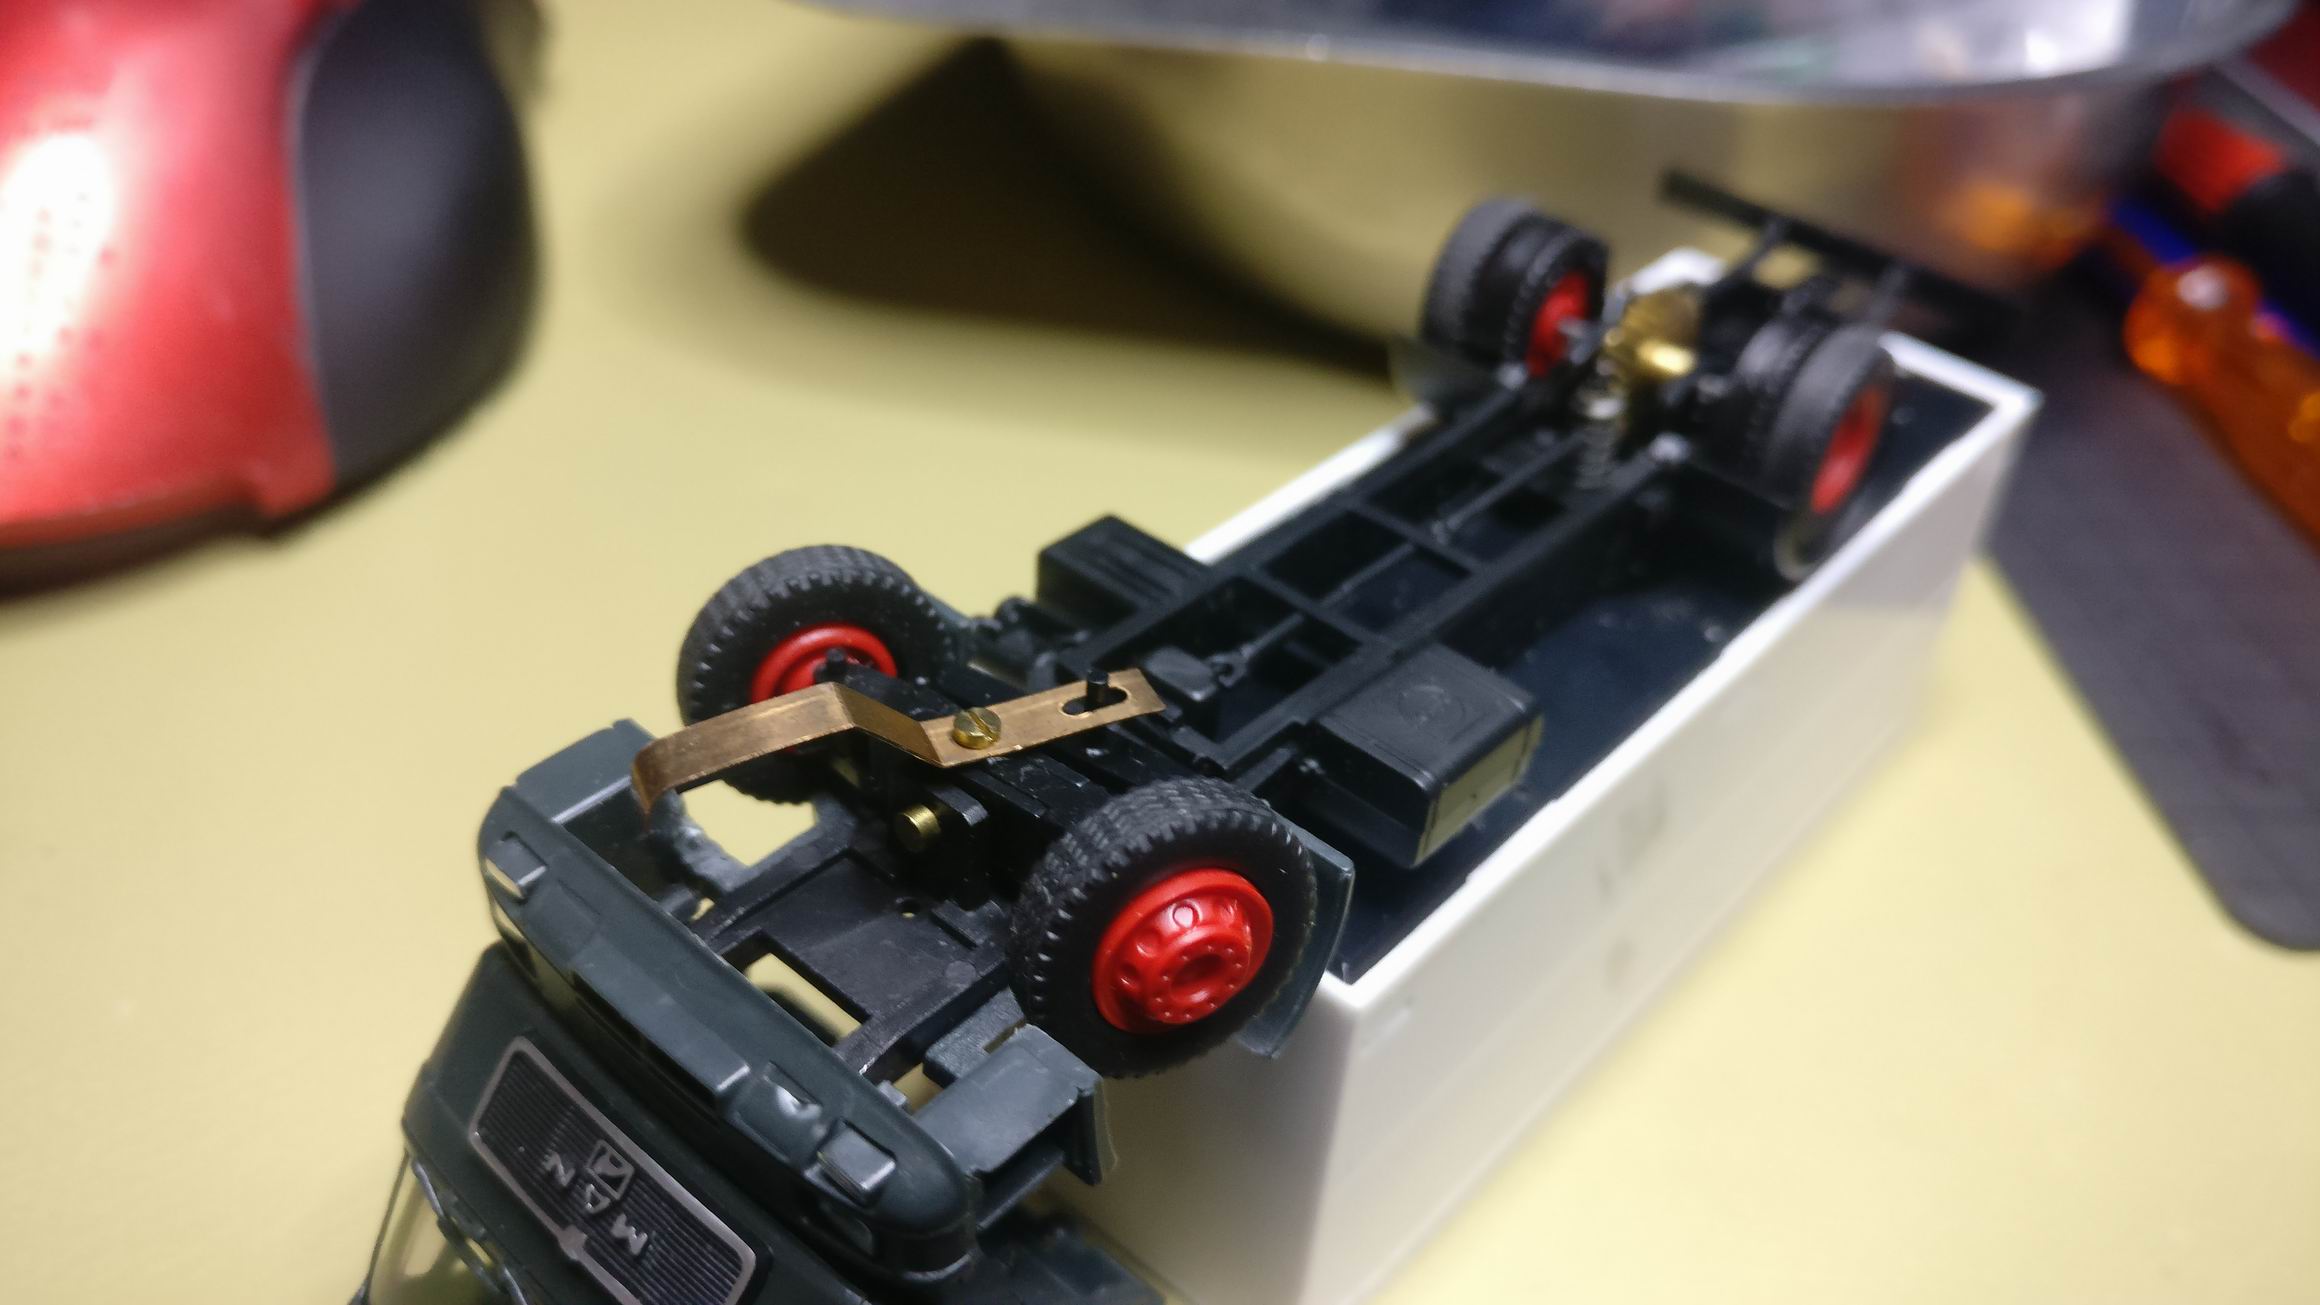
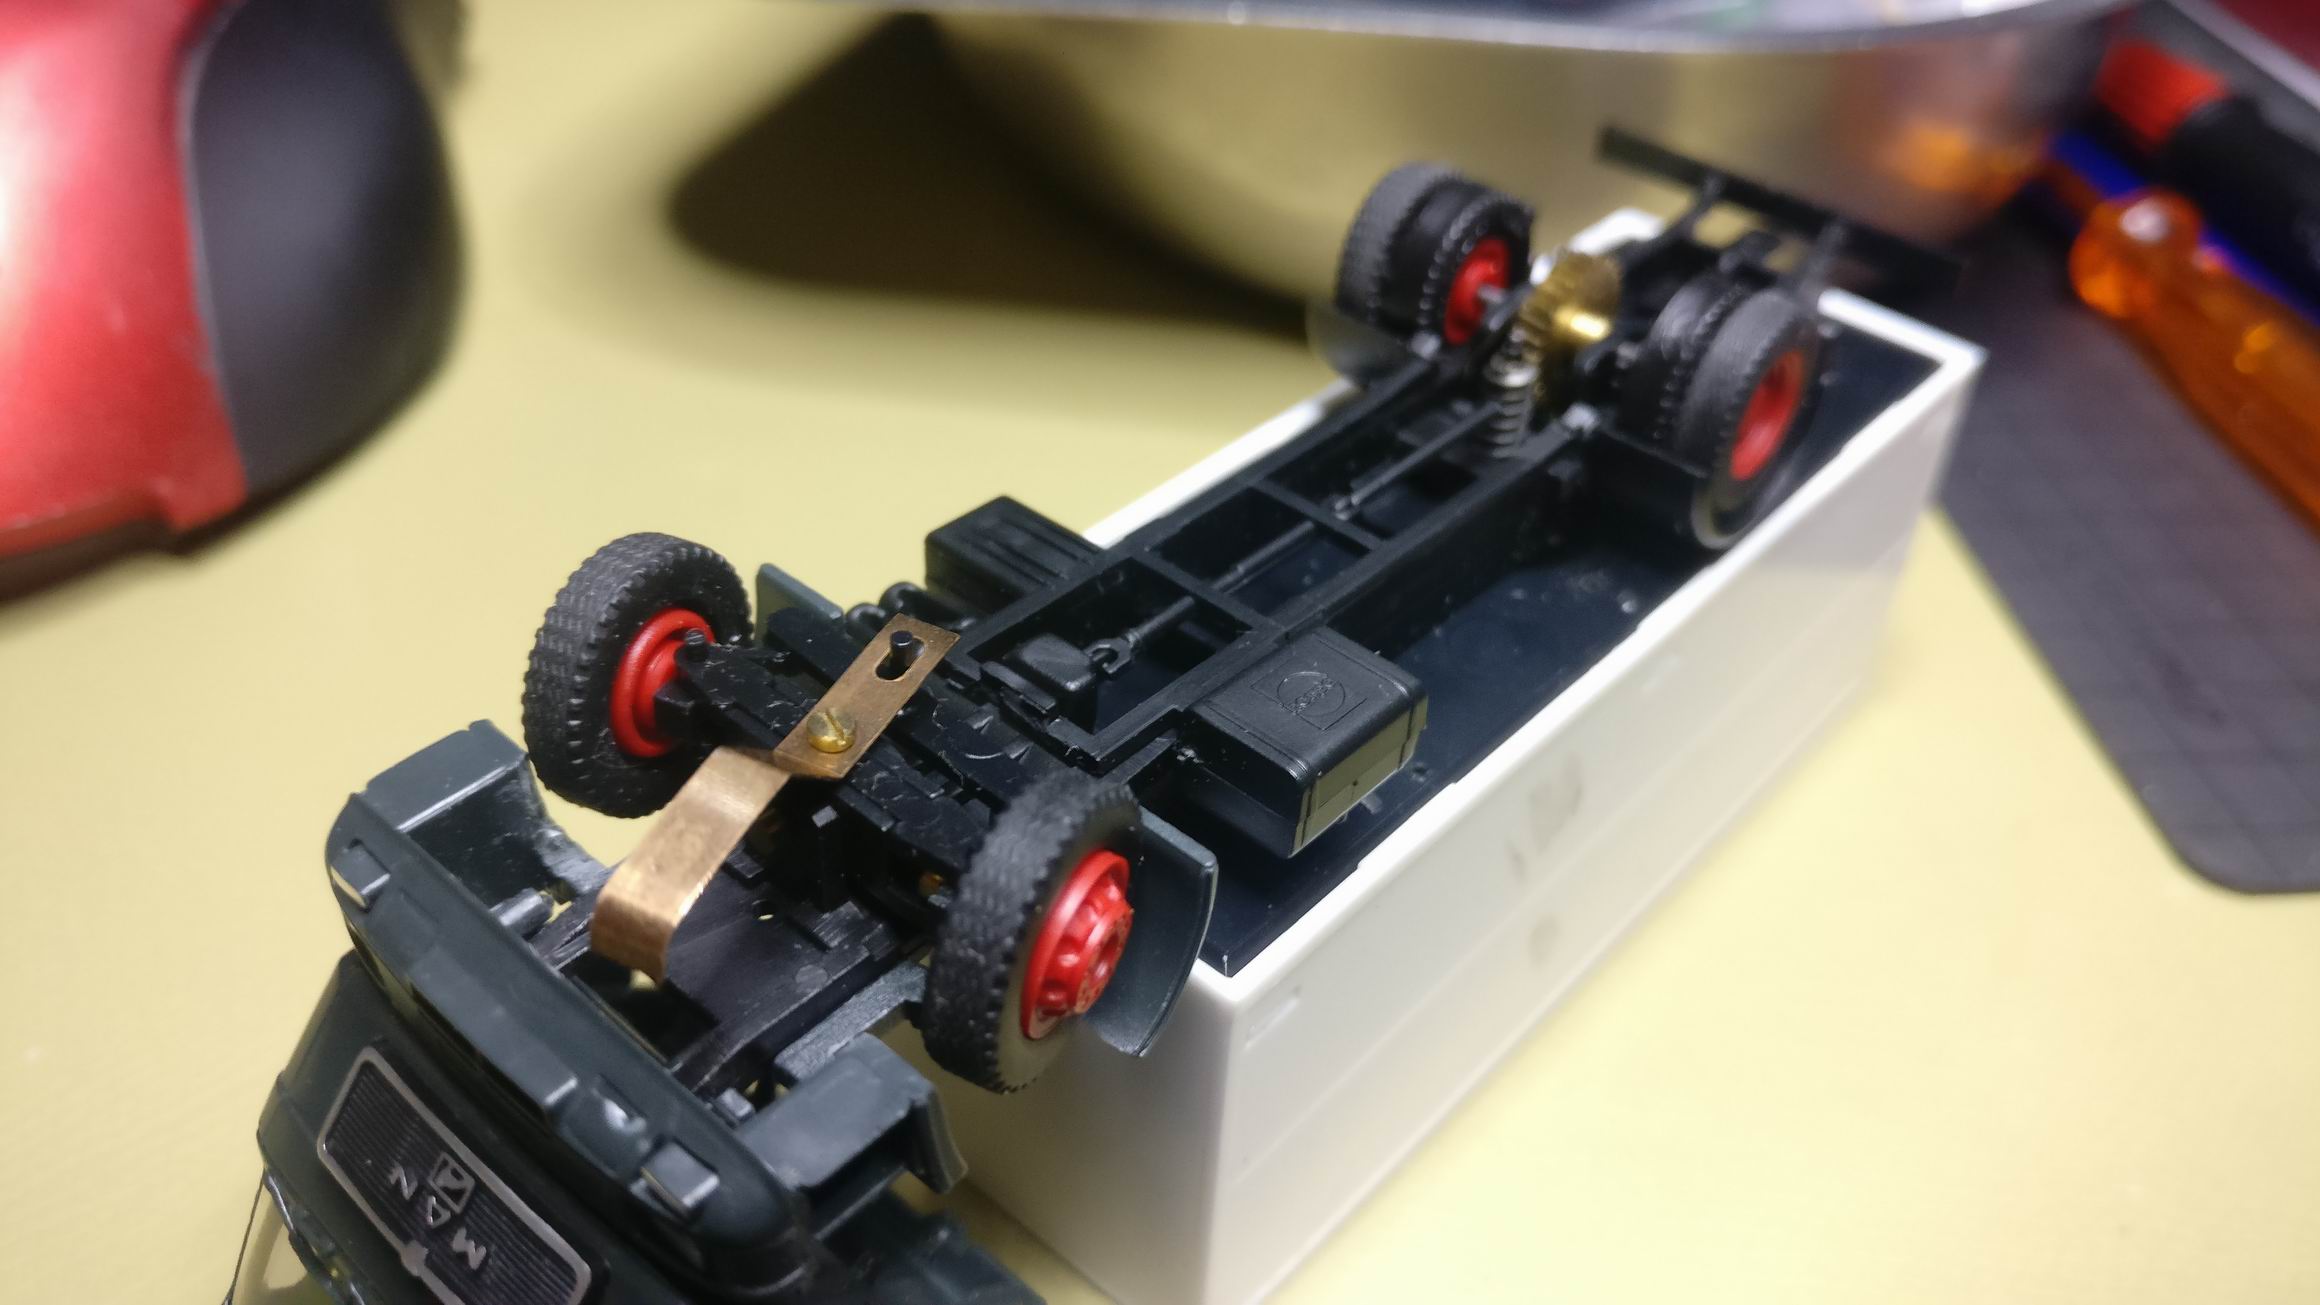
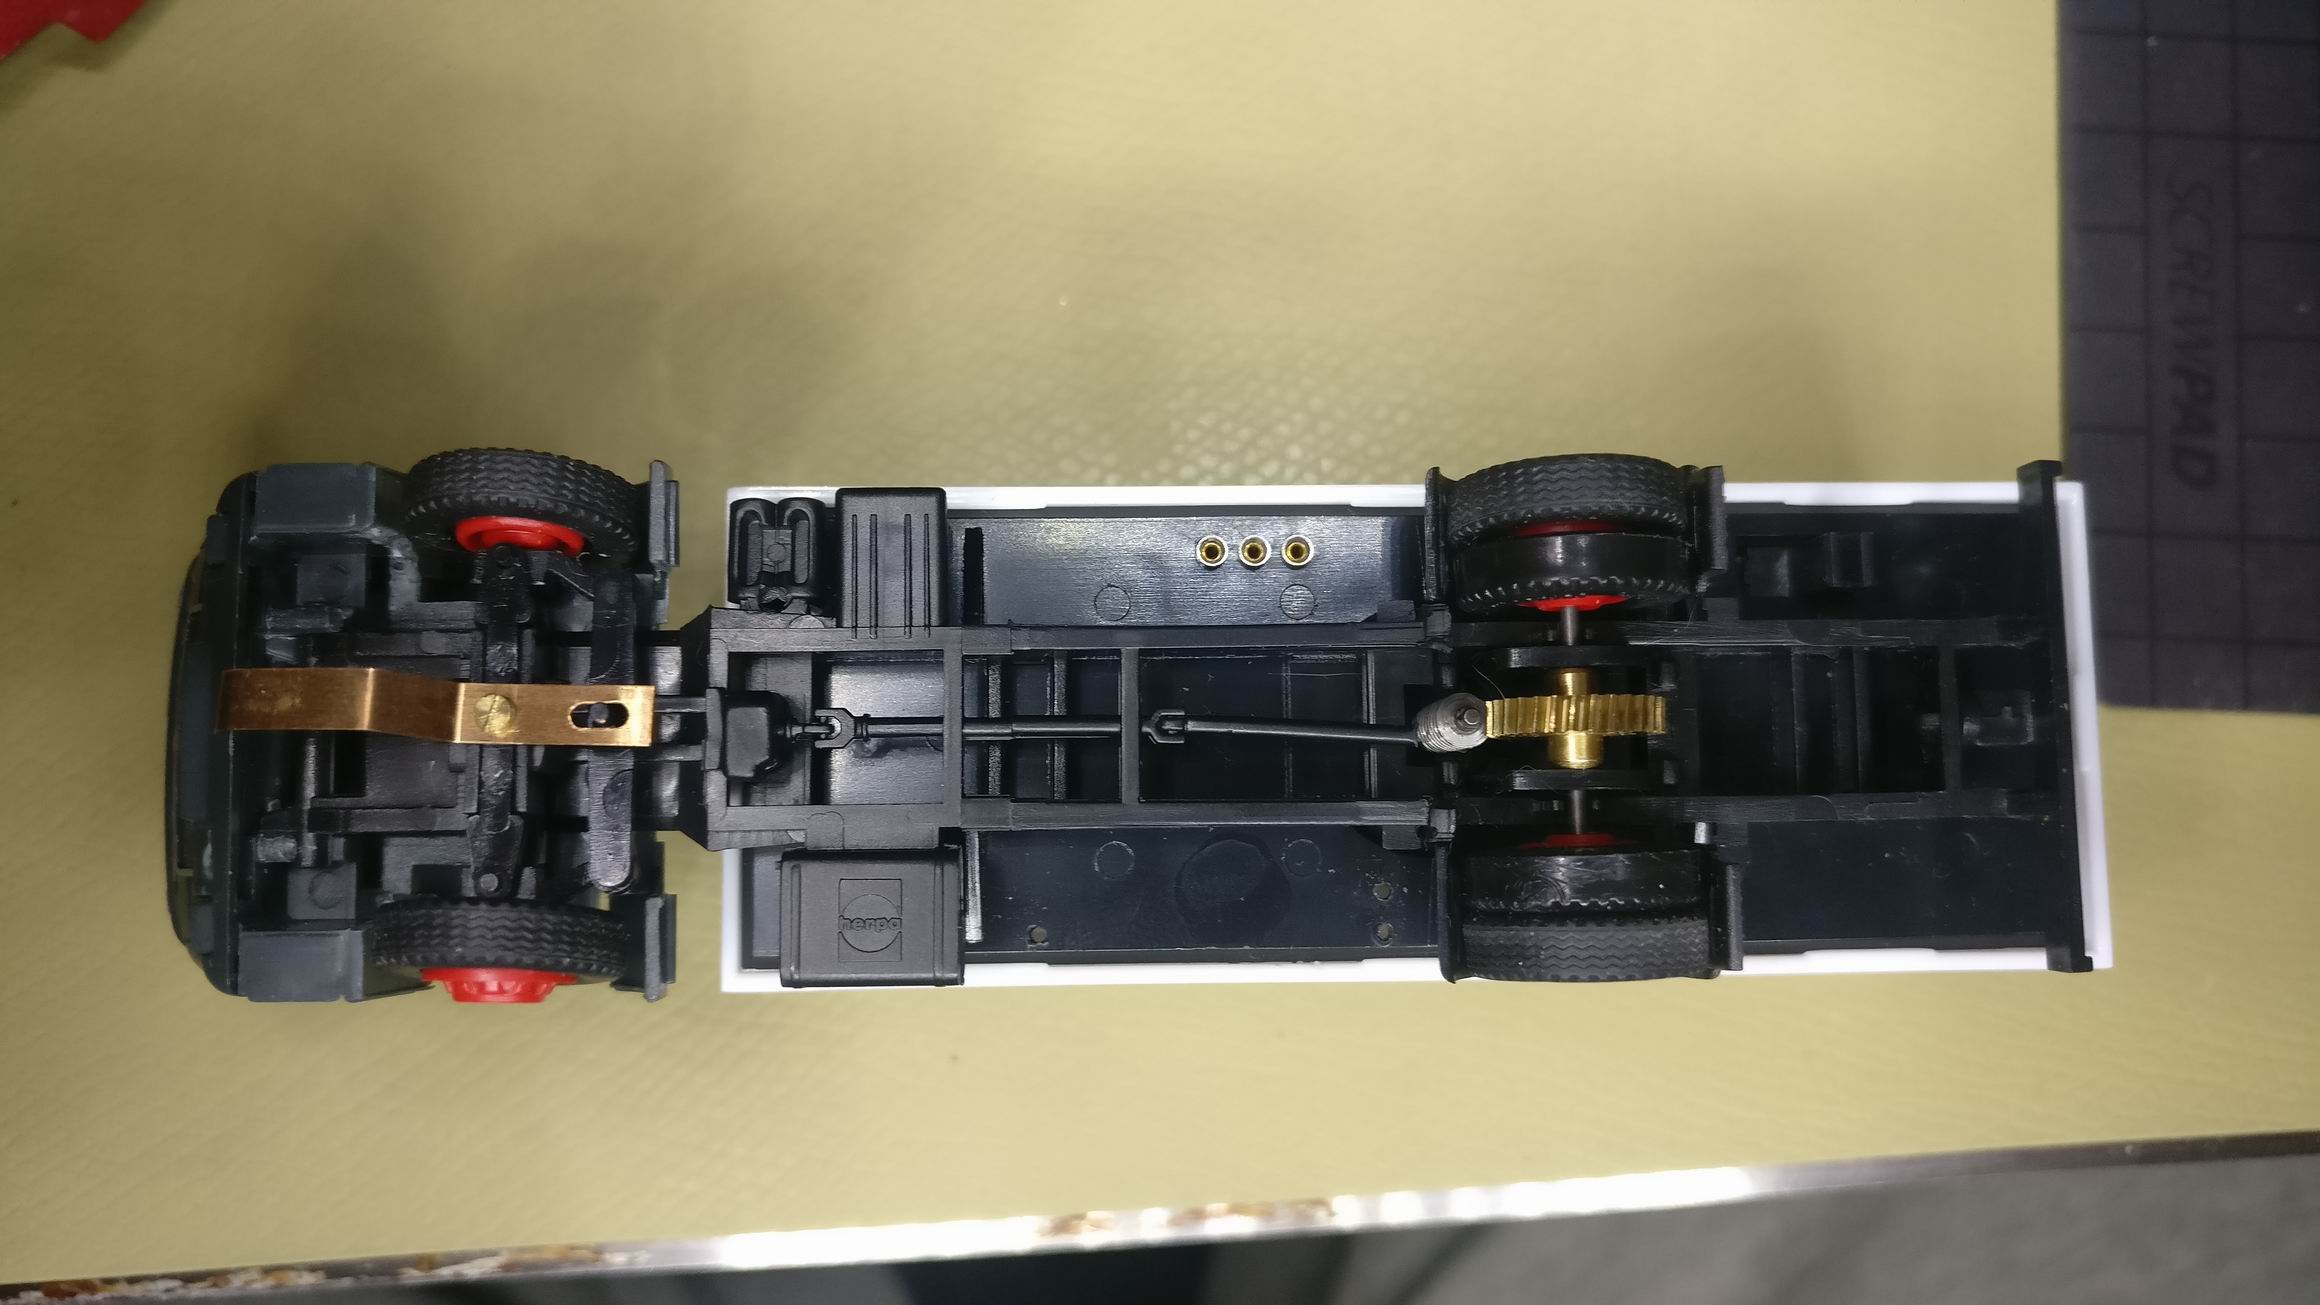
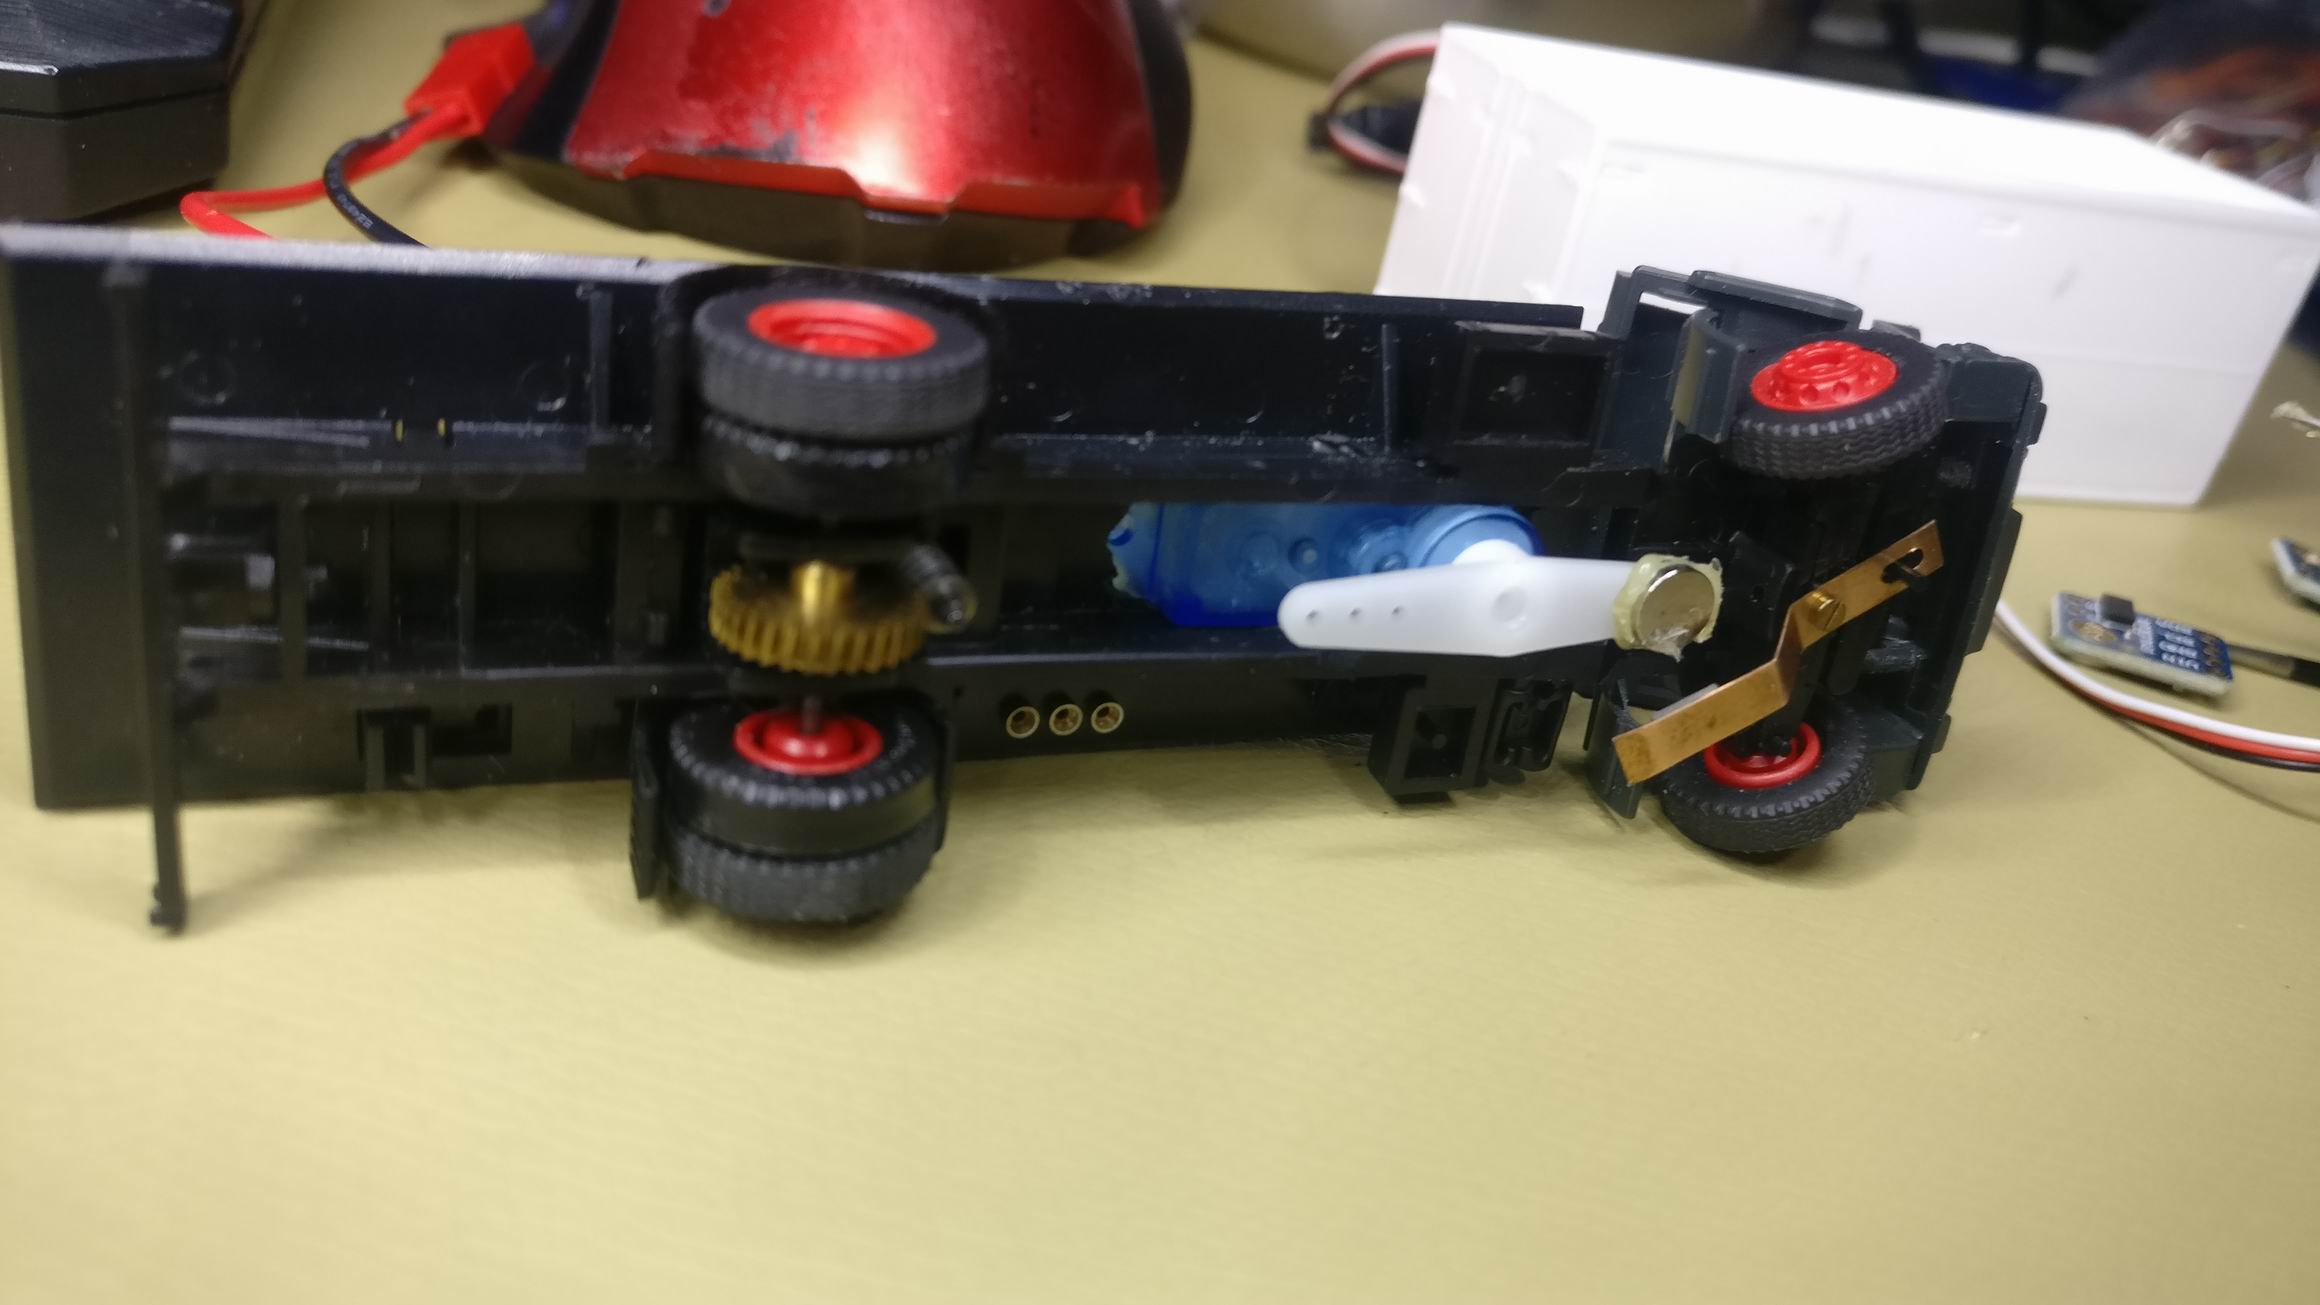
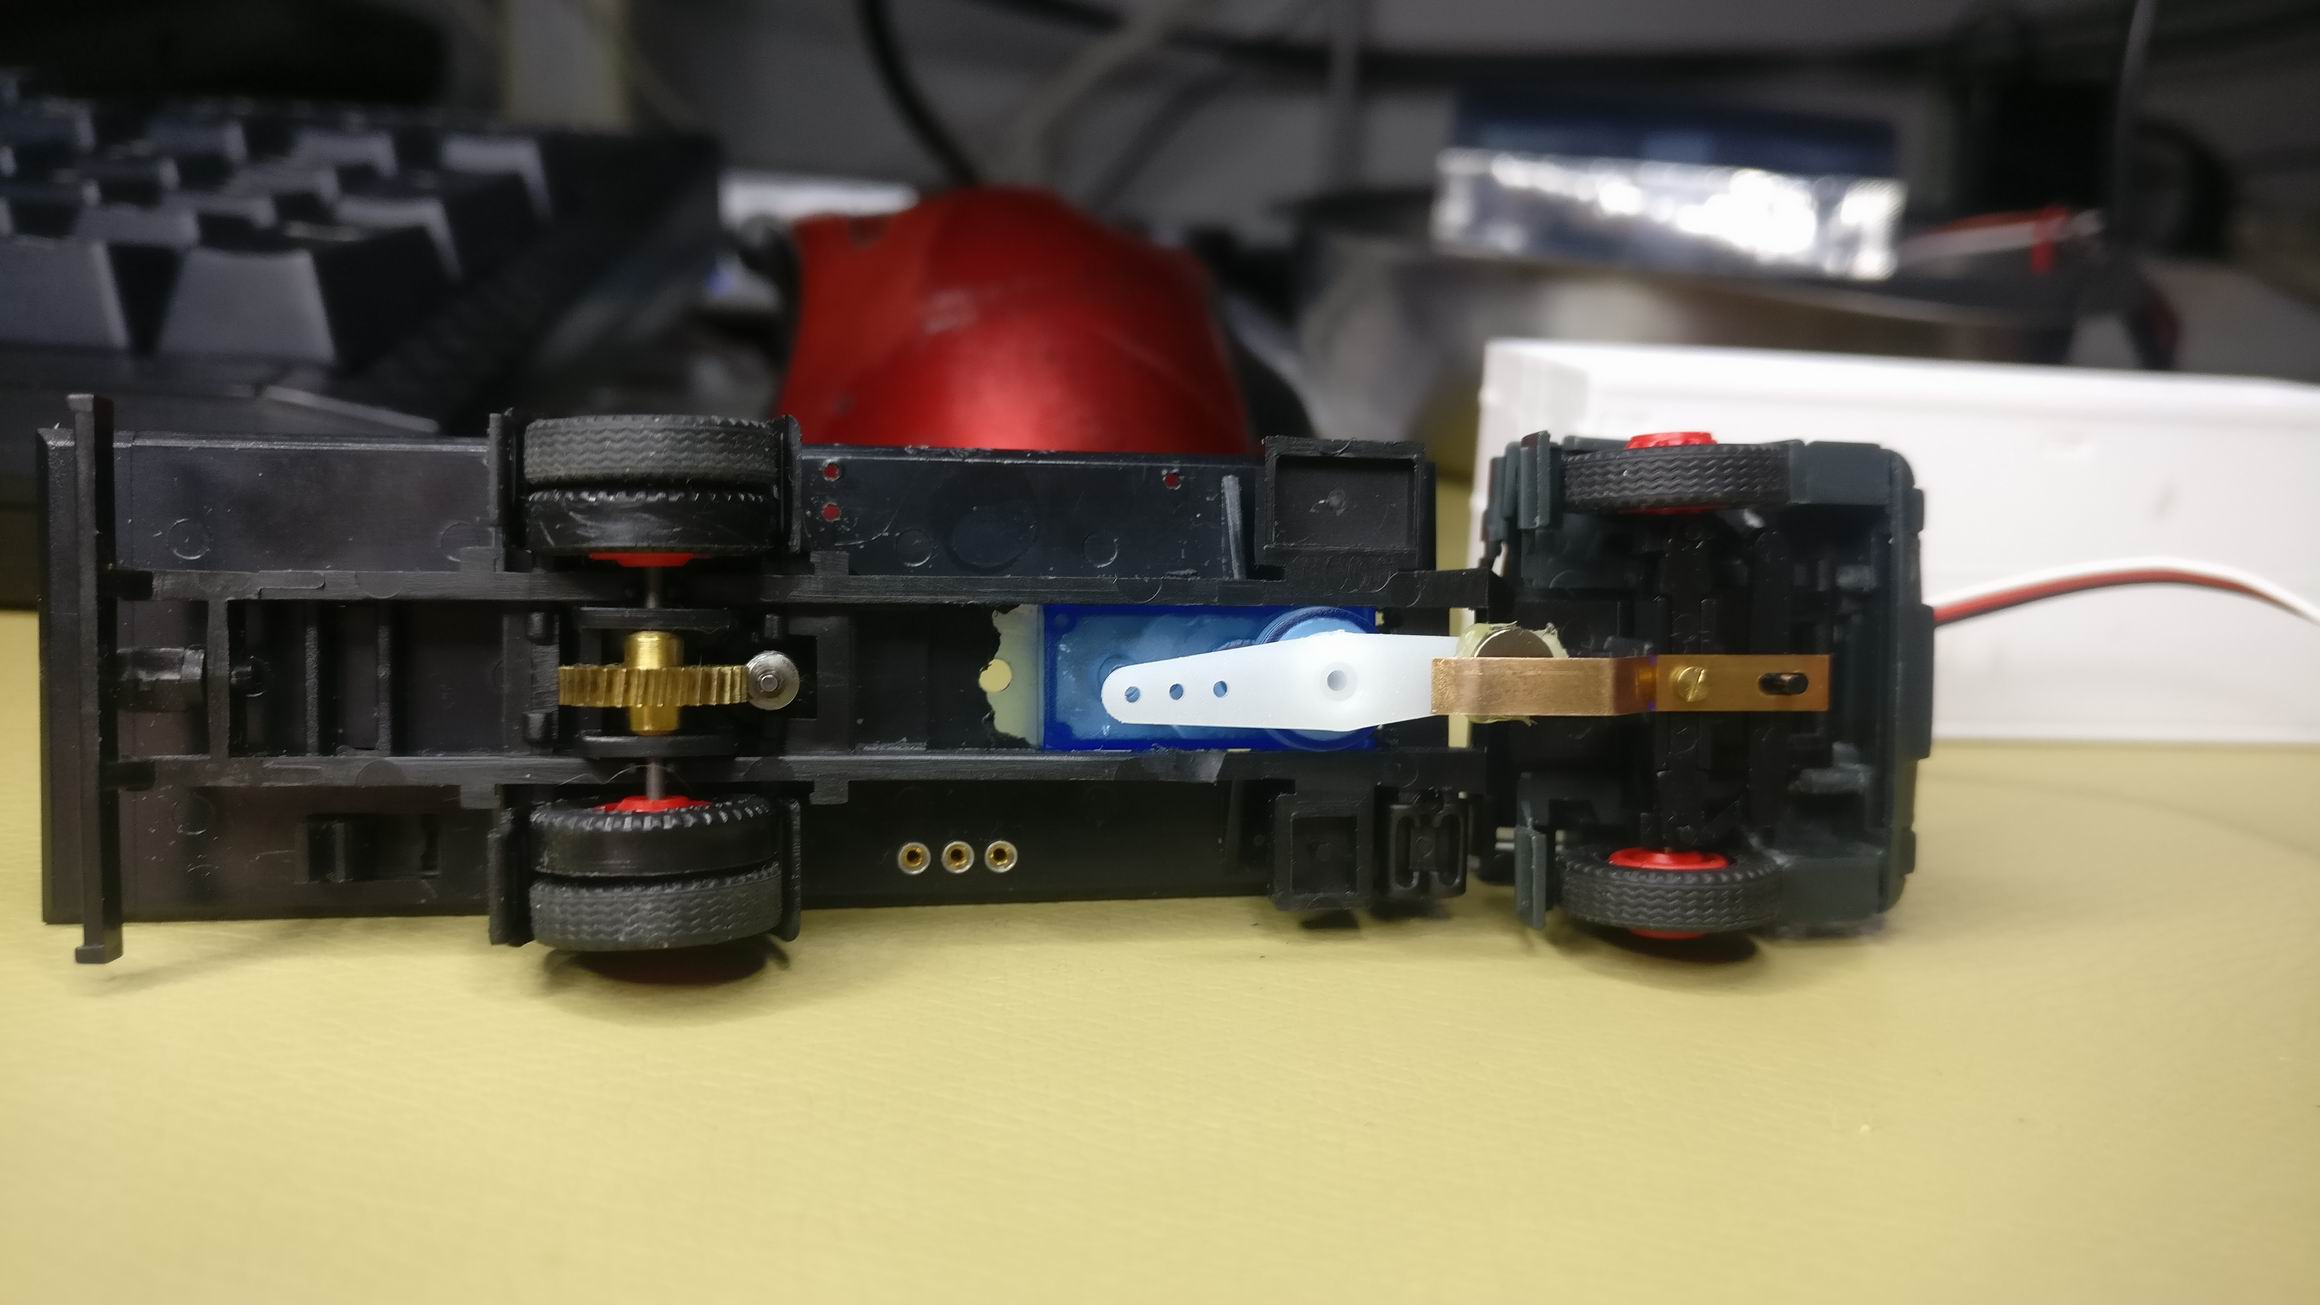
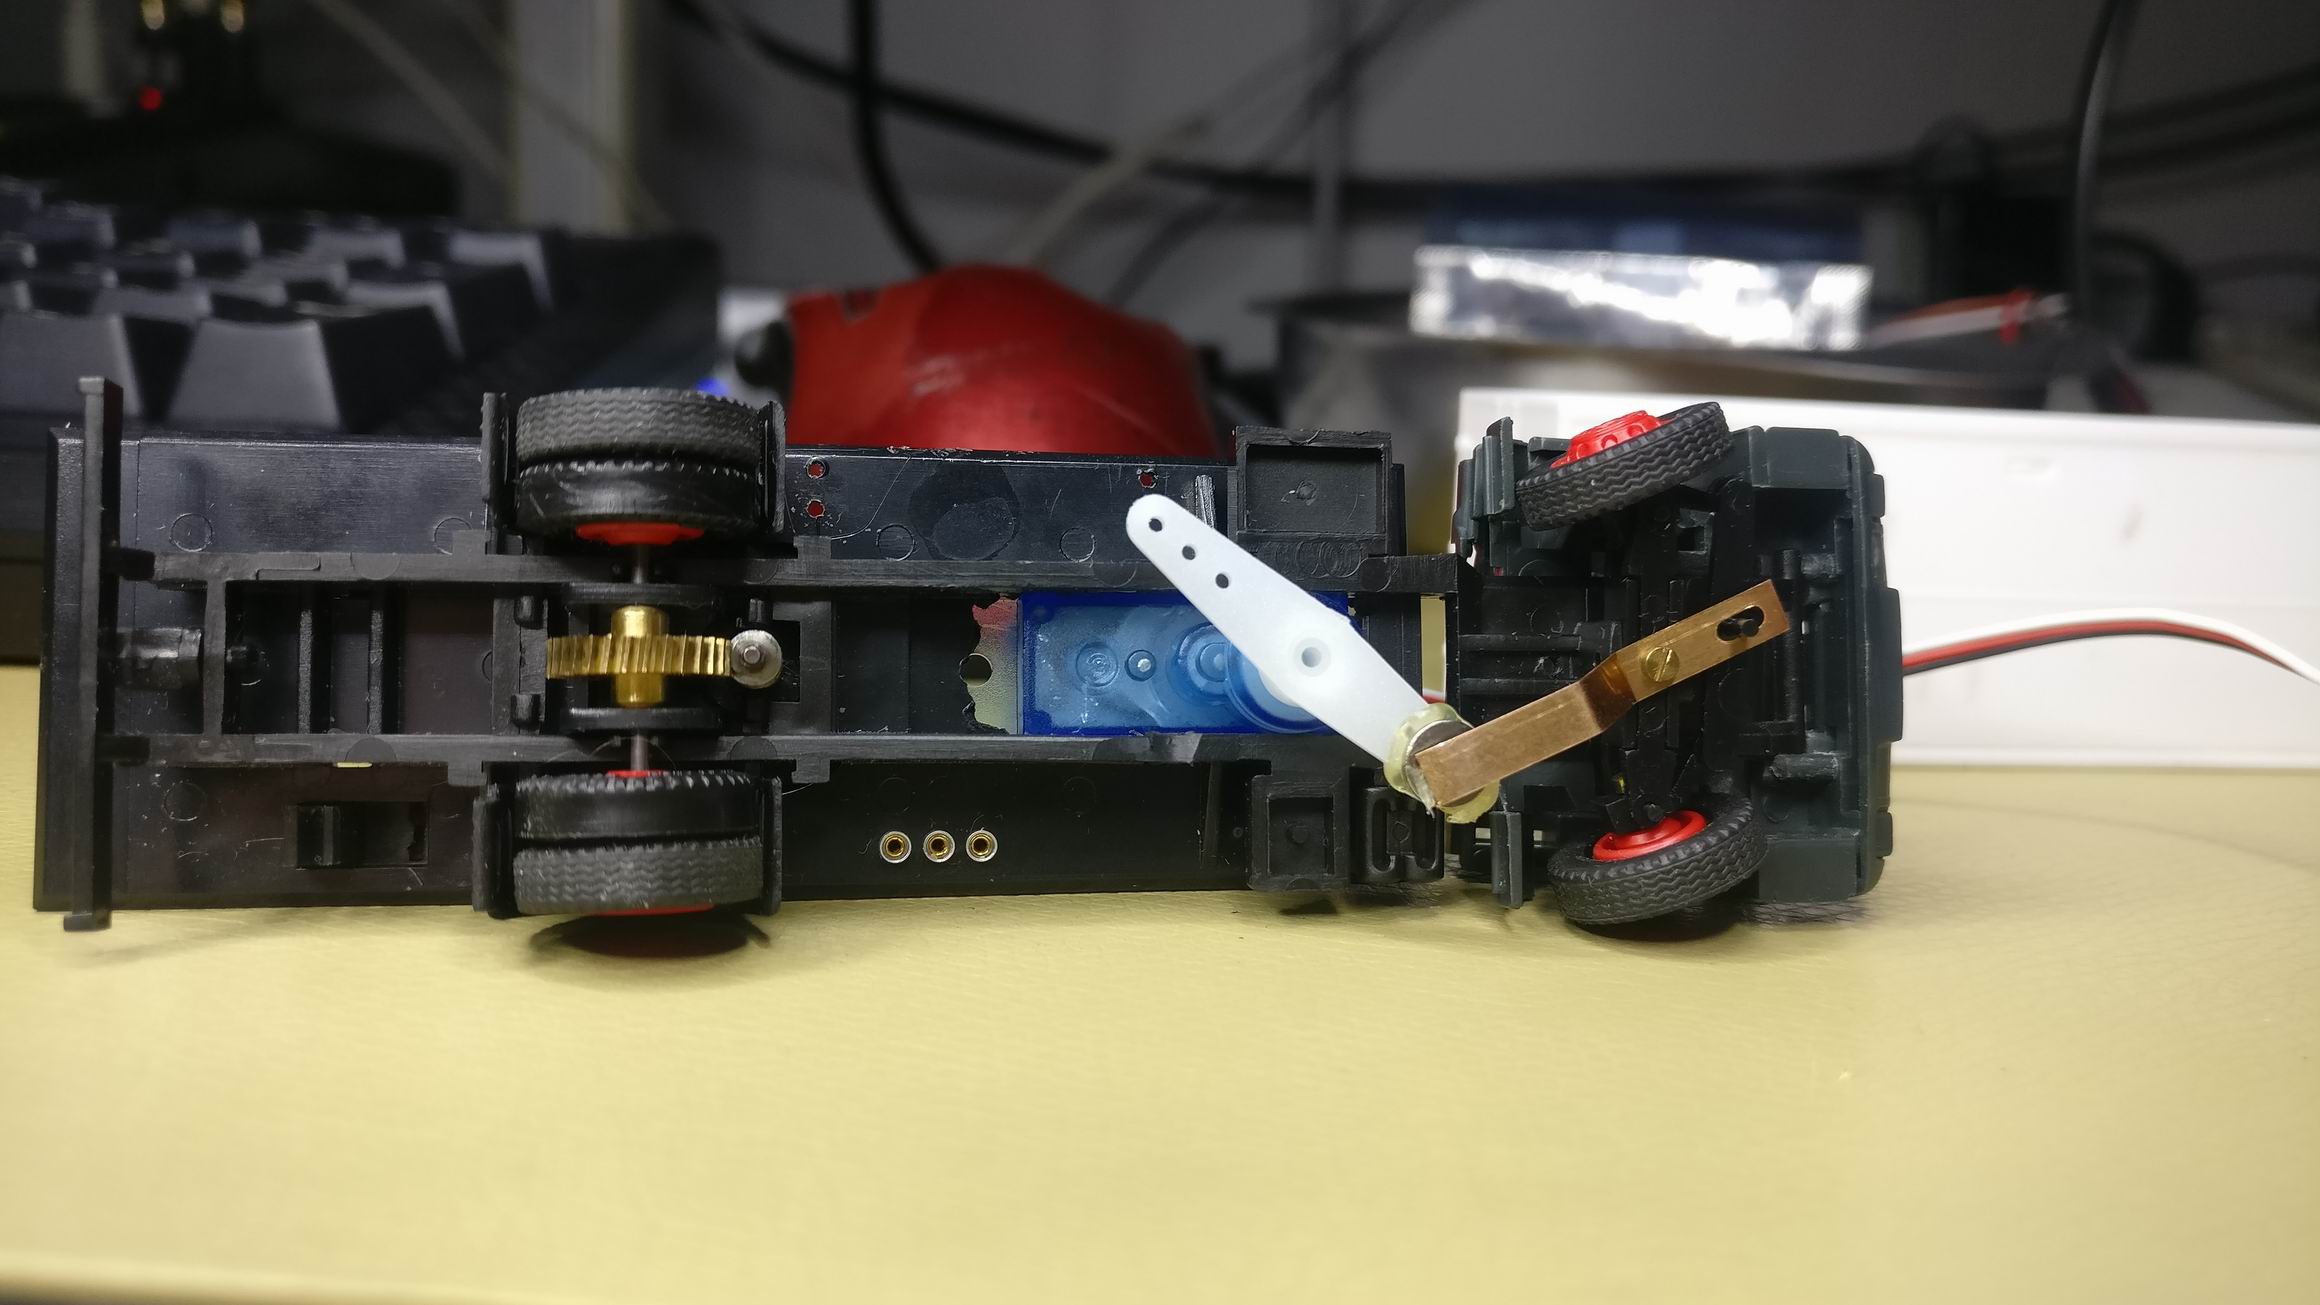
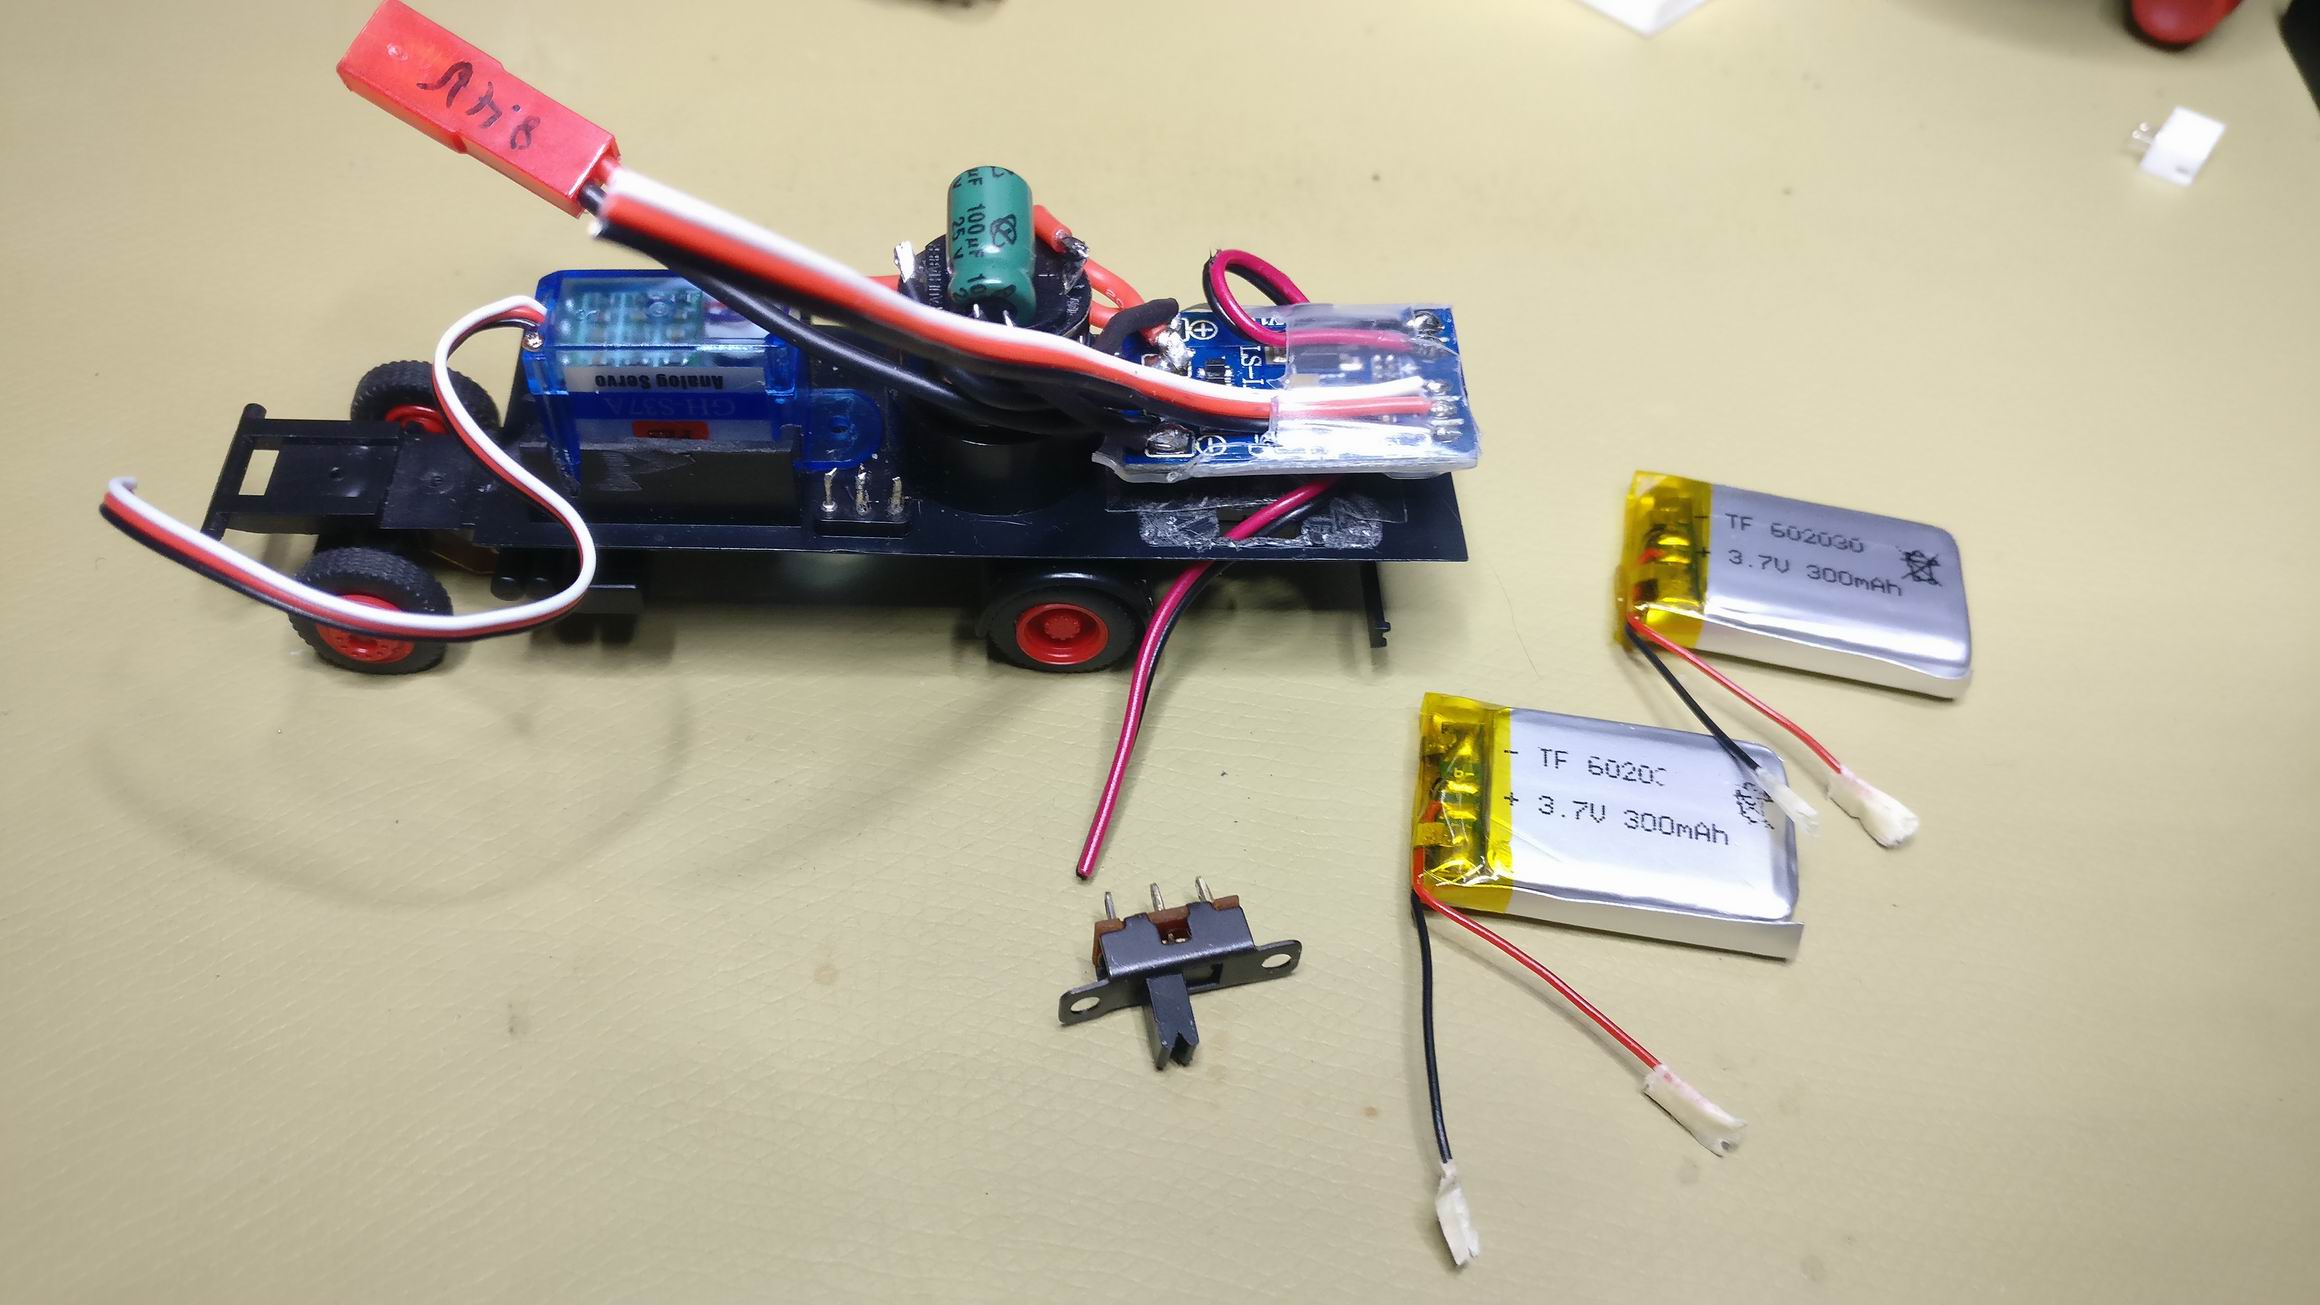
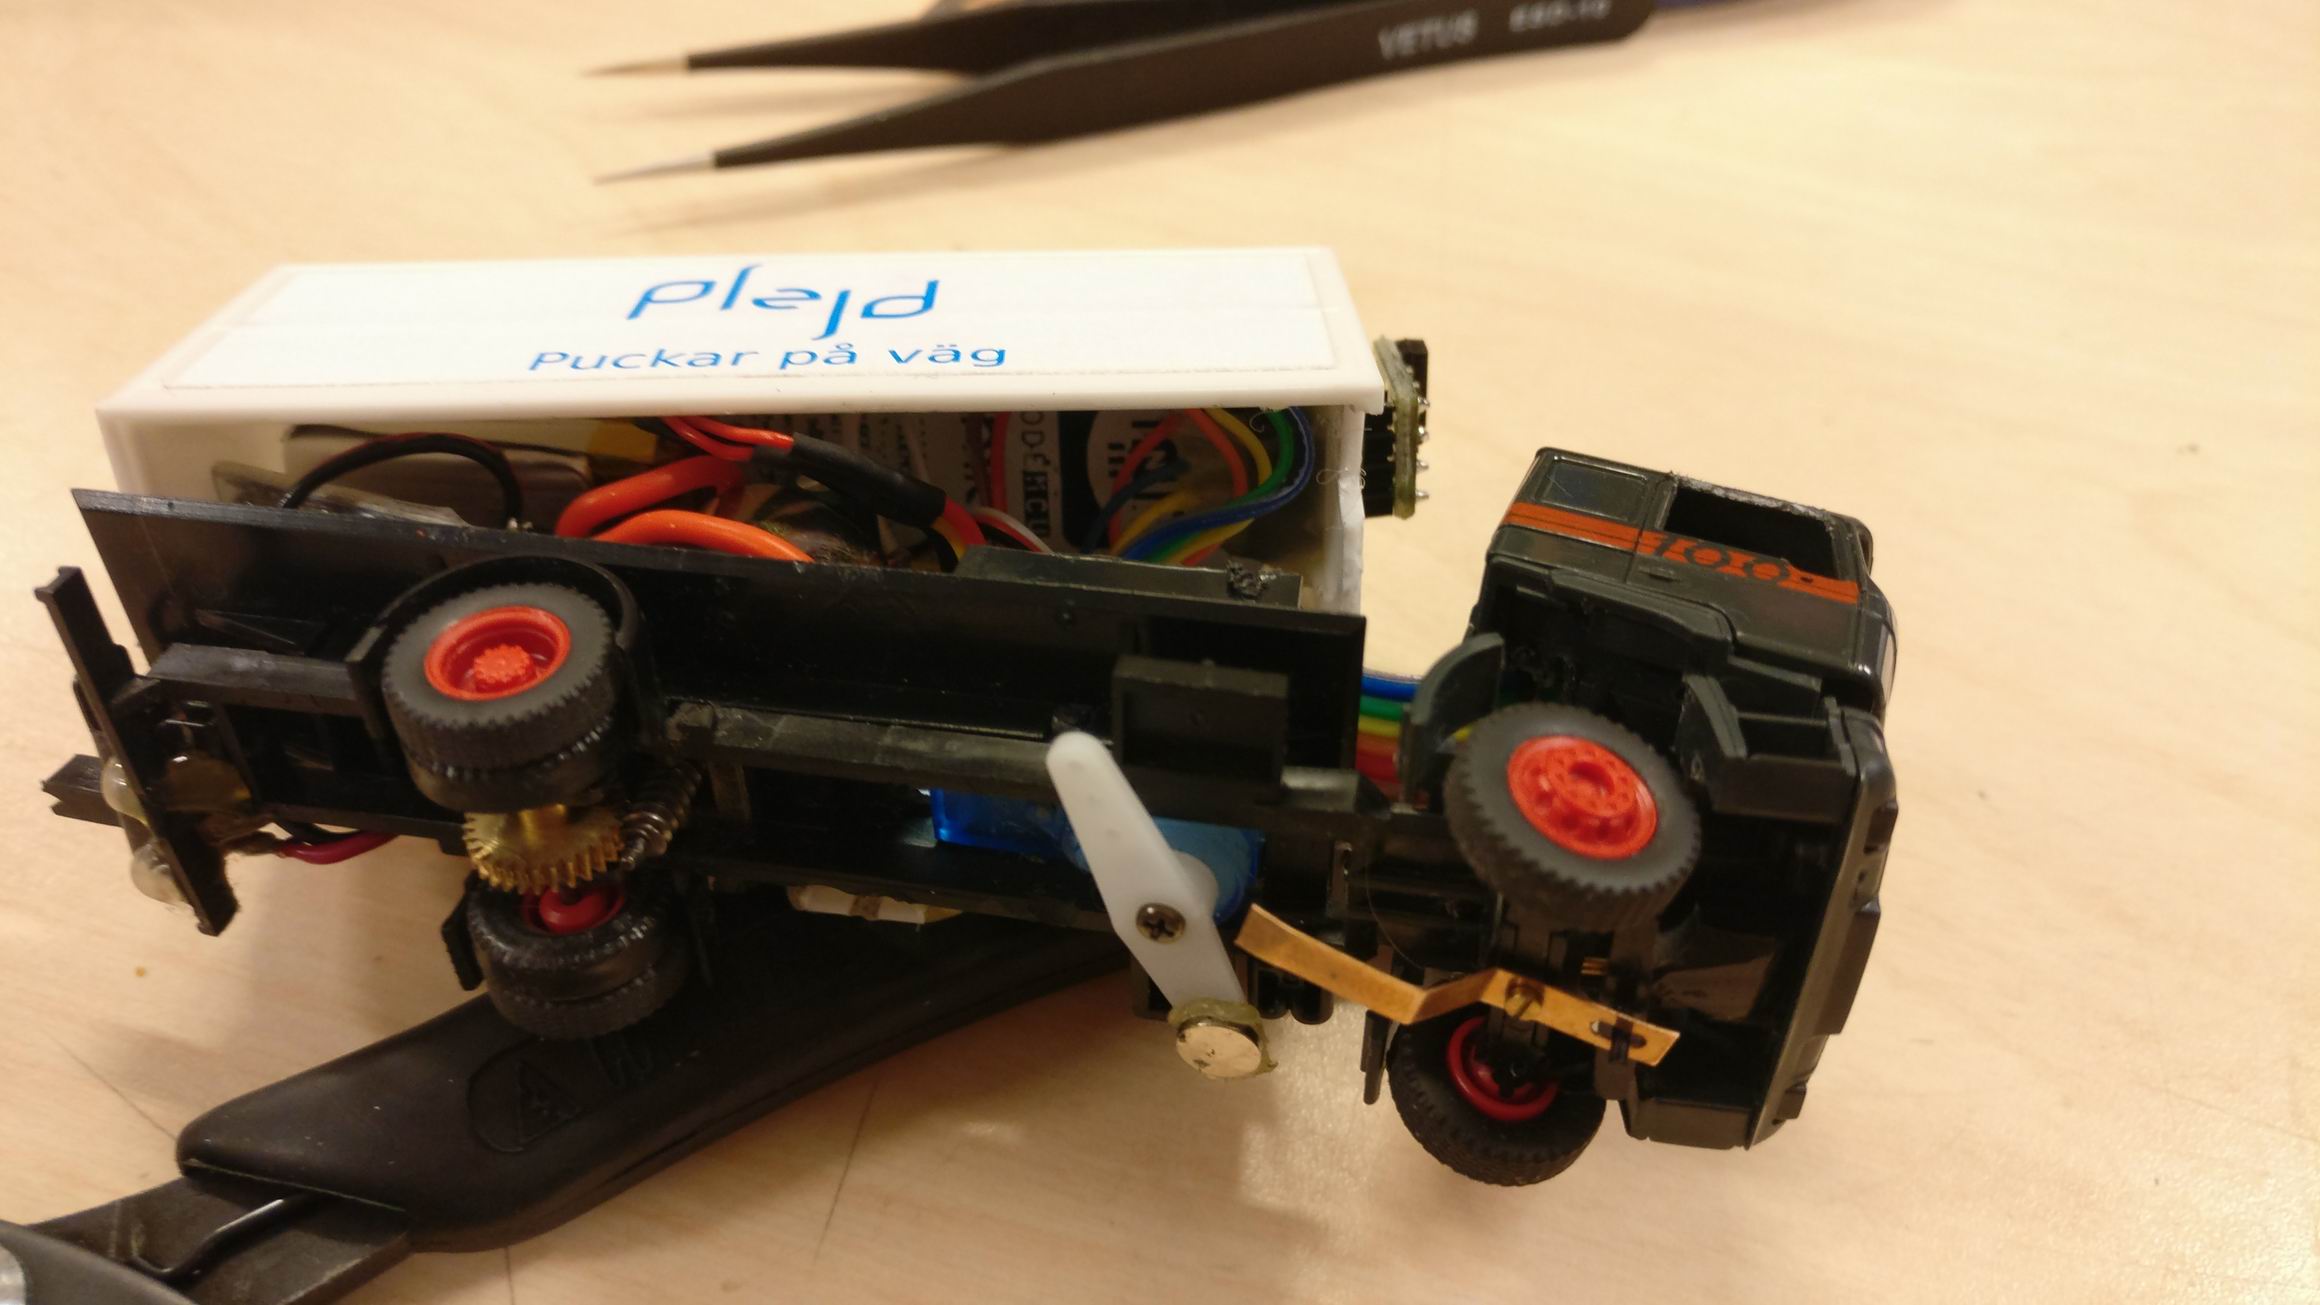
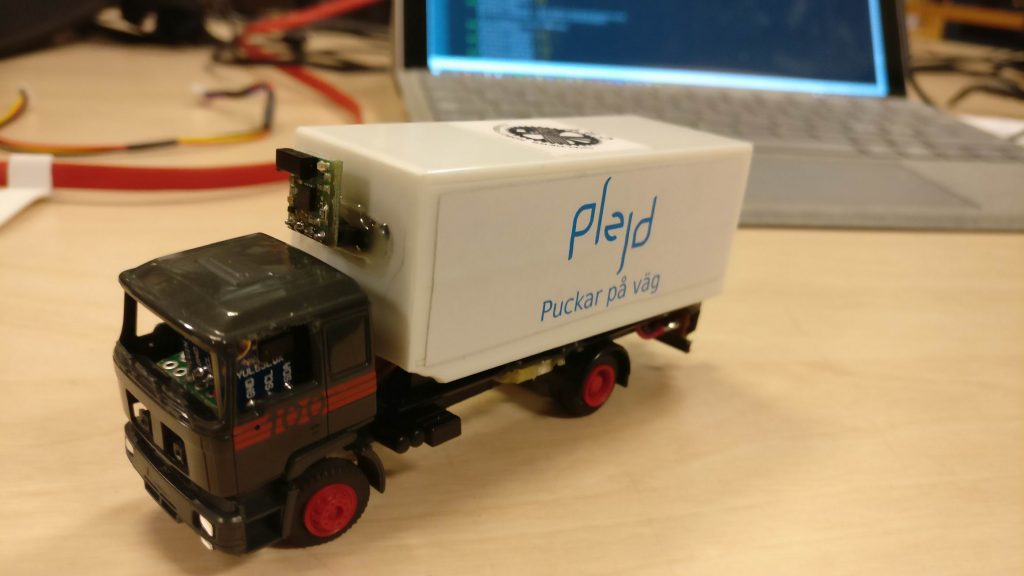
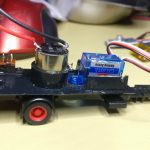
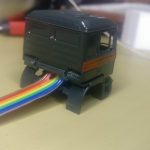
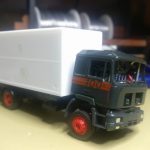
So I started out on a Fuller Car system truck in scale 1:87. It have some really nice suspension and drivetrain but is made for following a iron track.


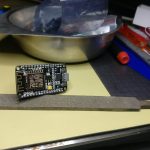
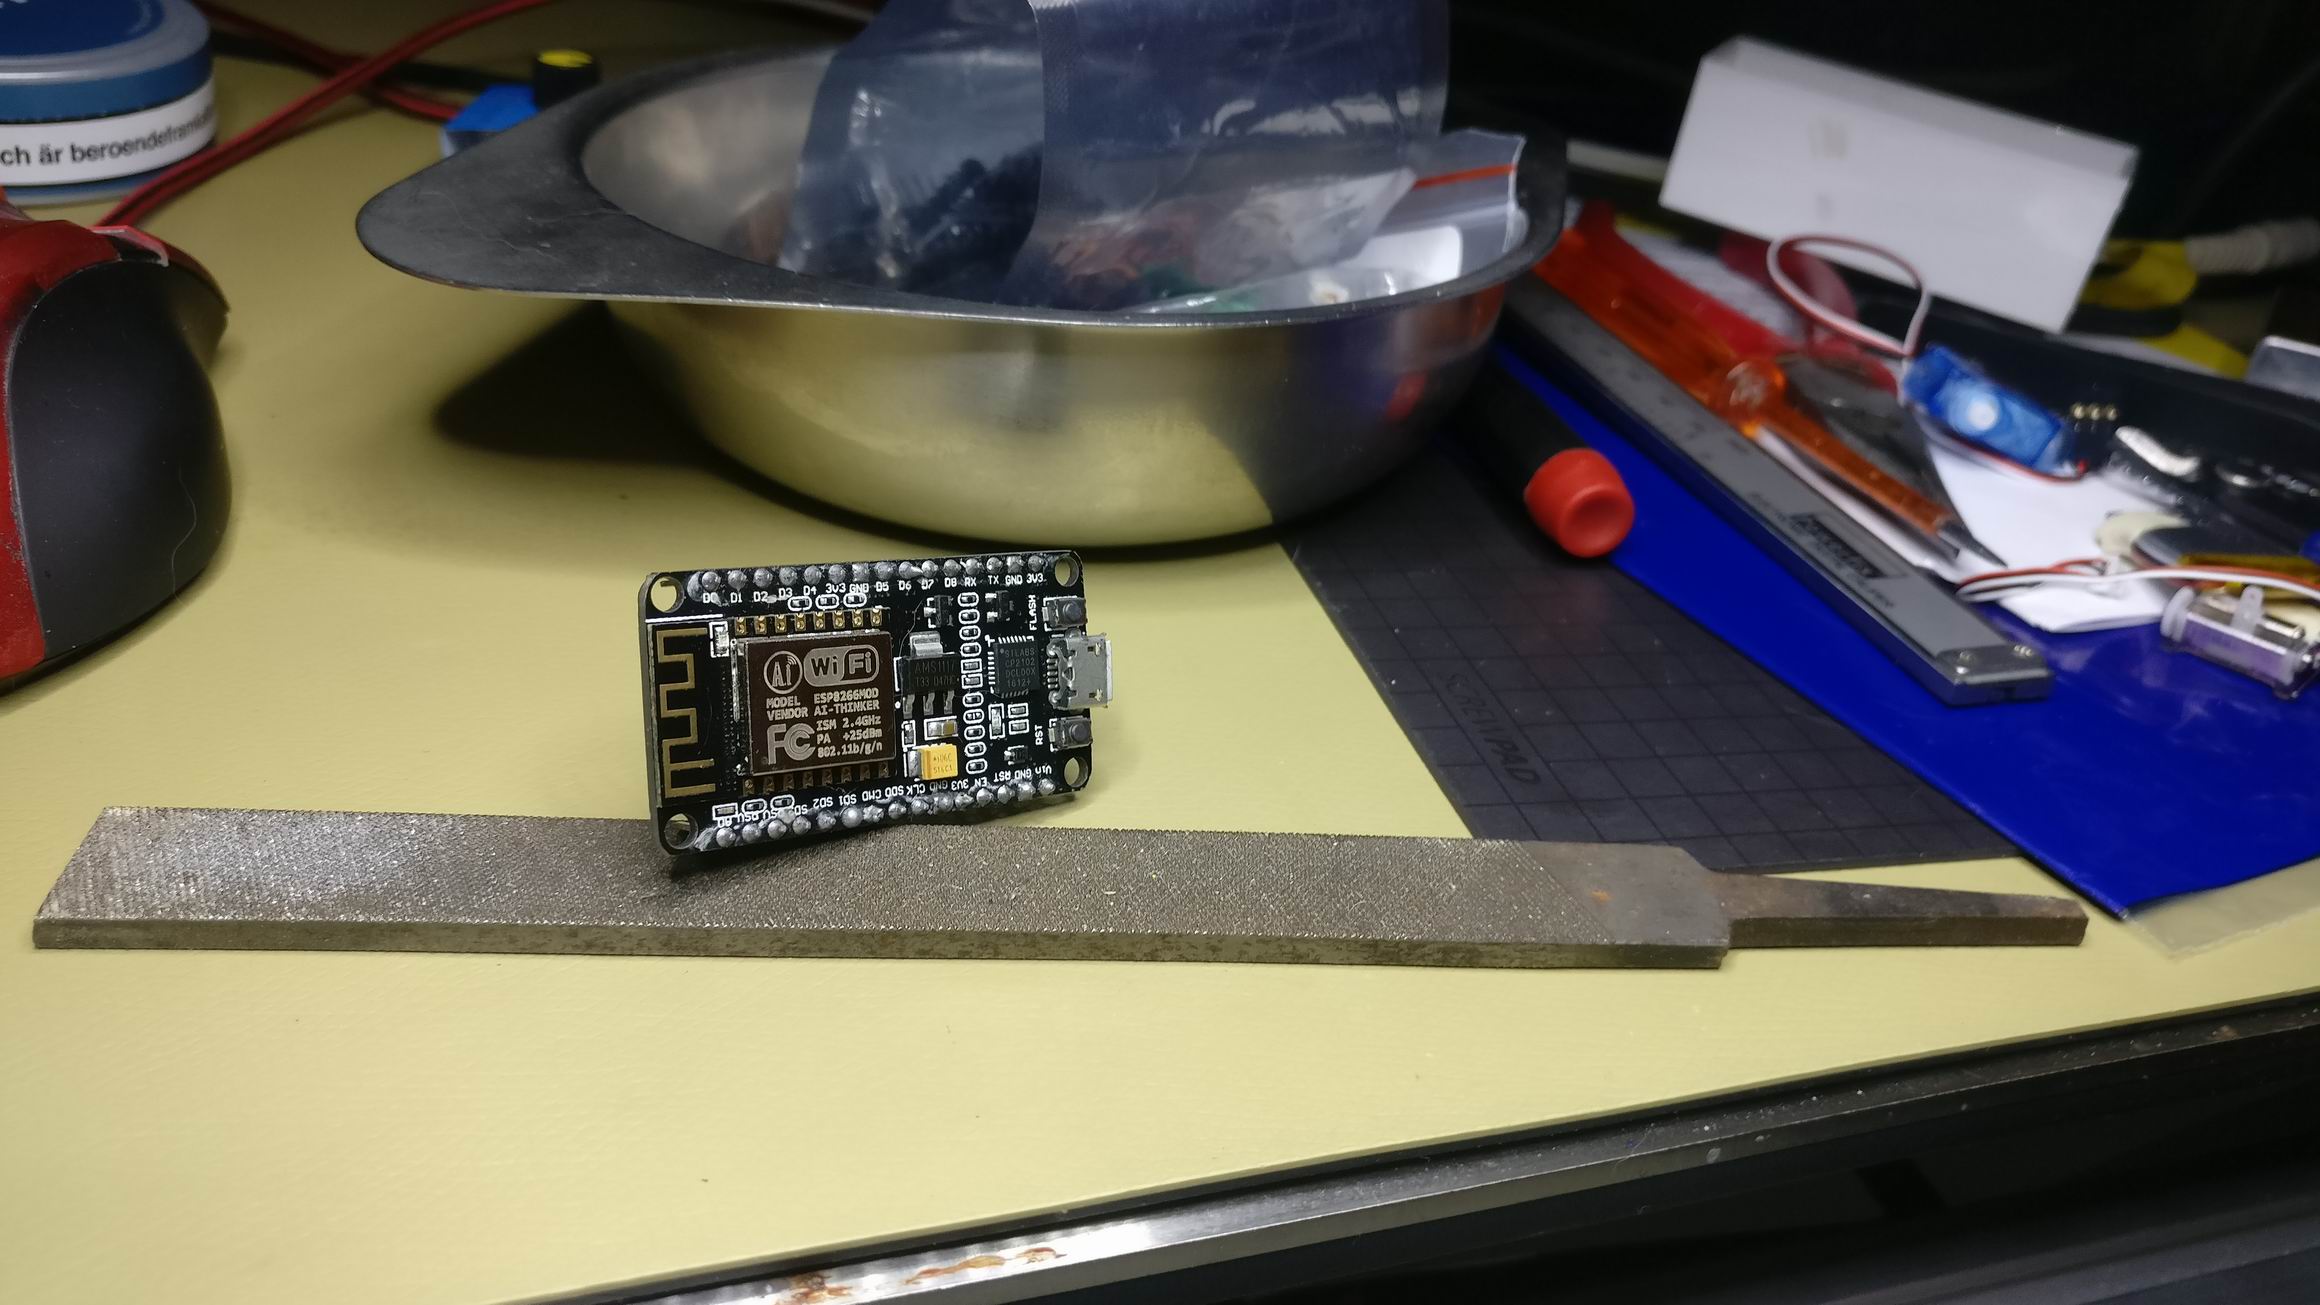
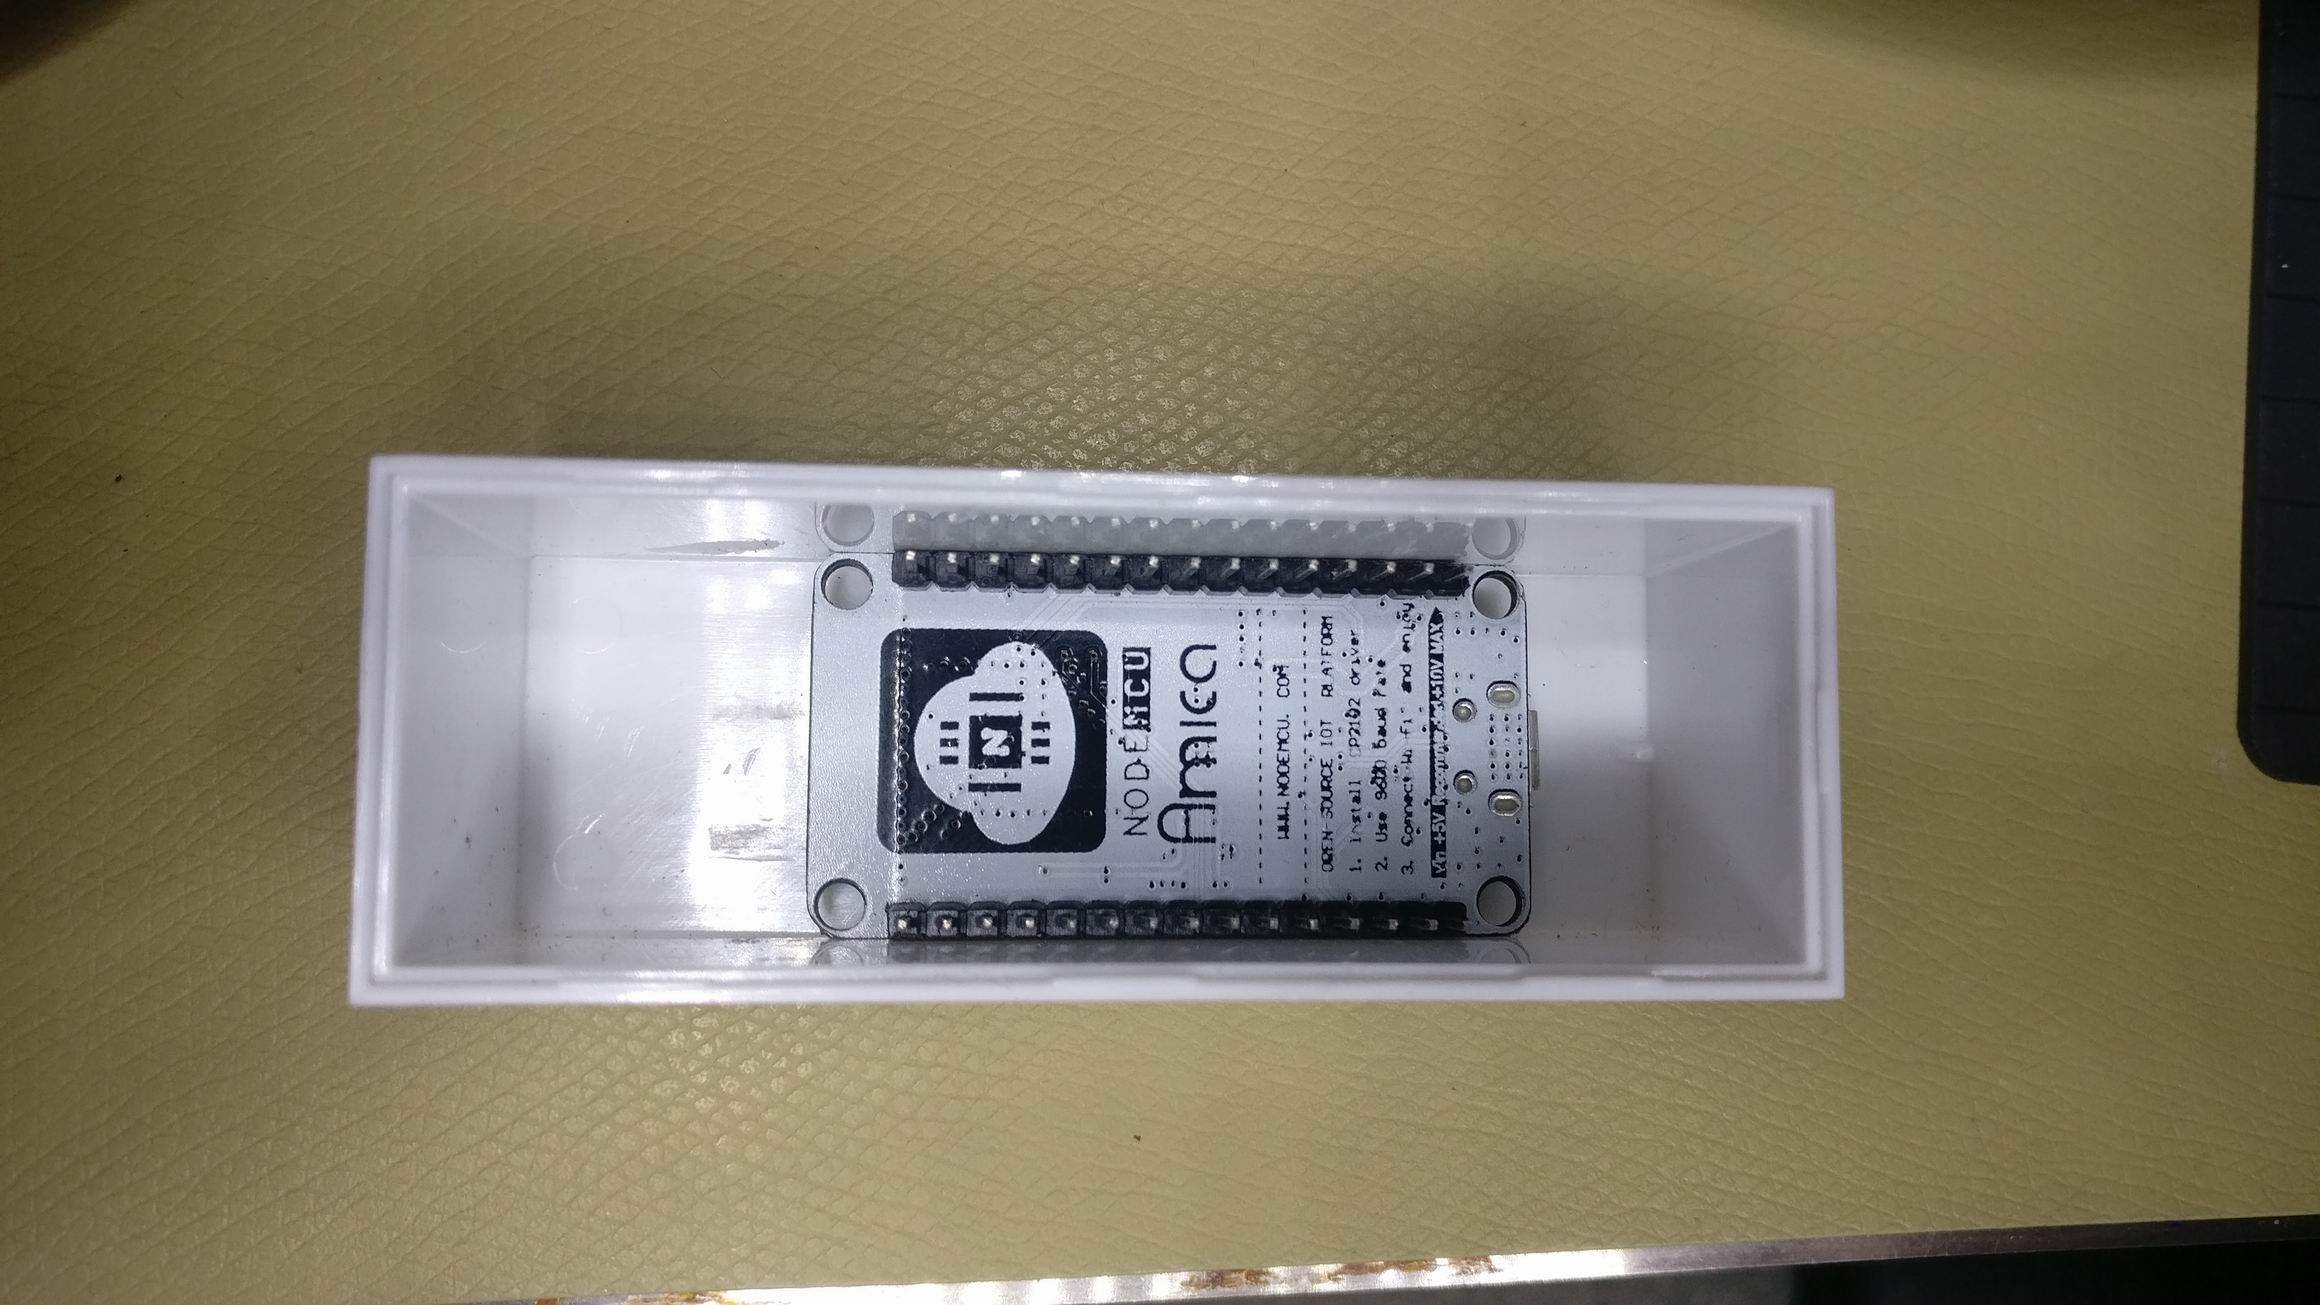
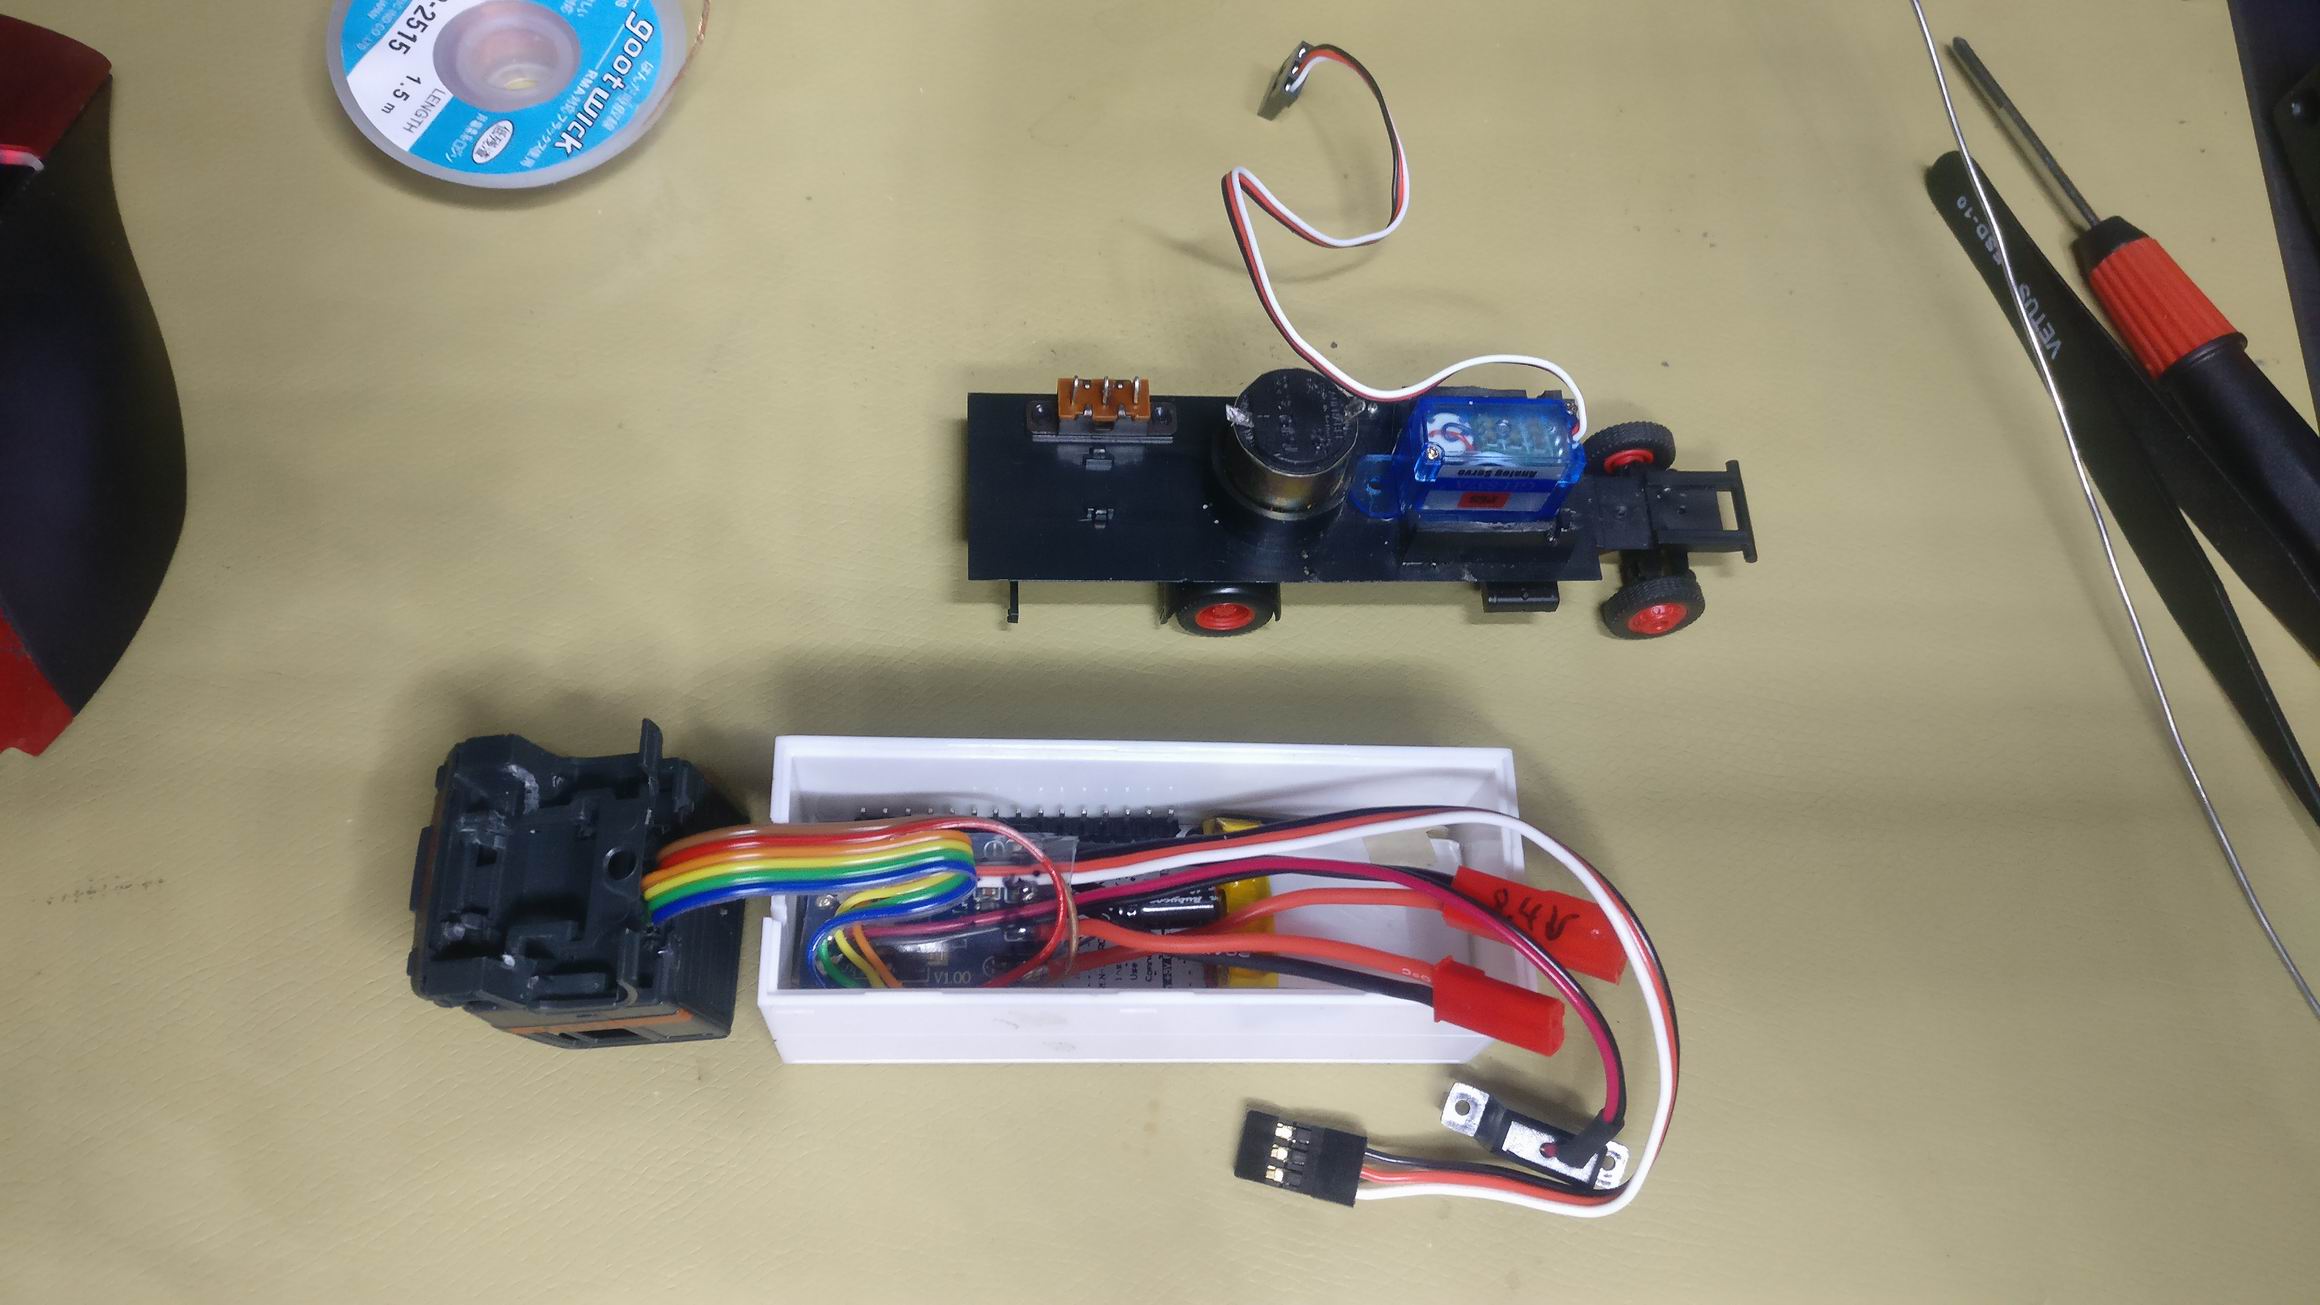
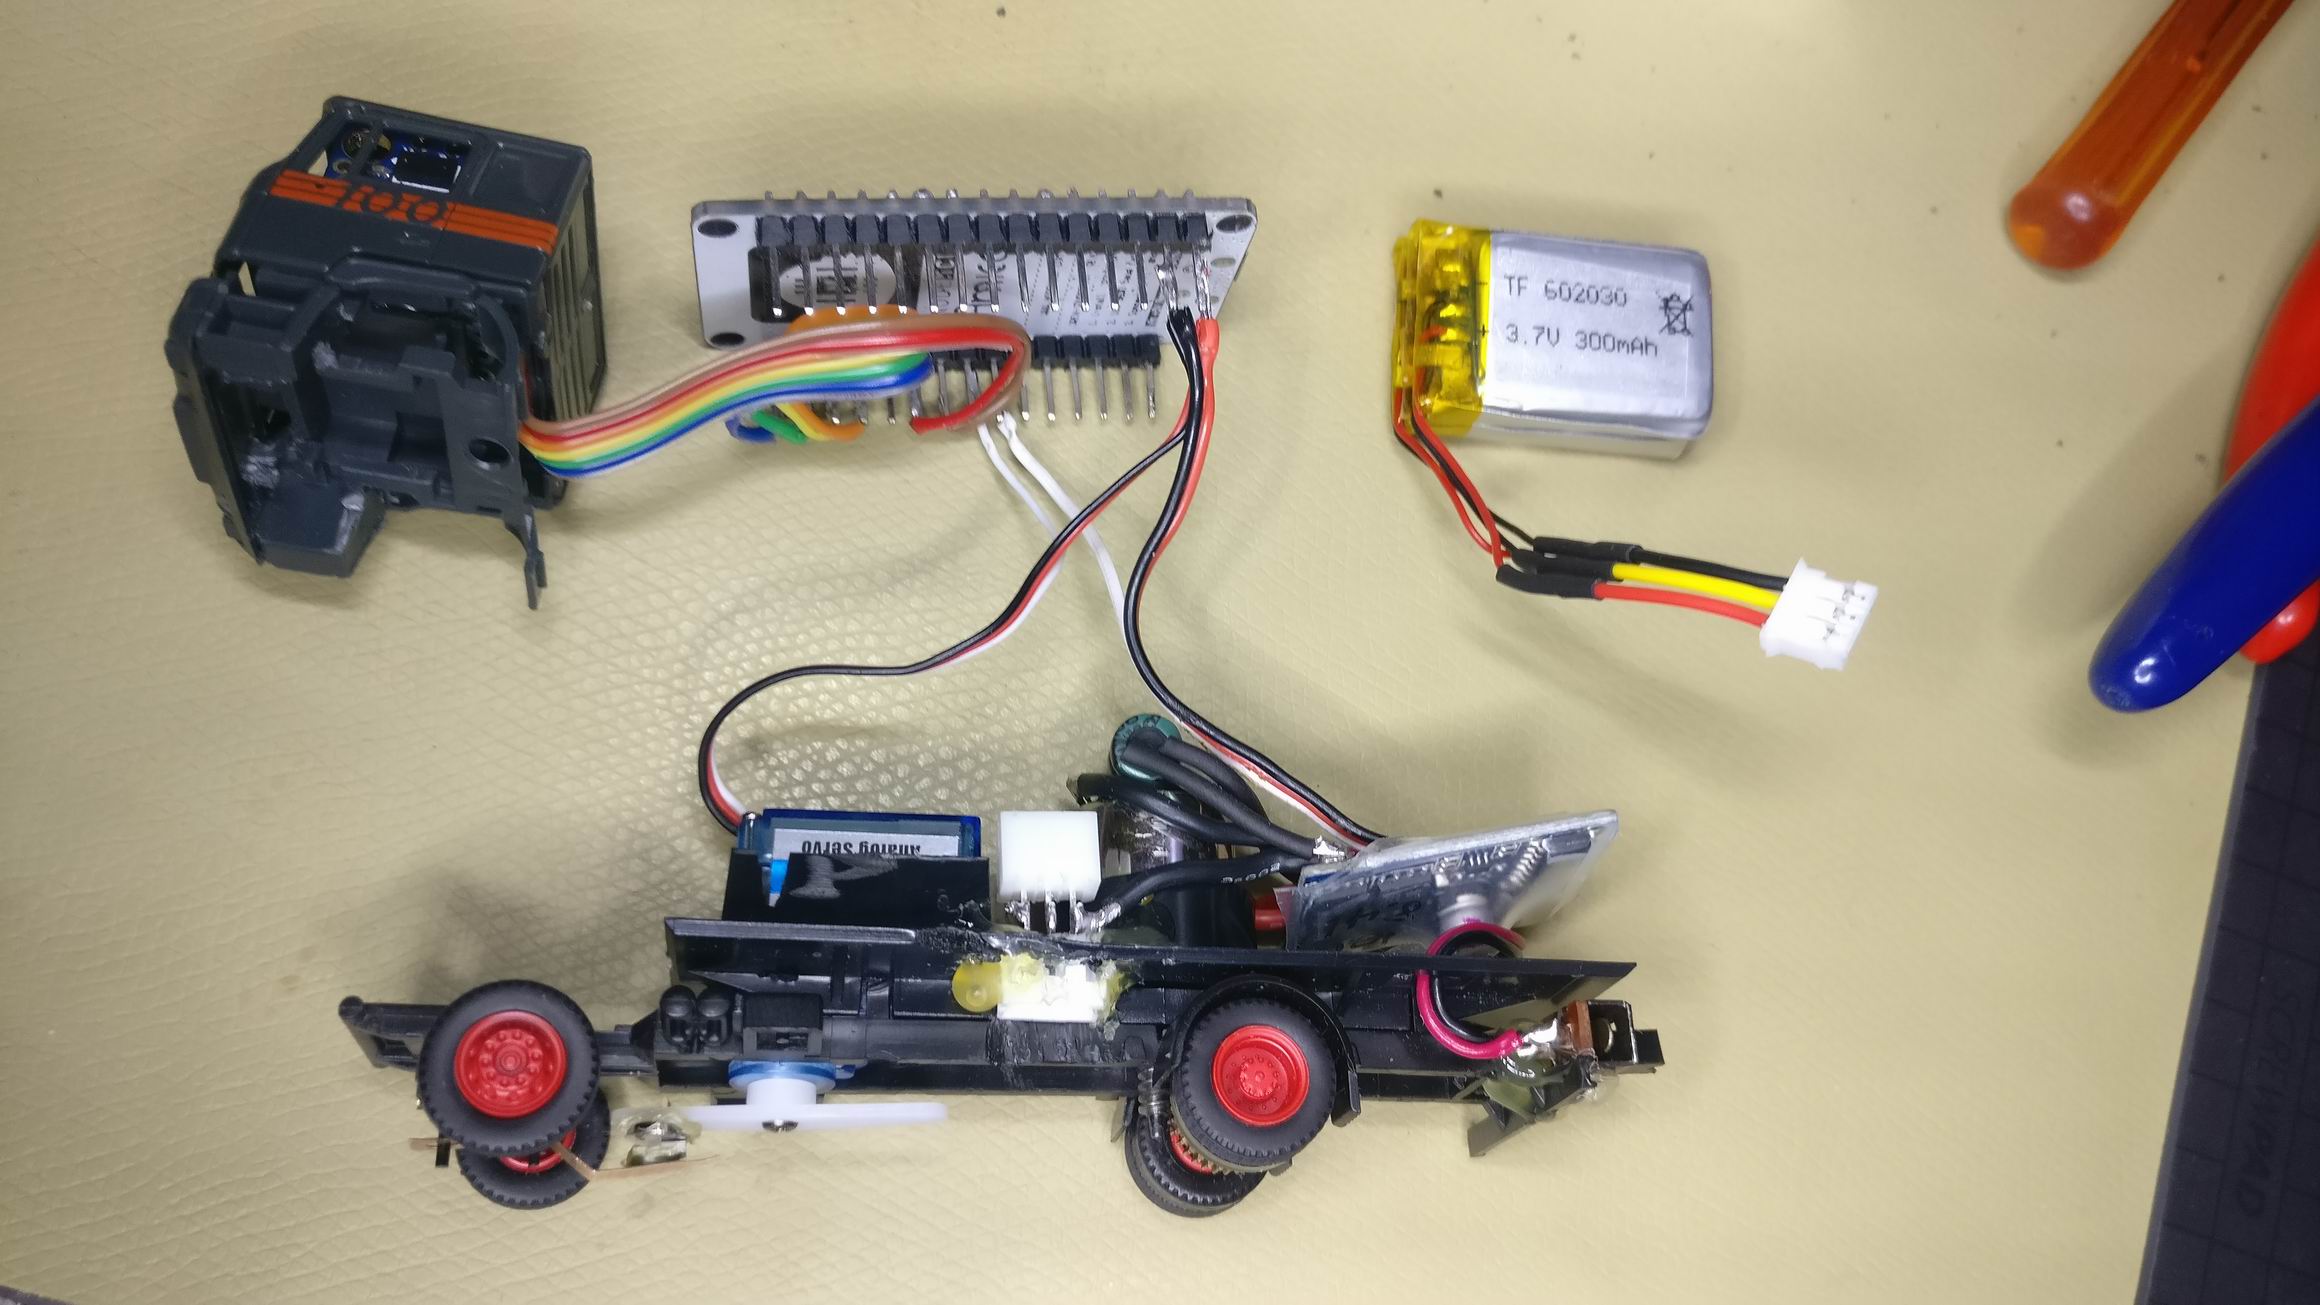
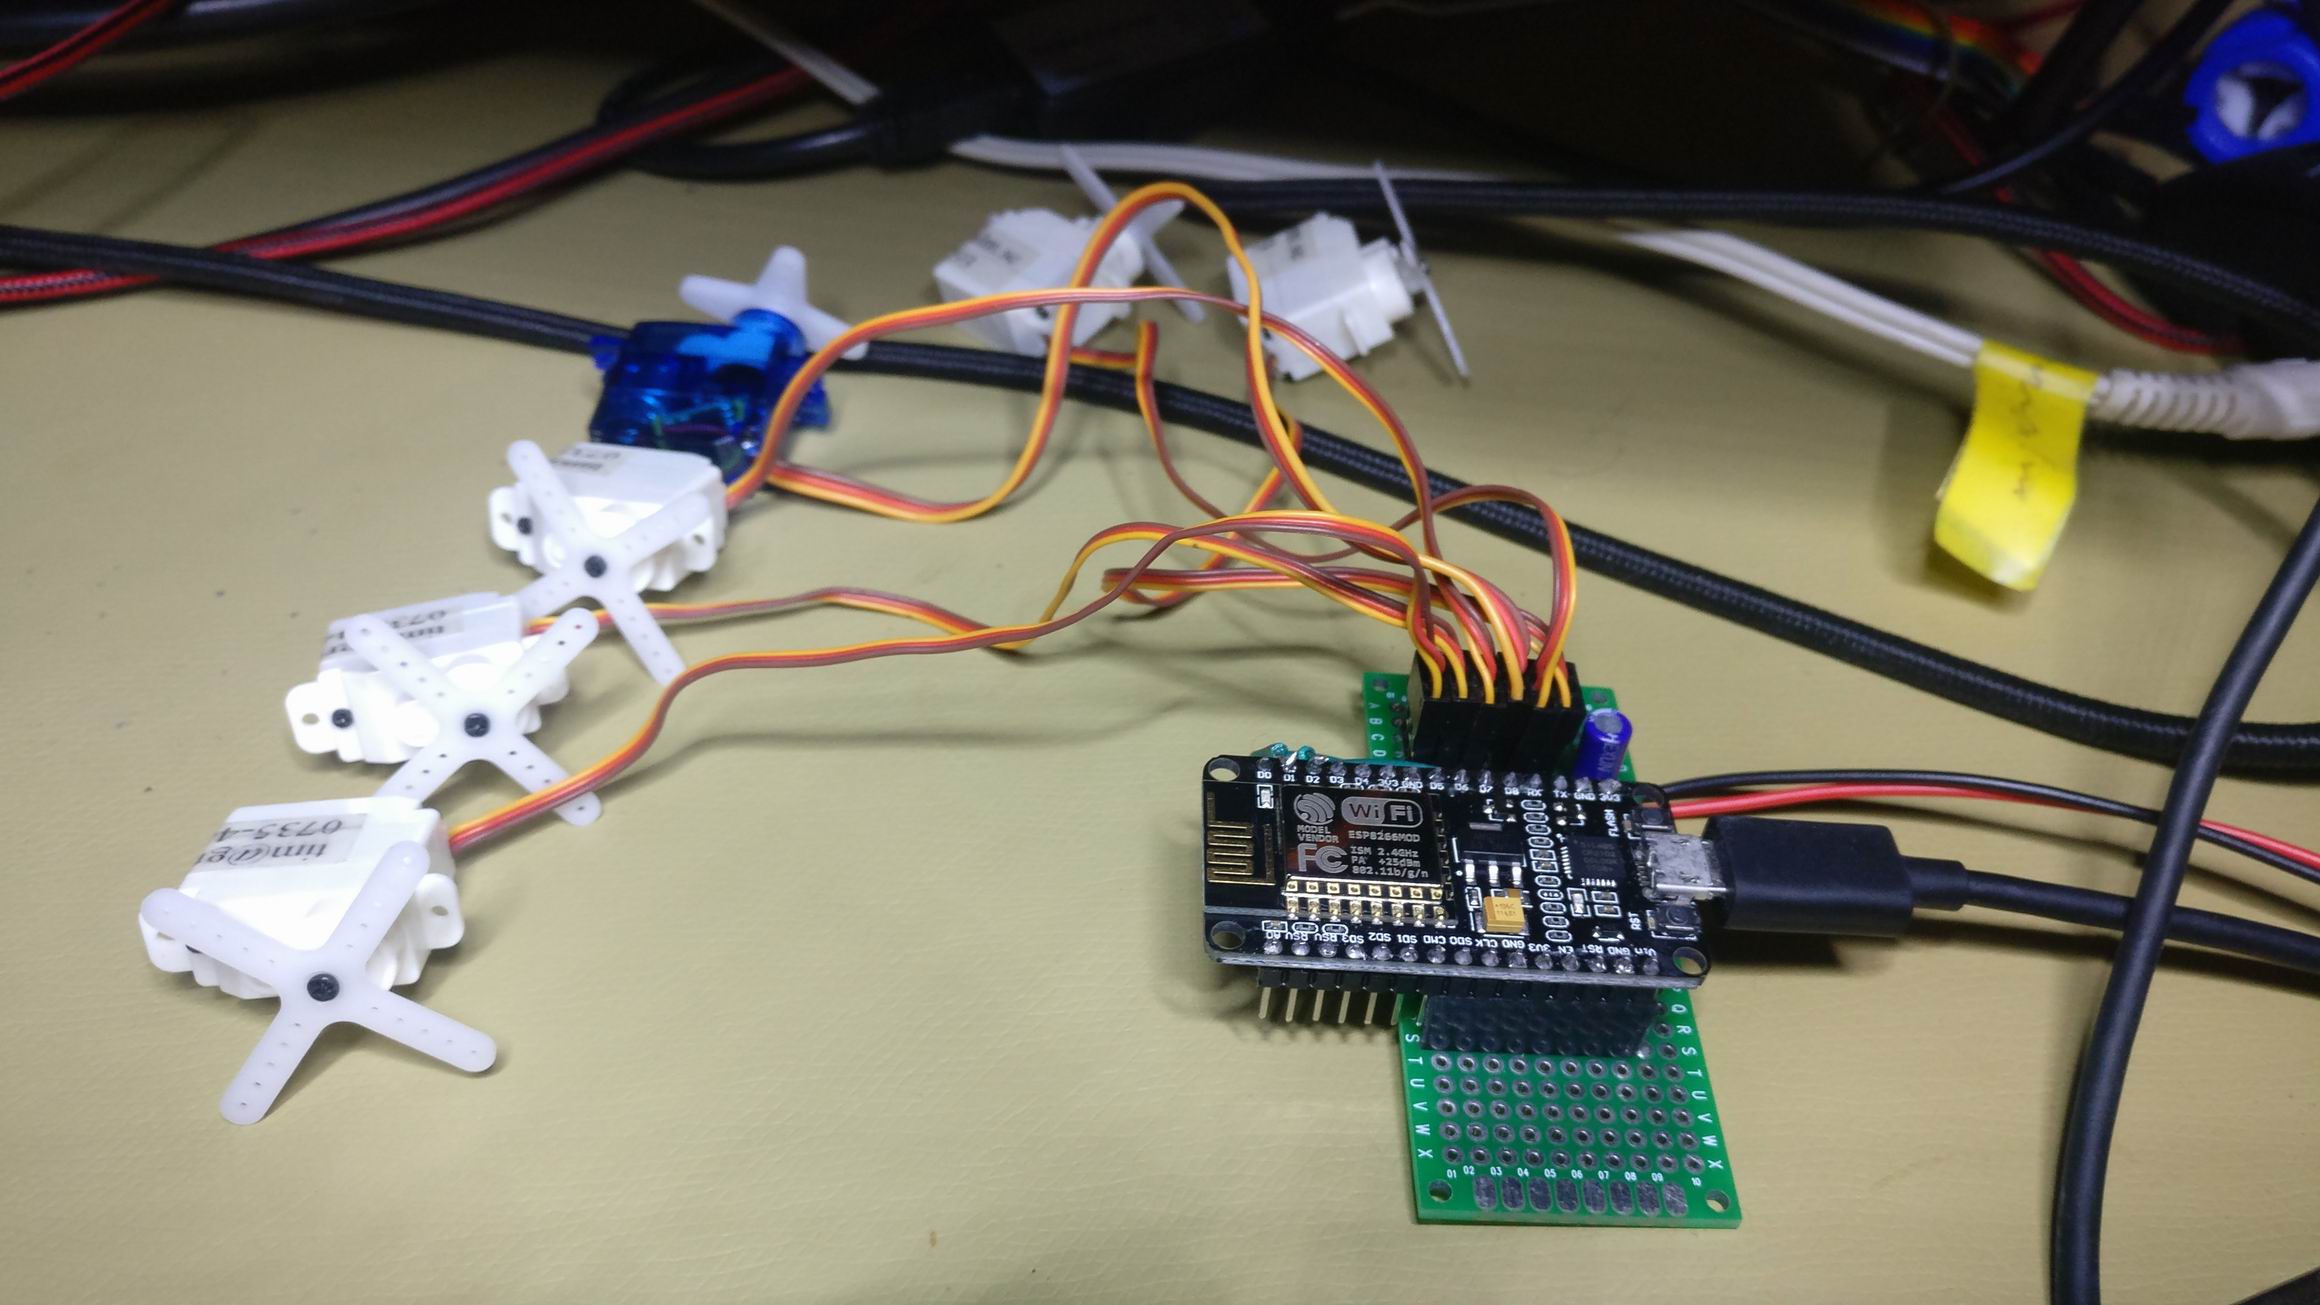
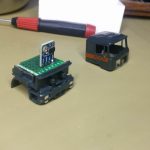
A NodeMCU development kit (ESP8266) almost fitted the truck bed, if i filed of 0.5mm of it i fitted perfectly.


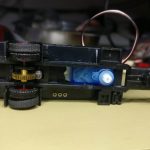
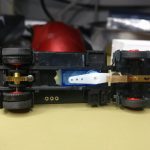
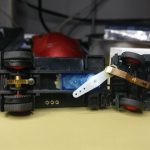
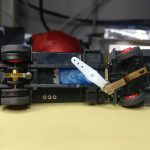
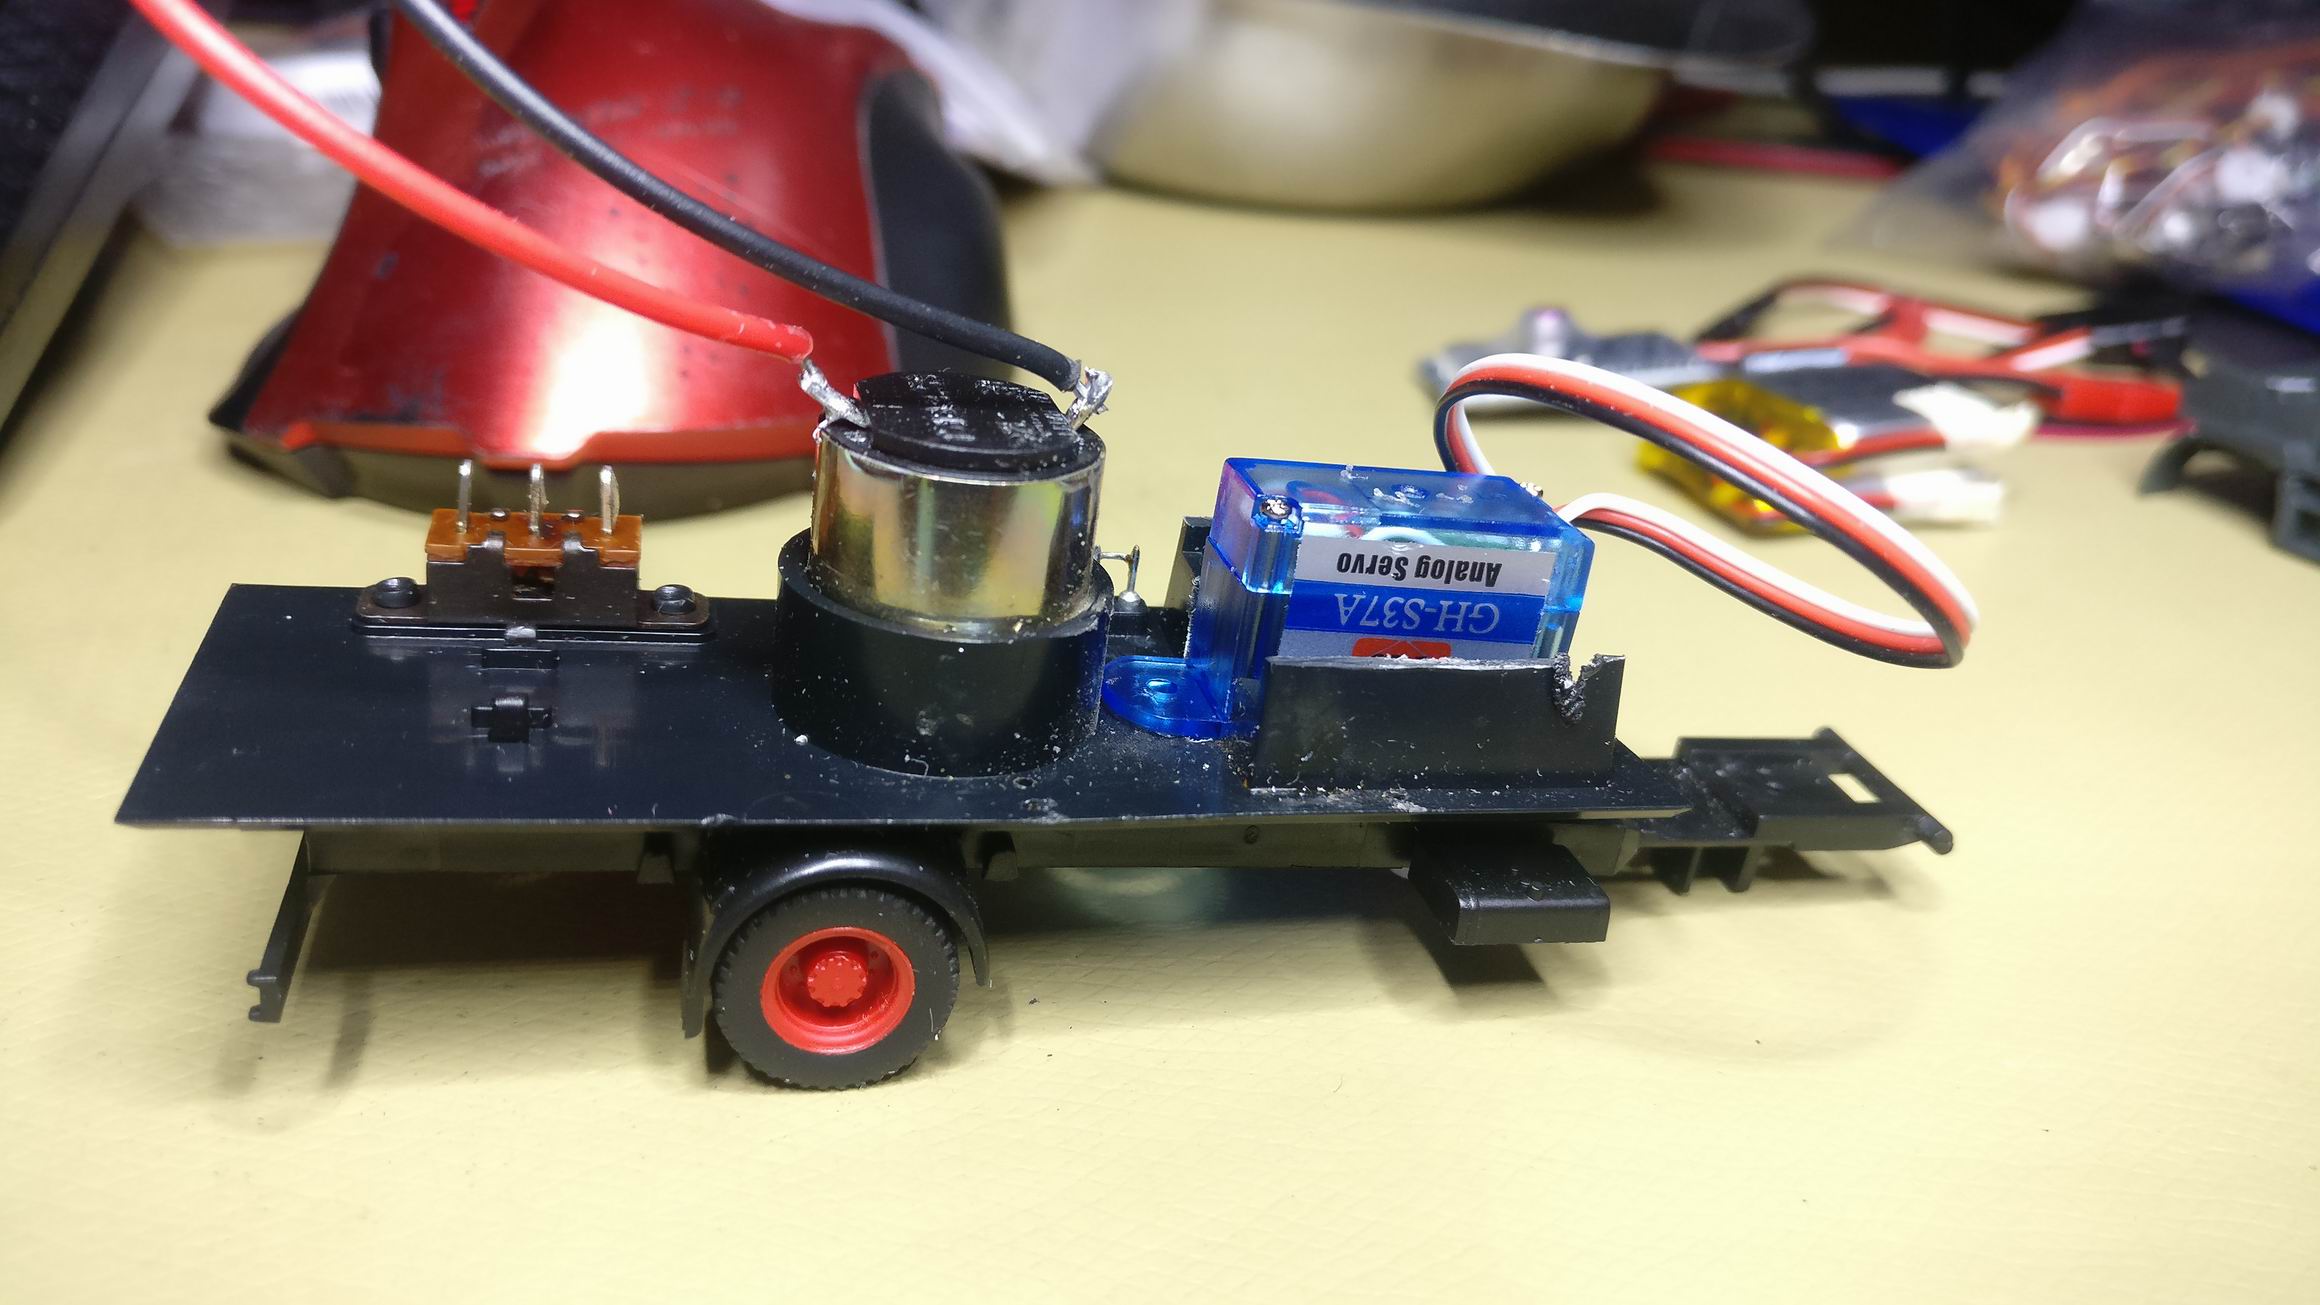
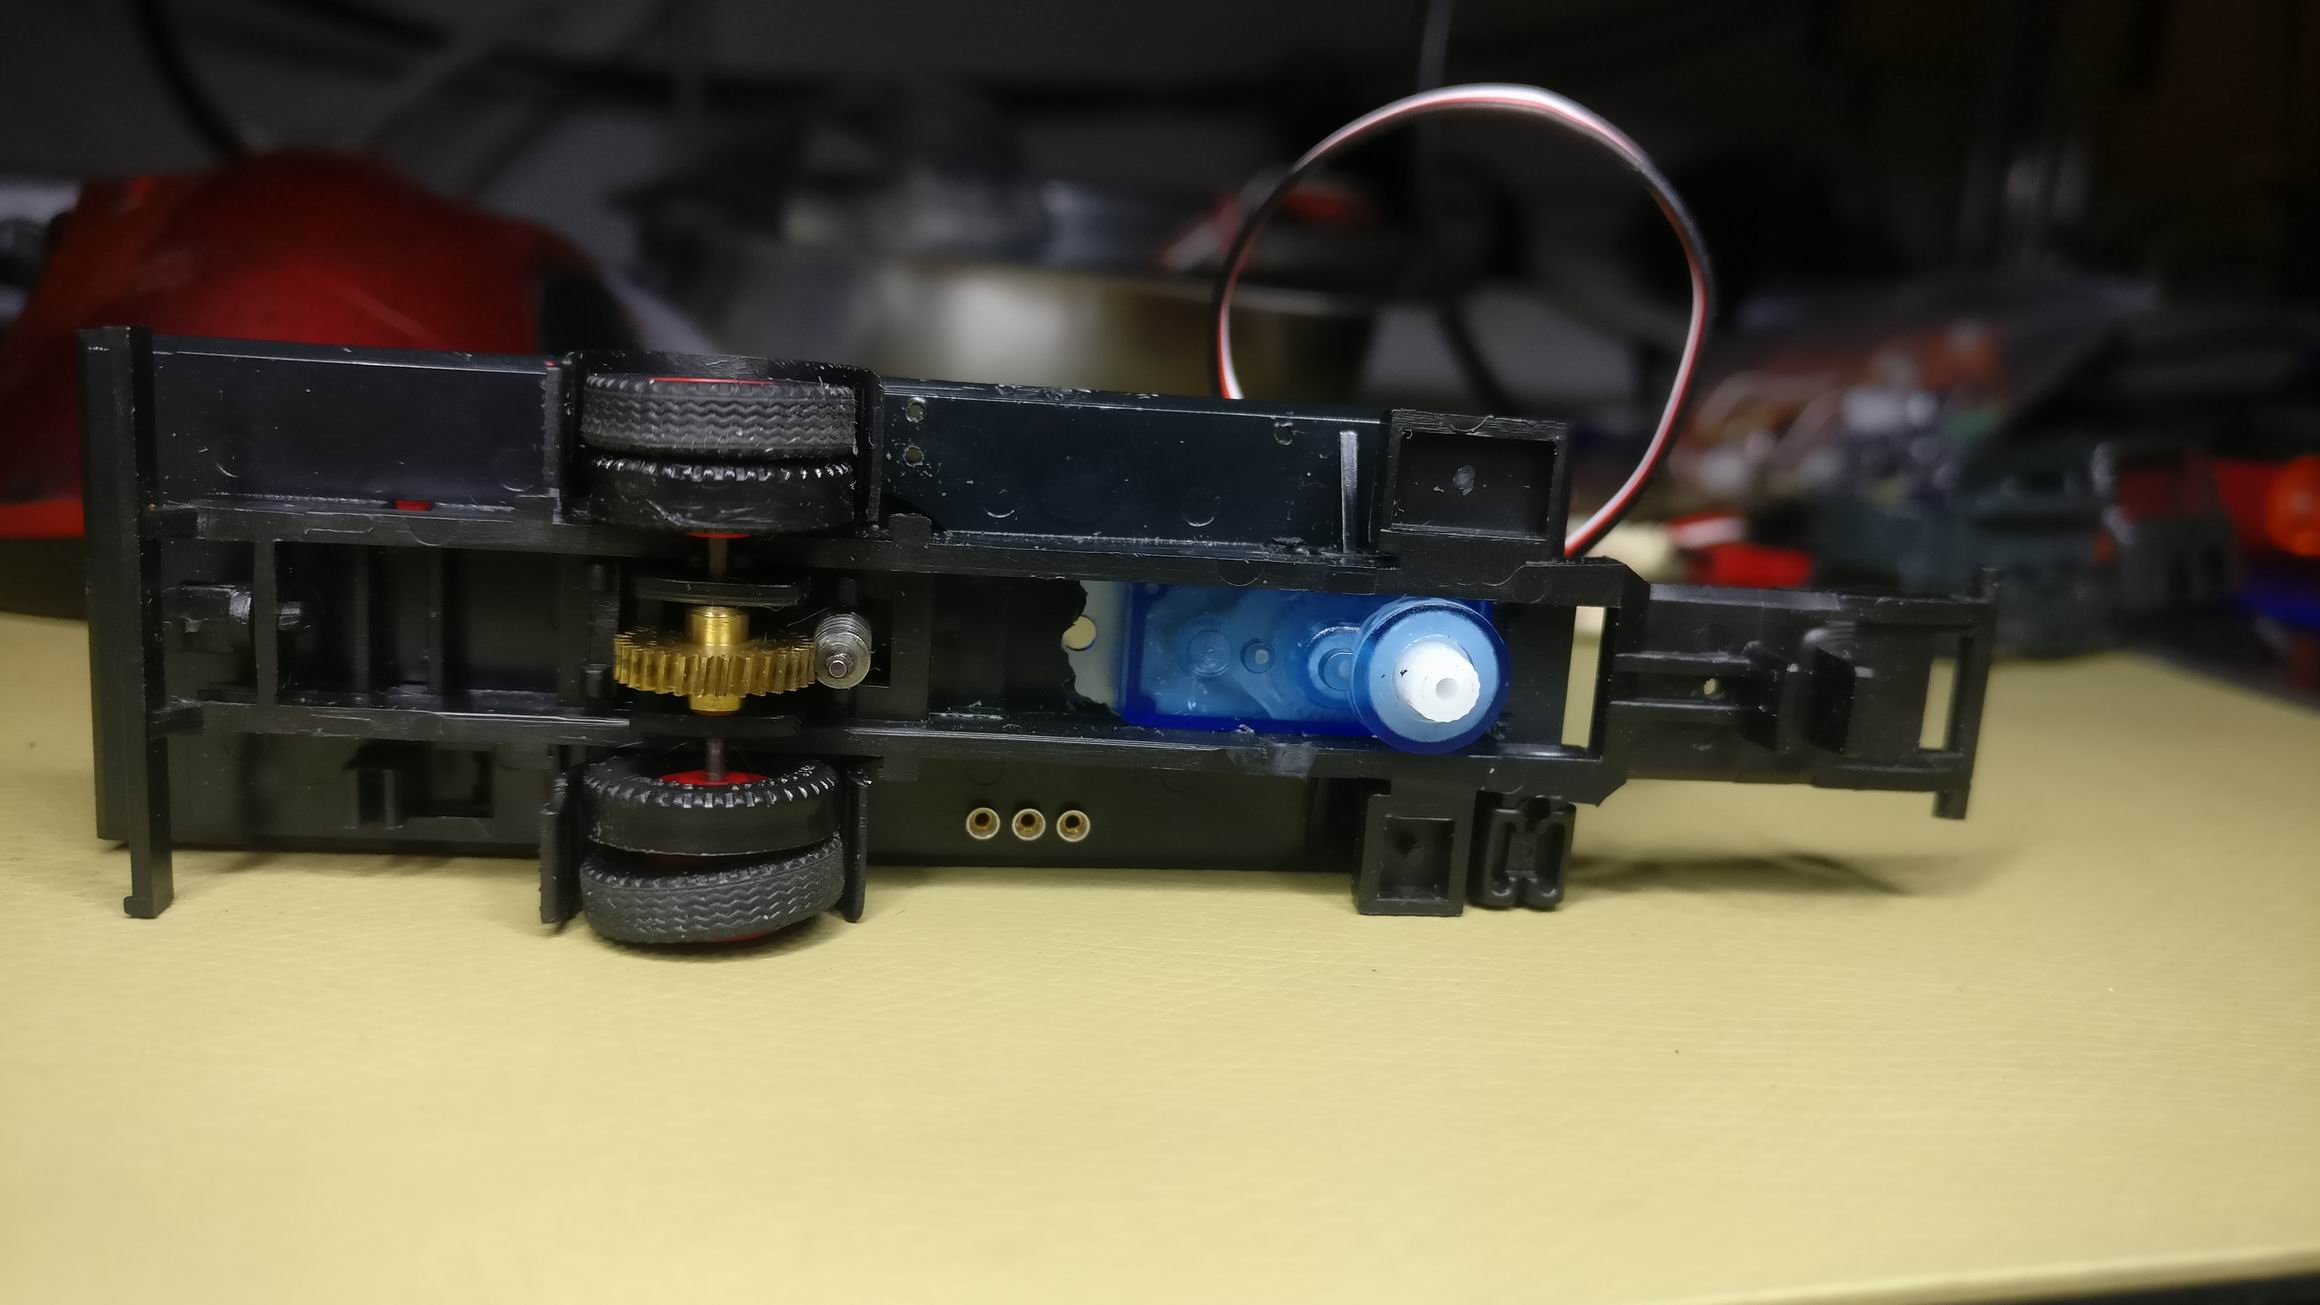
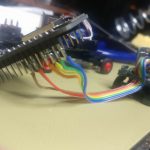
I solved the steering by cutting a hole, big enough for a small servo, in the trucks chassis.
Then i glued on a small magnet that aligned with the already existing magnet in the steering system.


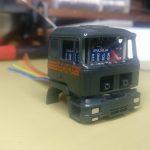
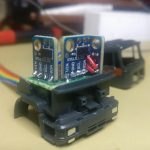
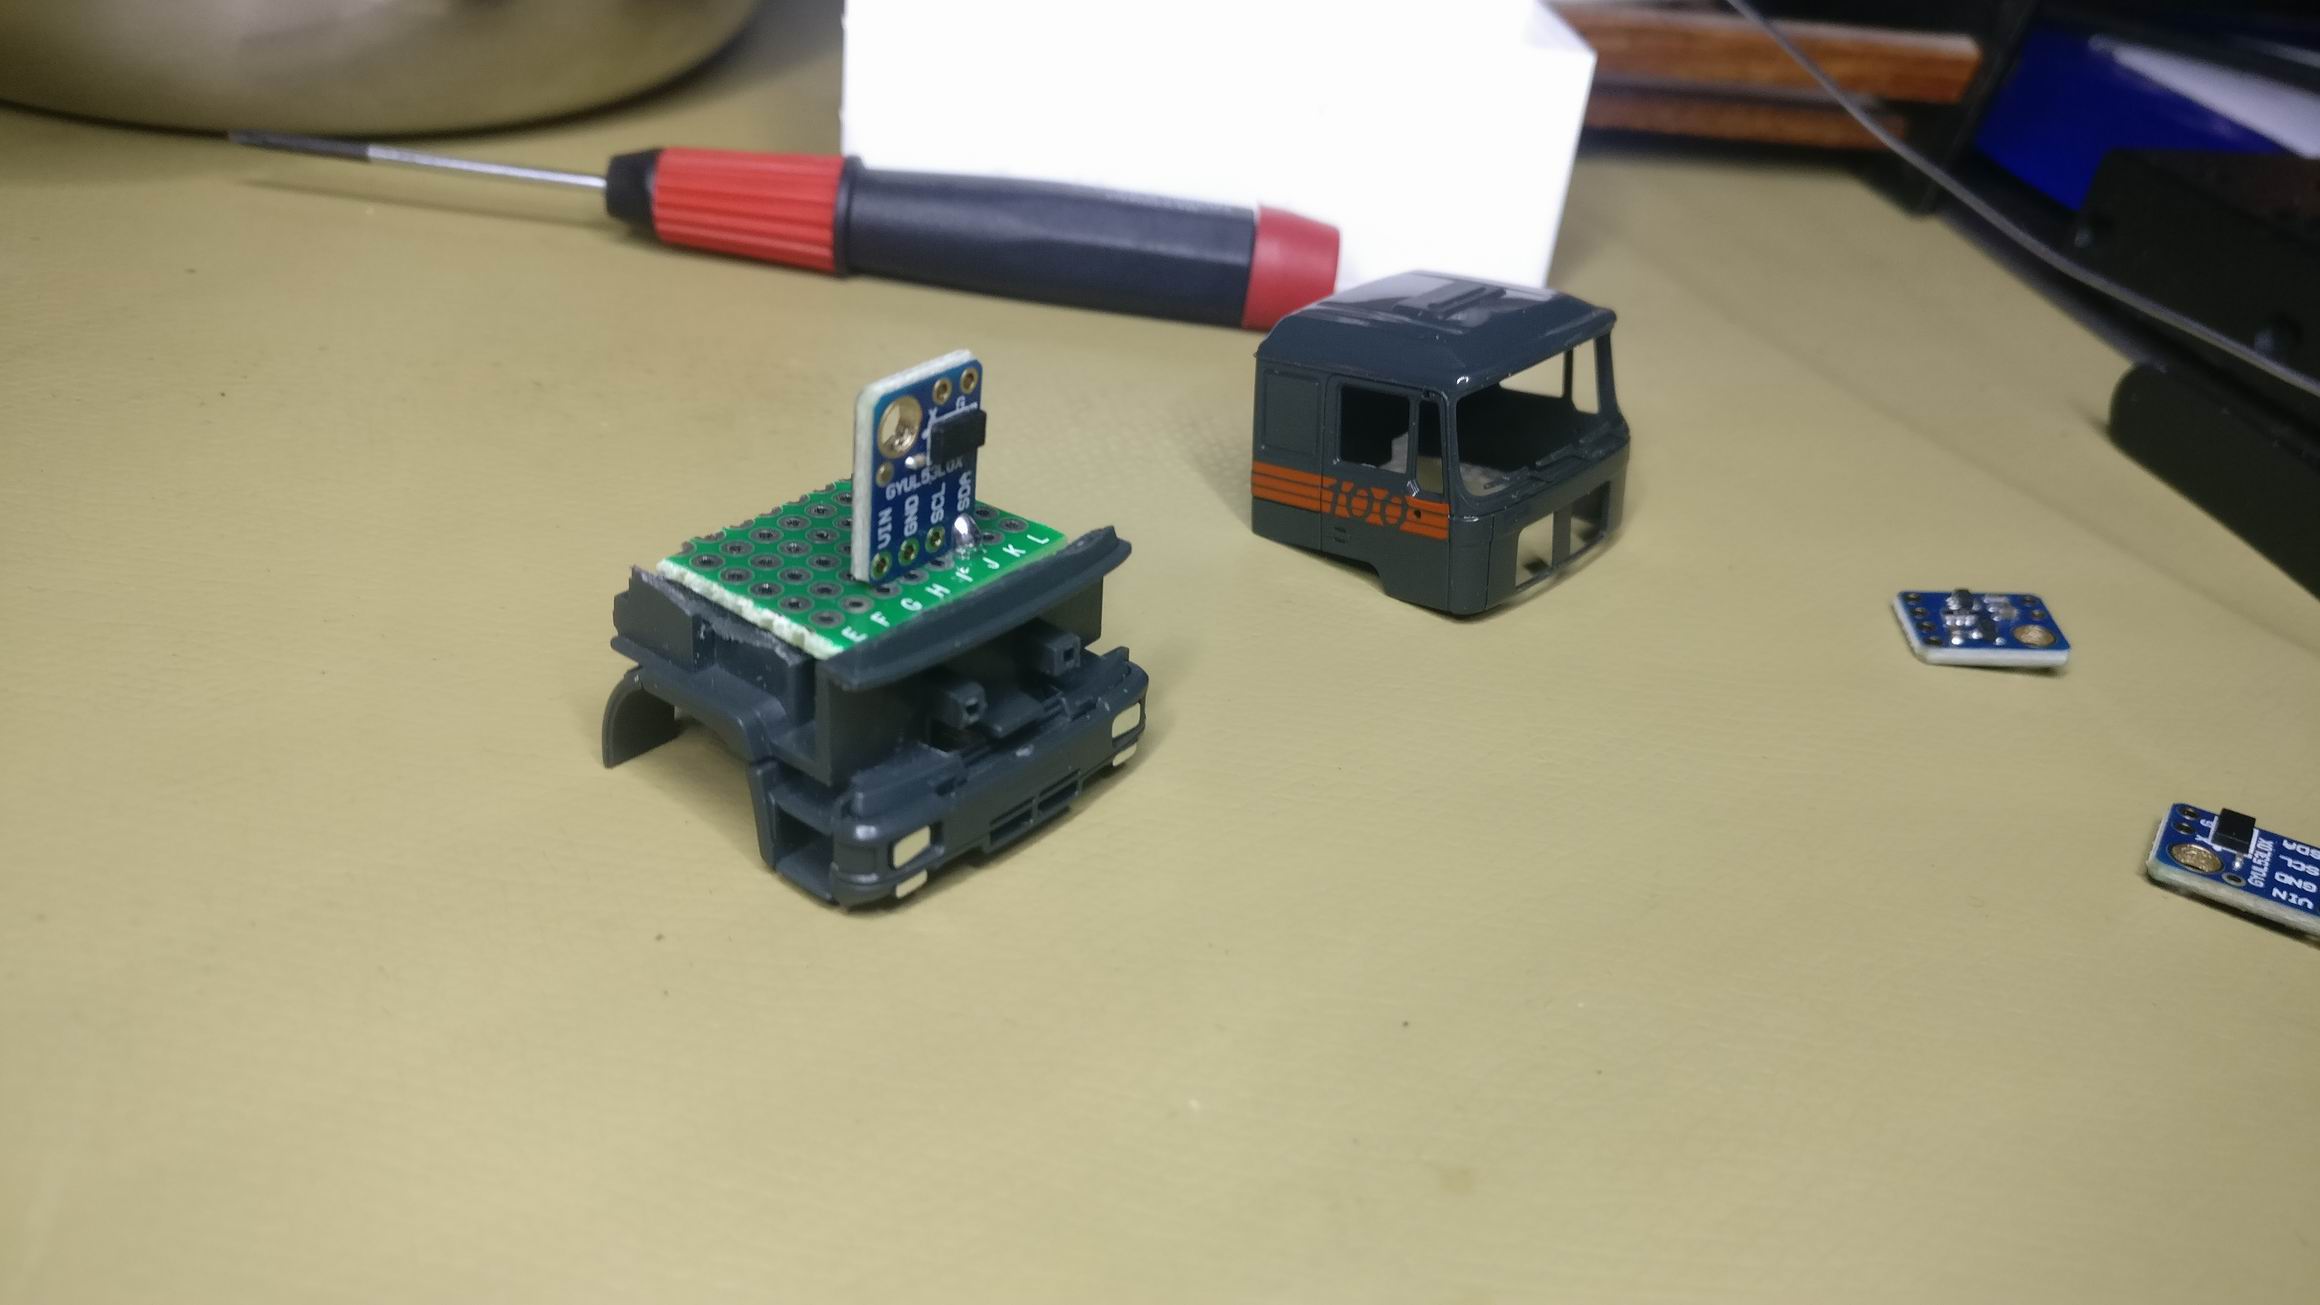
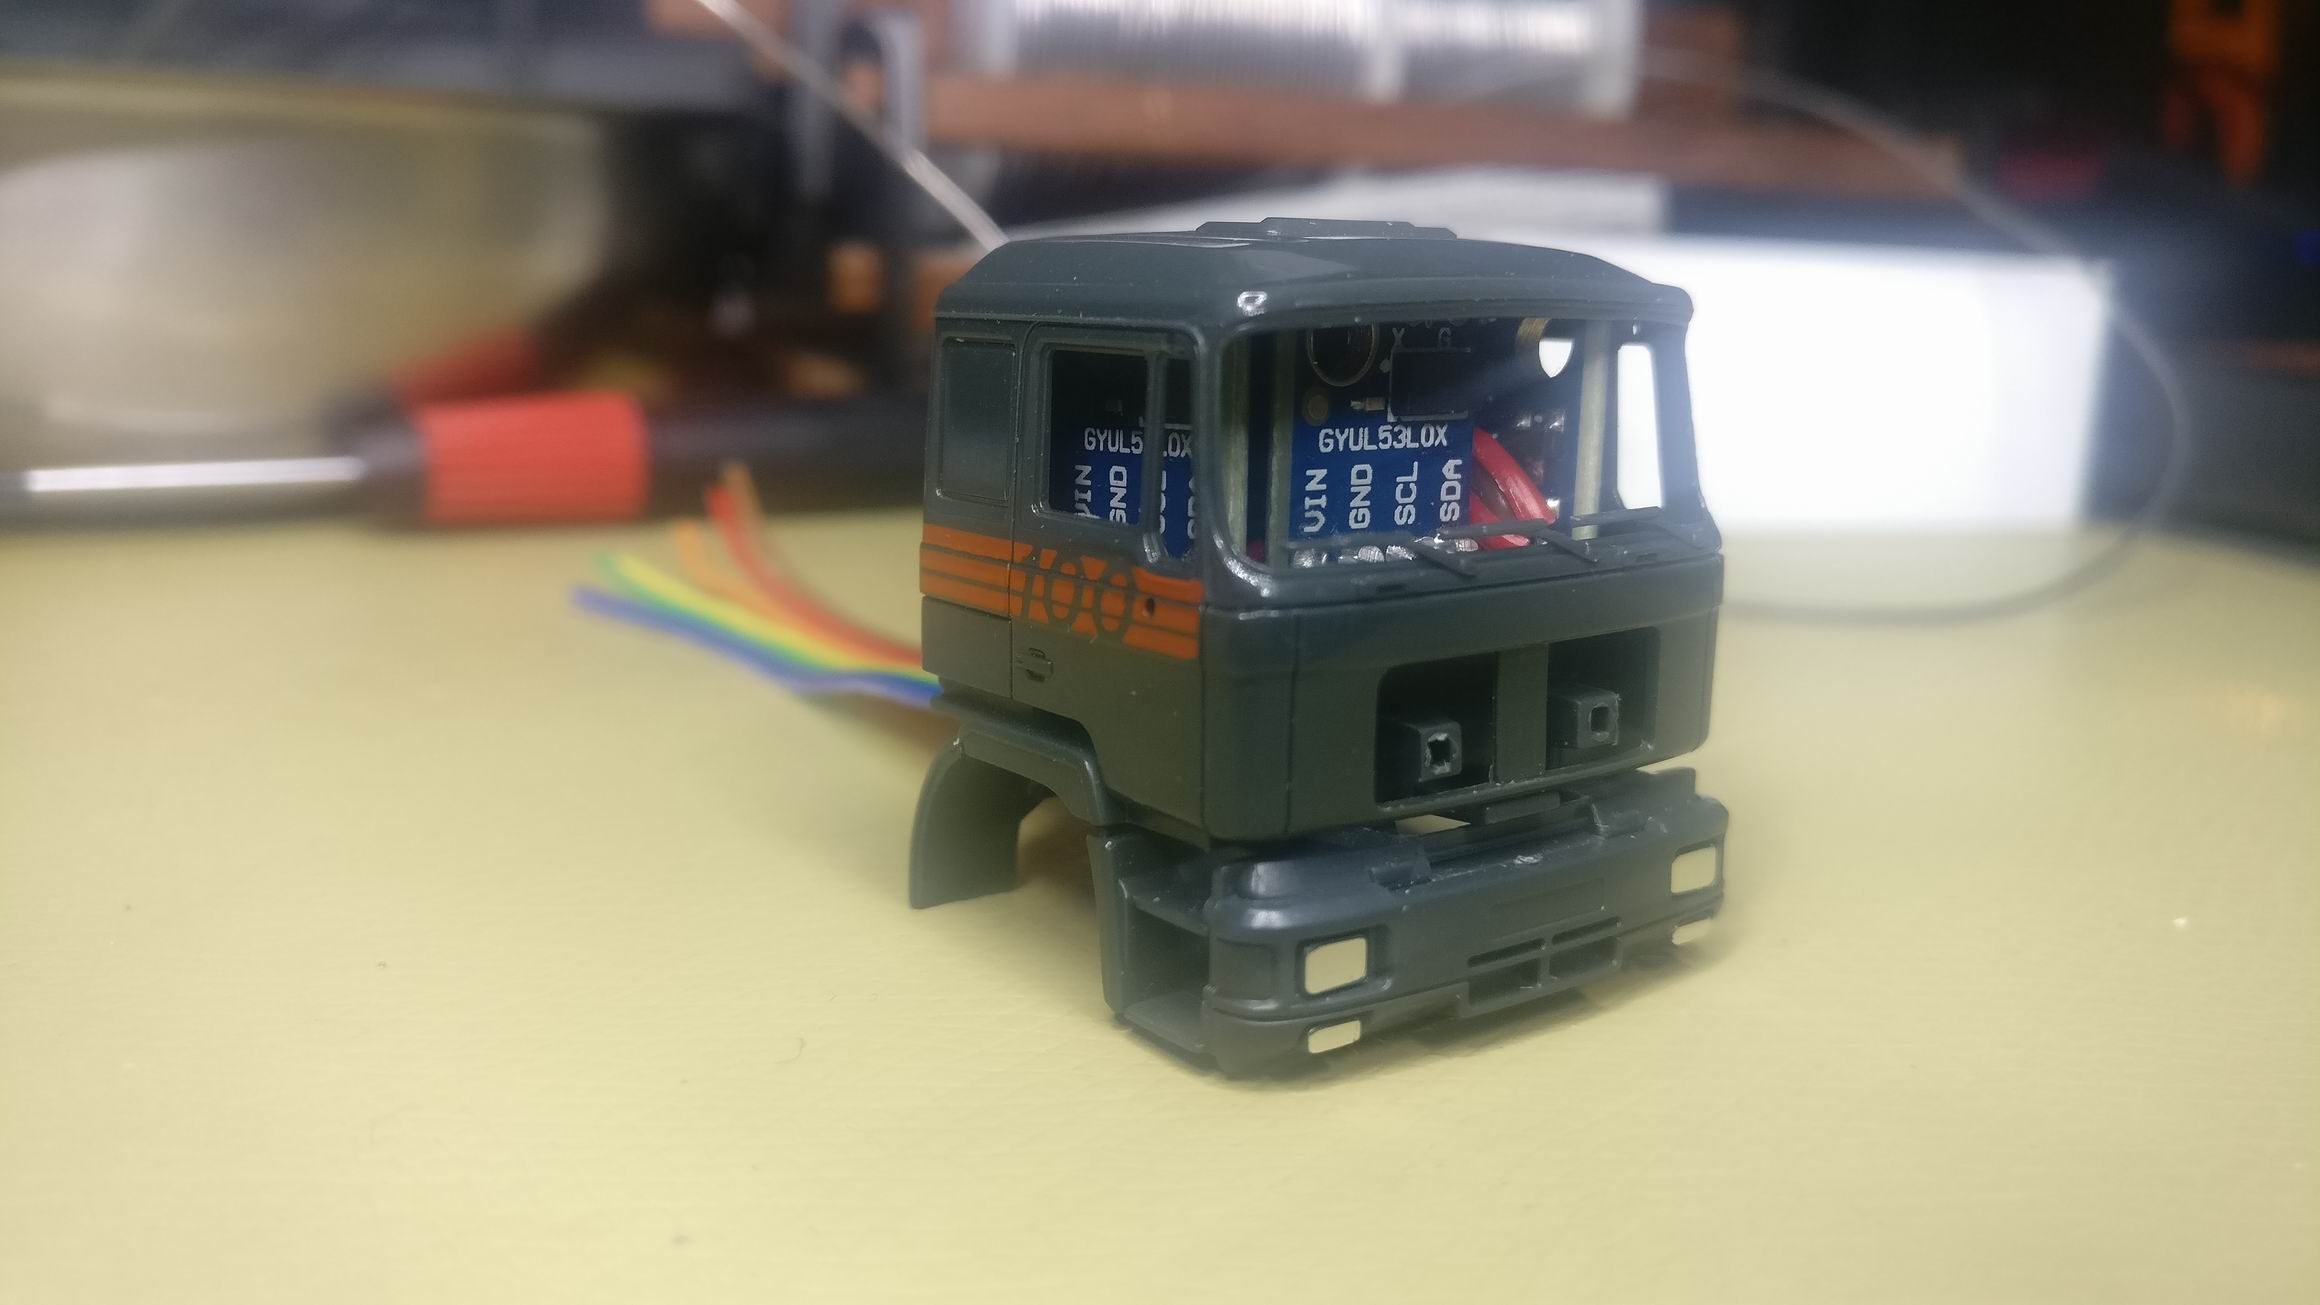
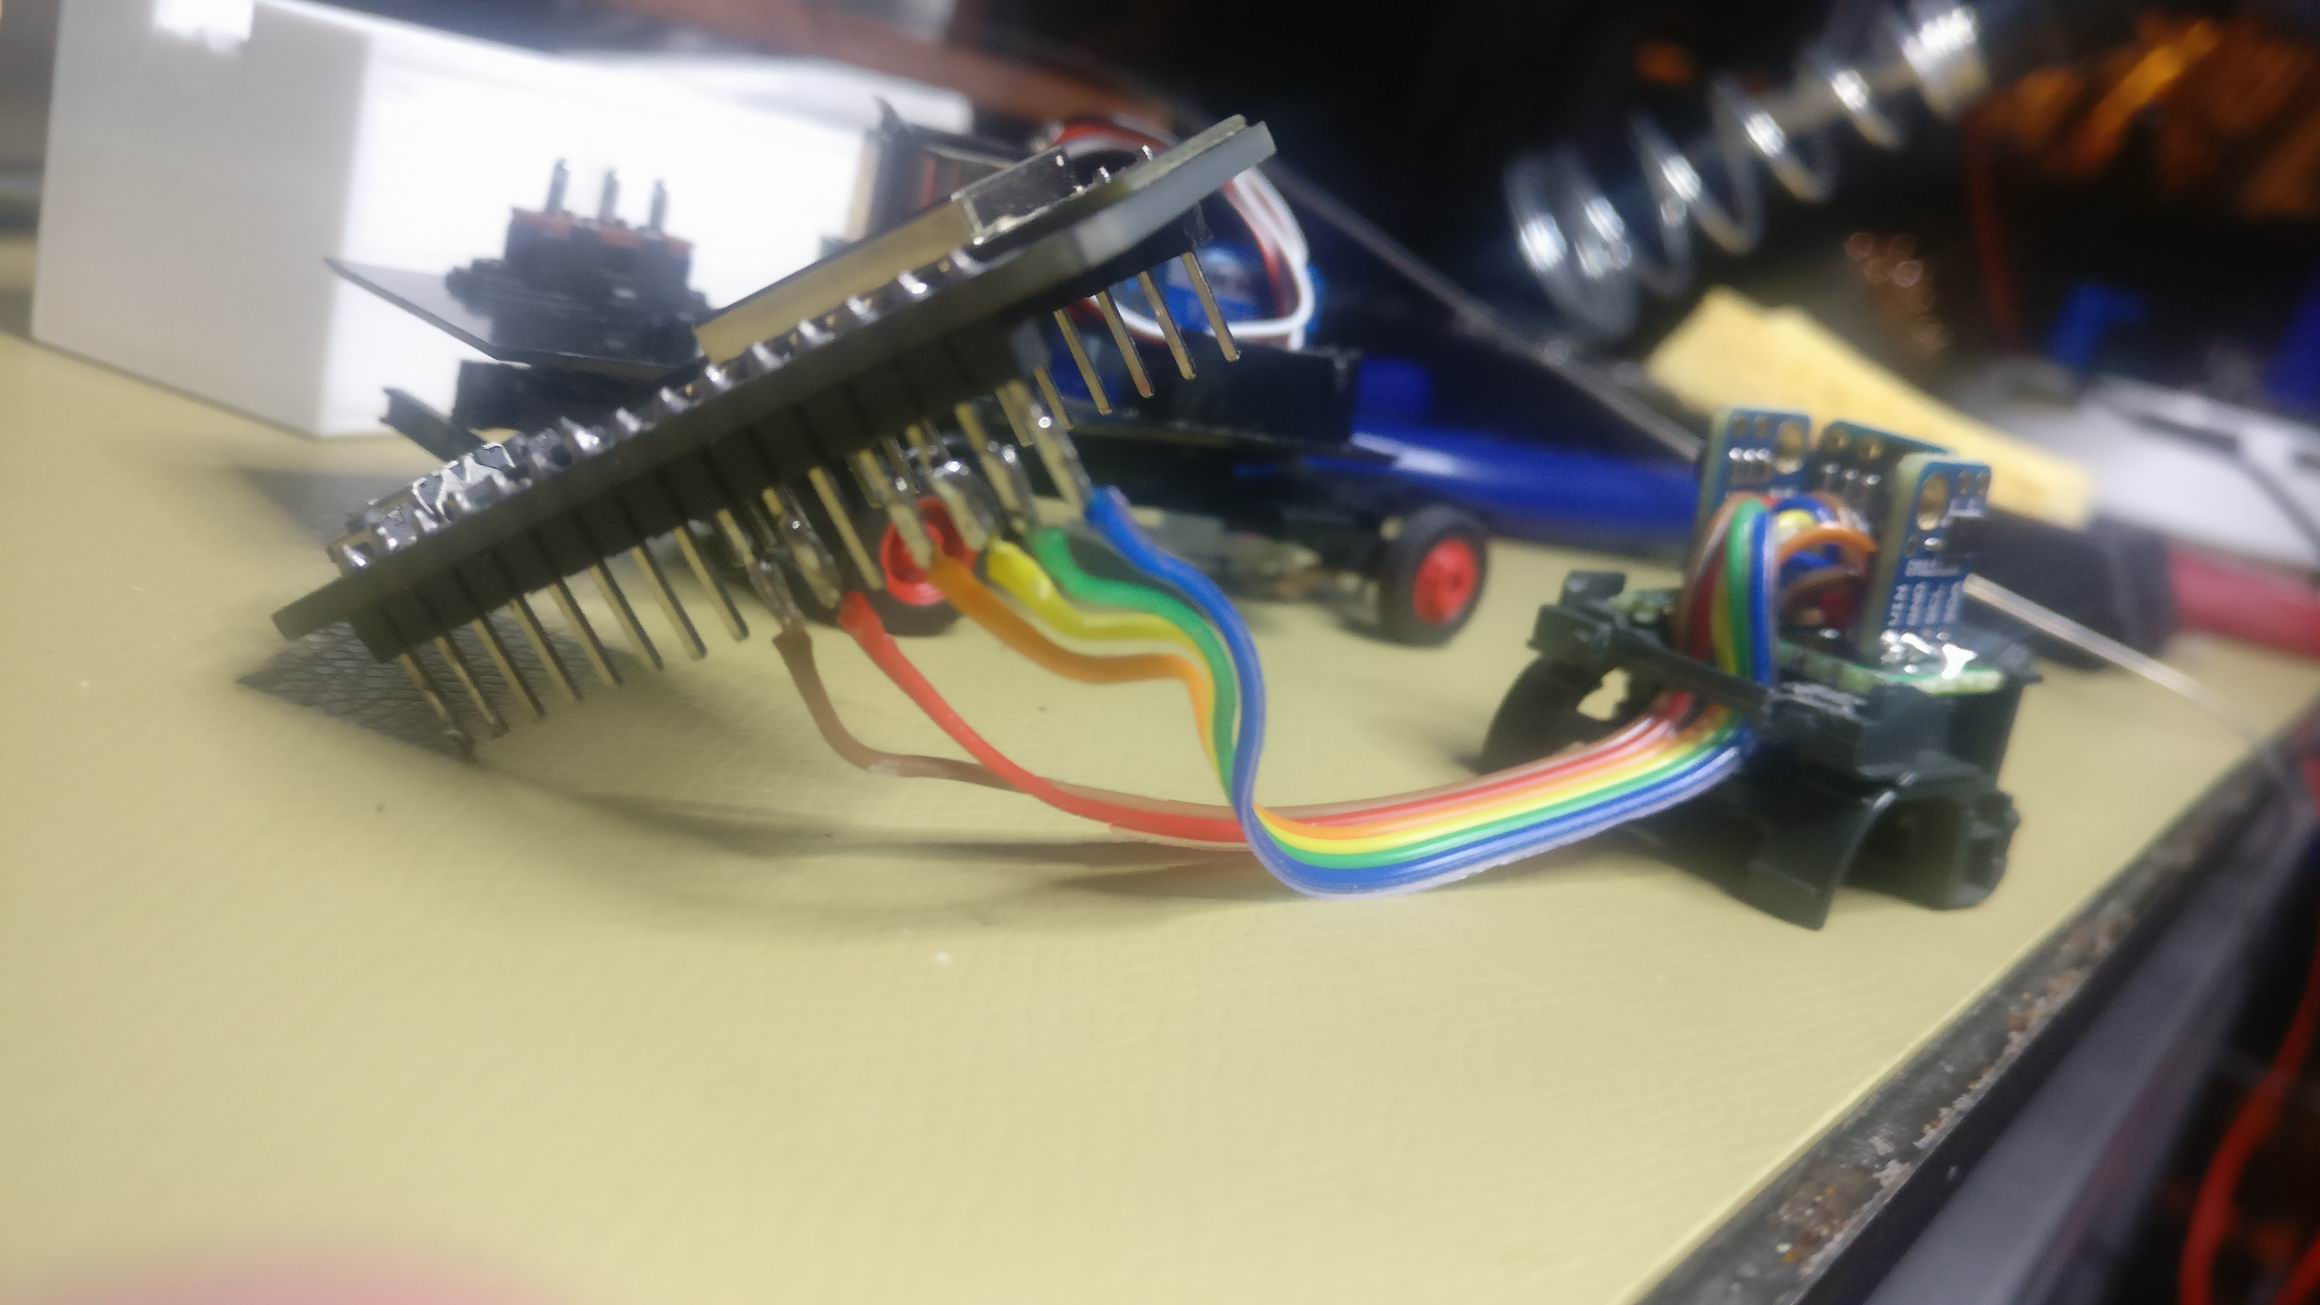
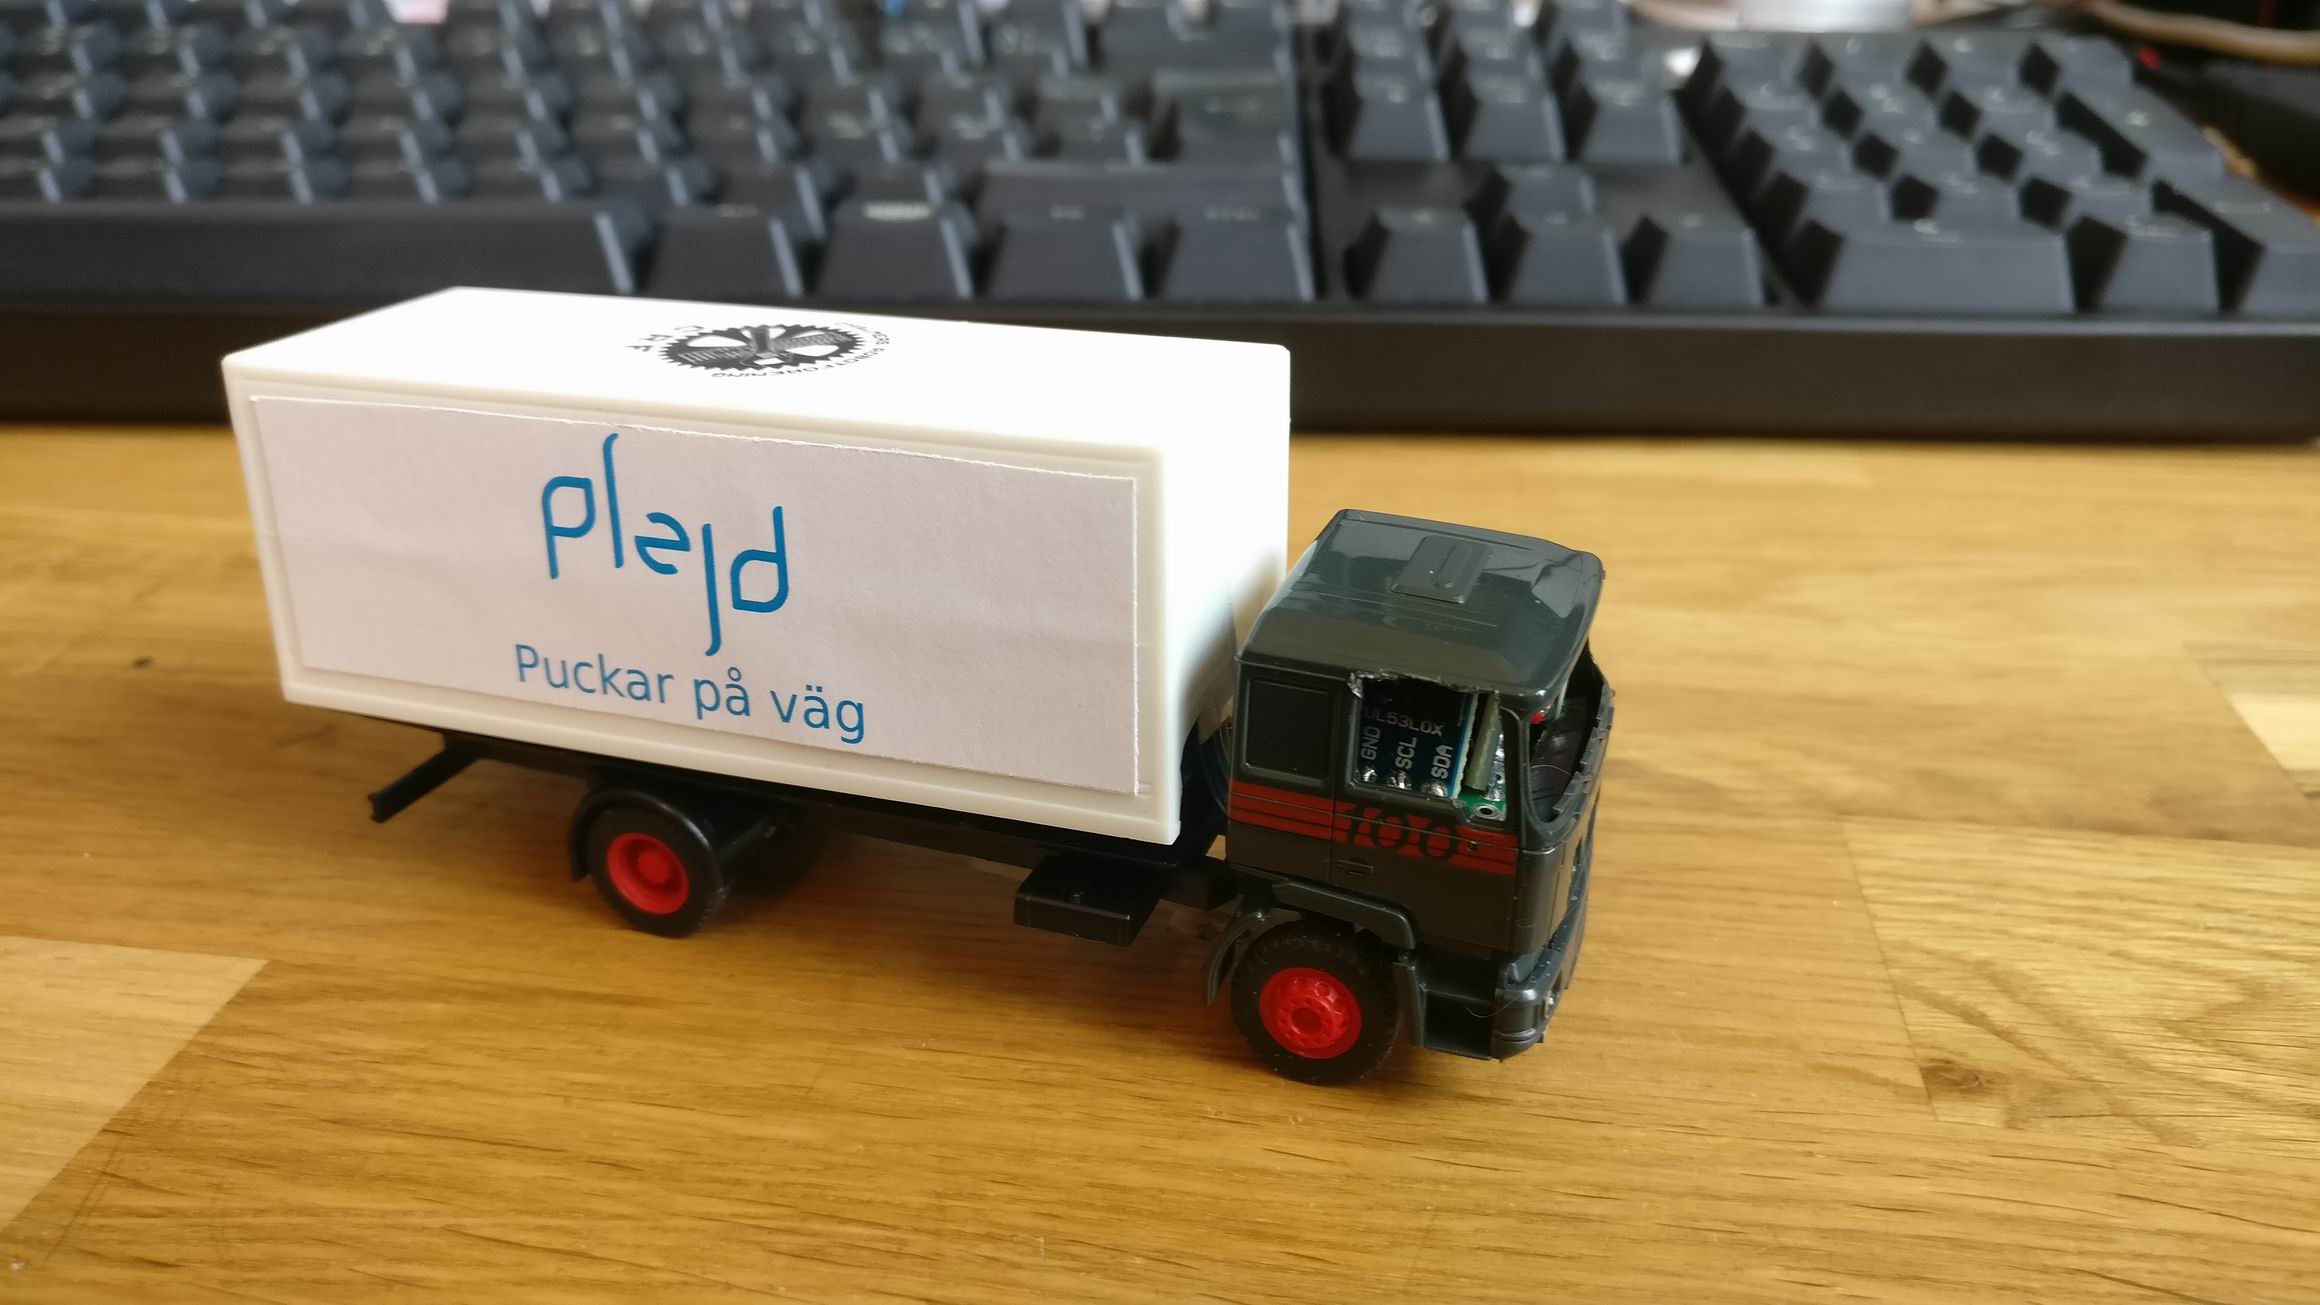
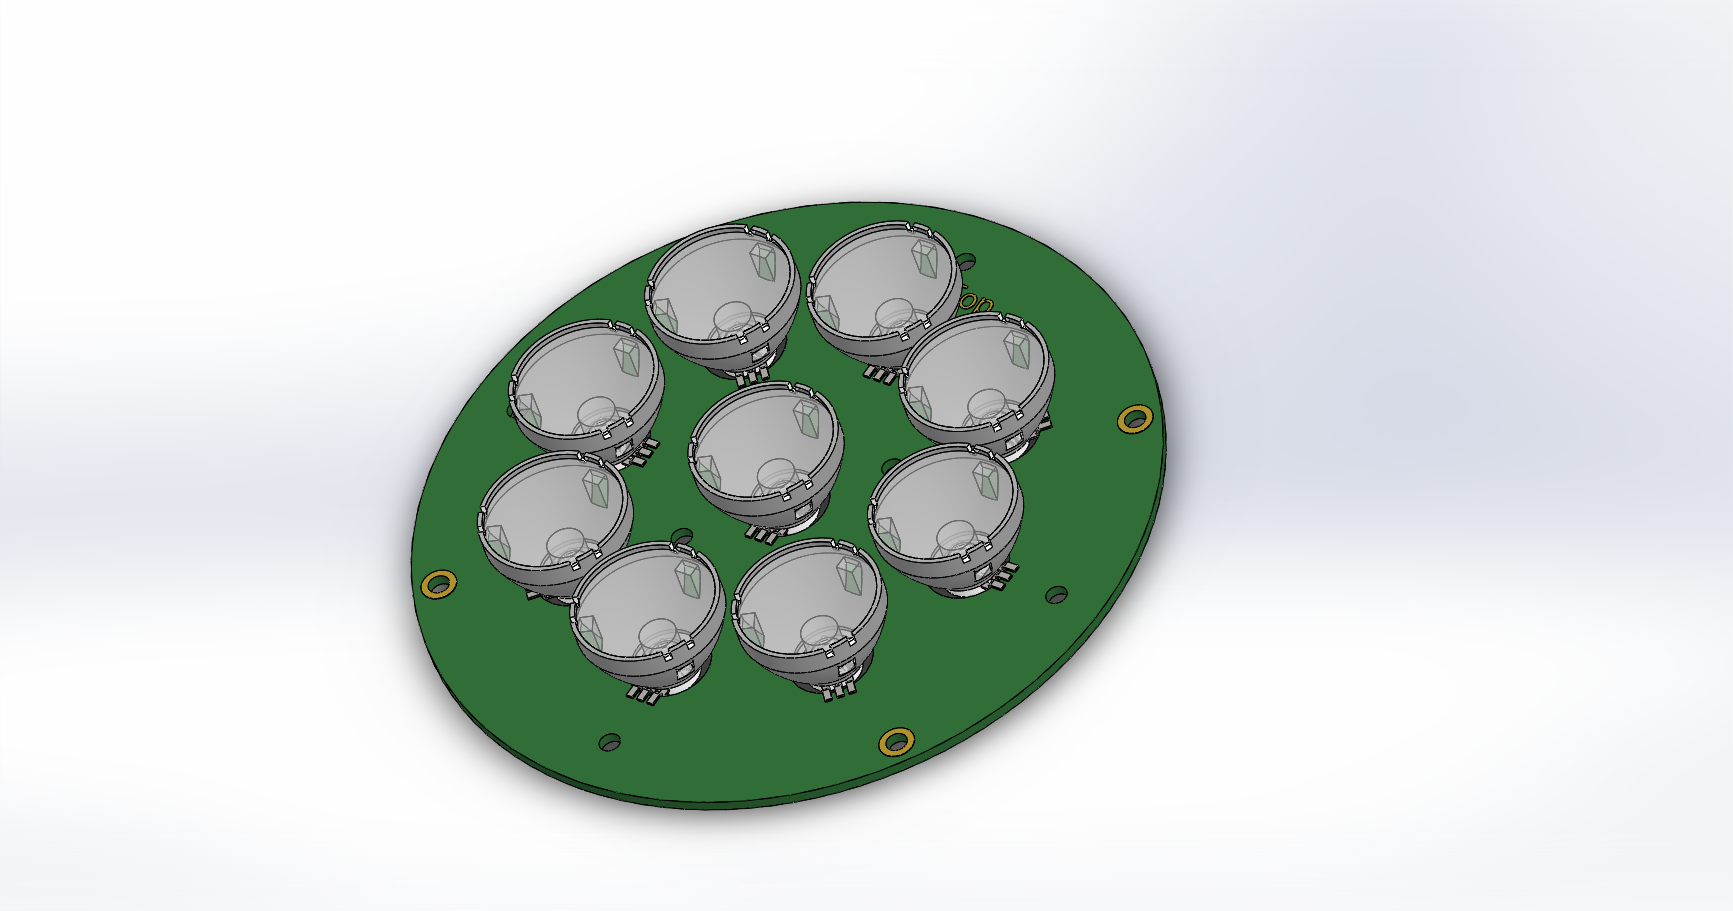
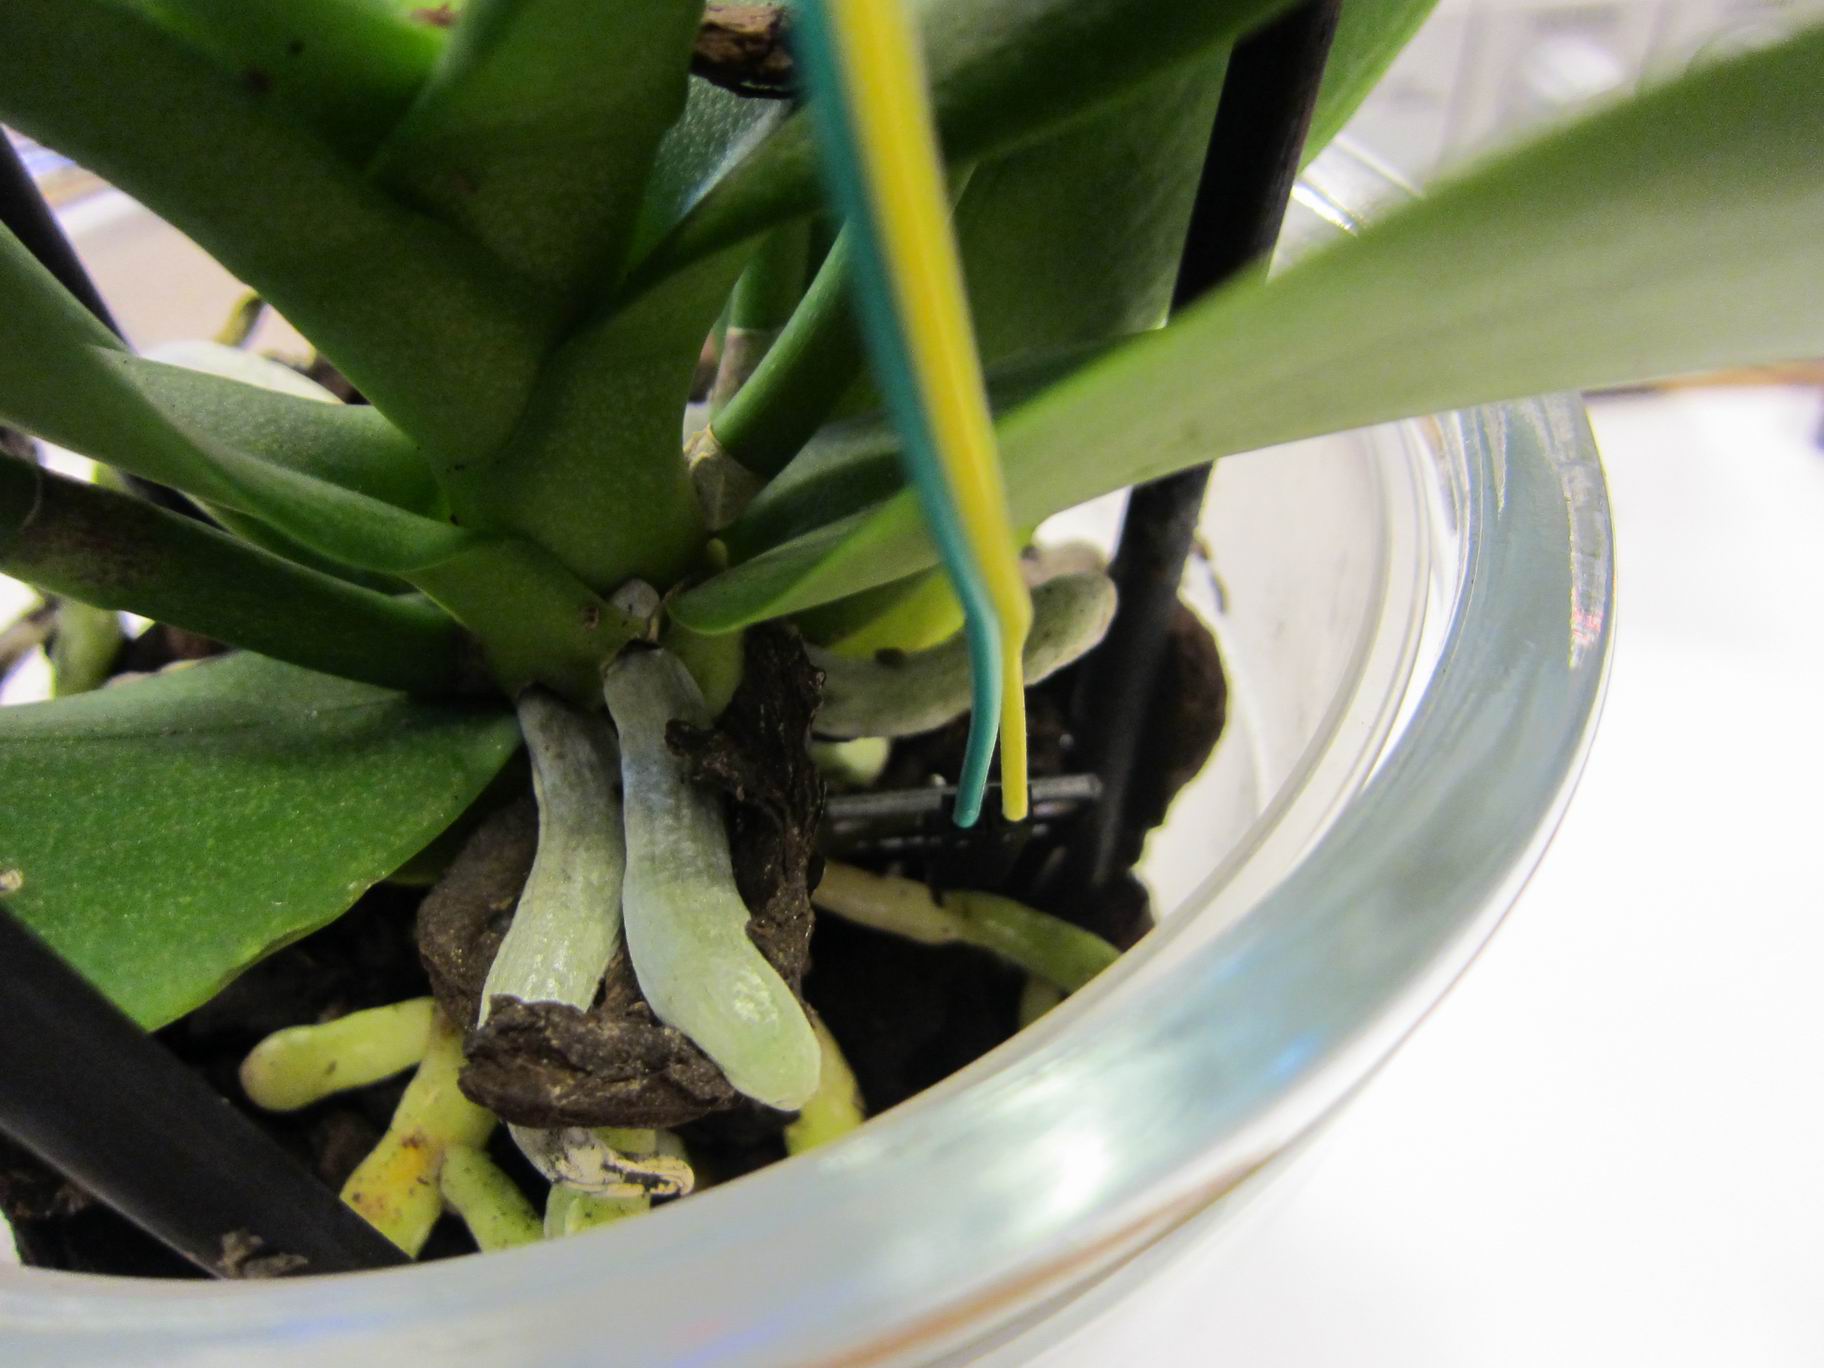
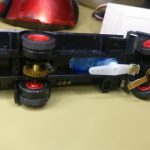
I then mounted 3 VL53L0X ToF (Time of FLight) distance sensors inside the cab of the truck. The sensors is pointing out from the same holes the windows are located.
The sensors will be used to locate walls and other trucks, it’s gives a pretty low resolution, but should be enough.


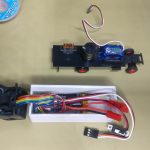
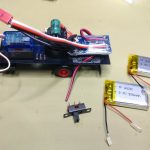
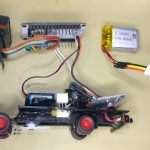
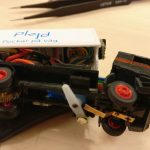
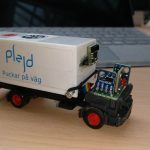
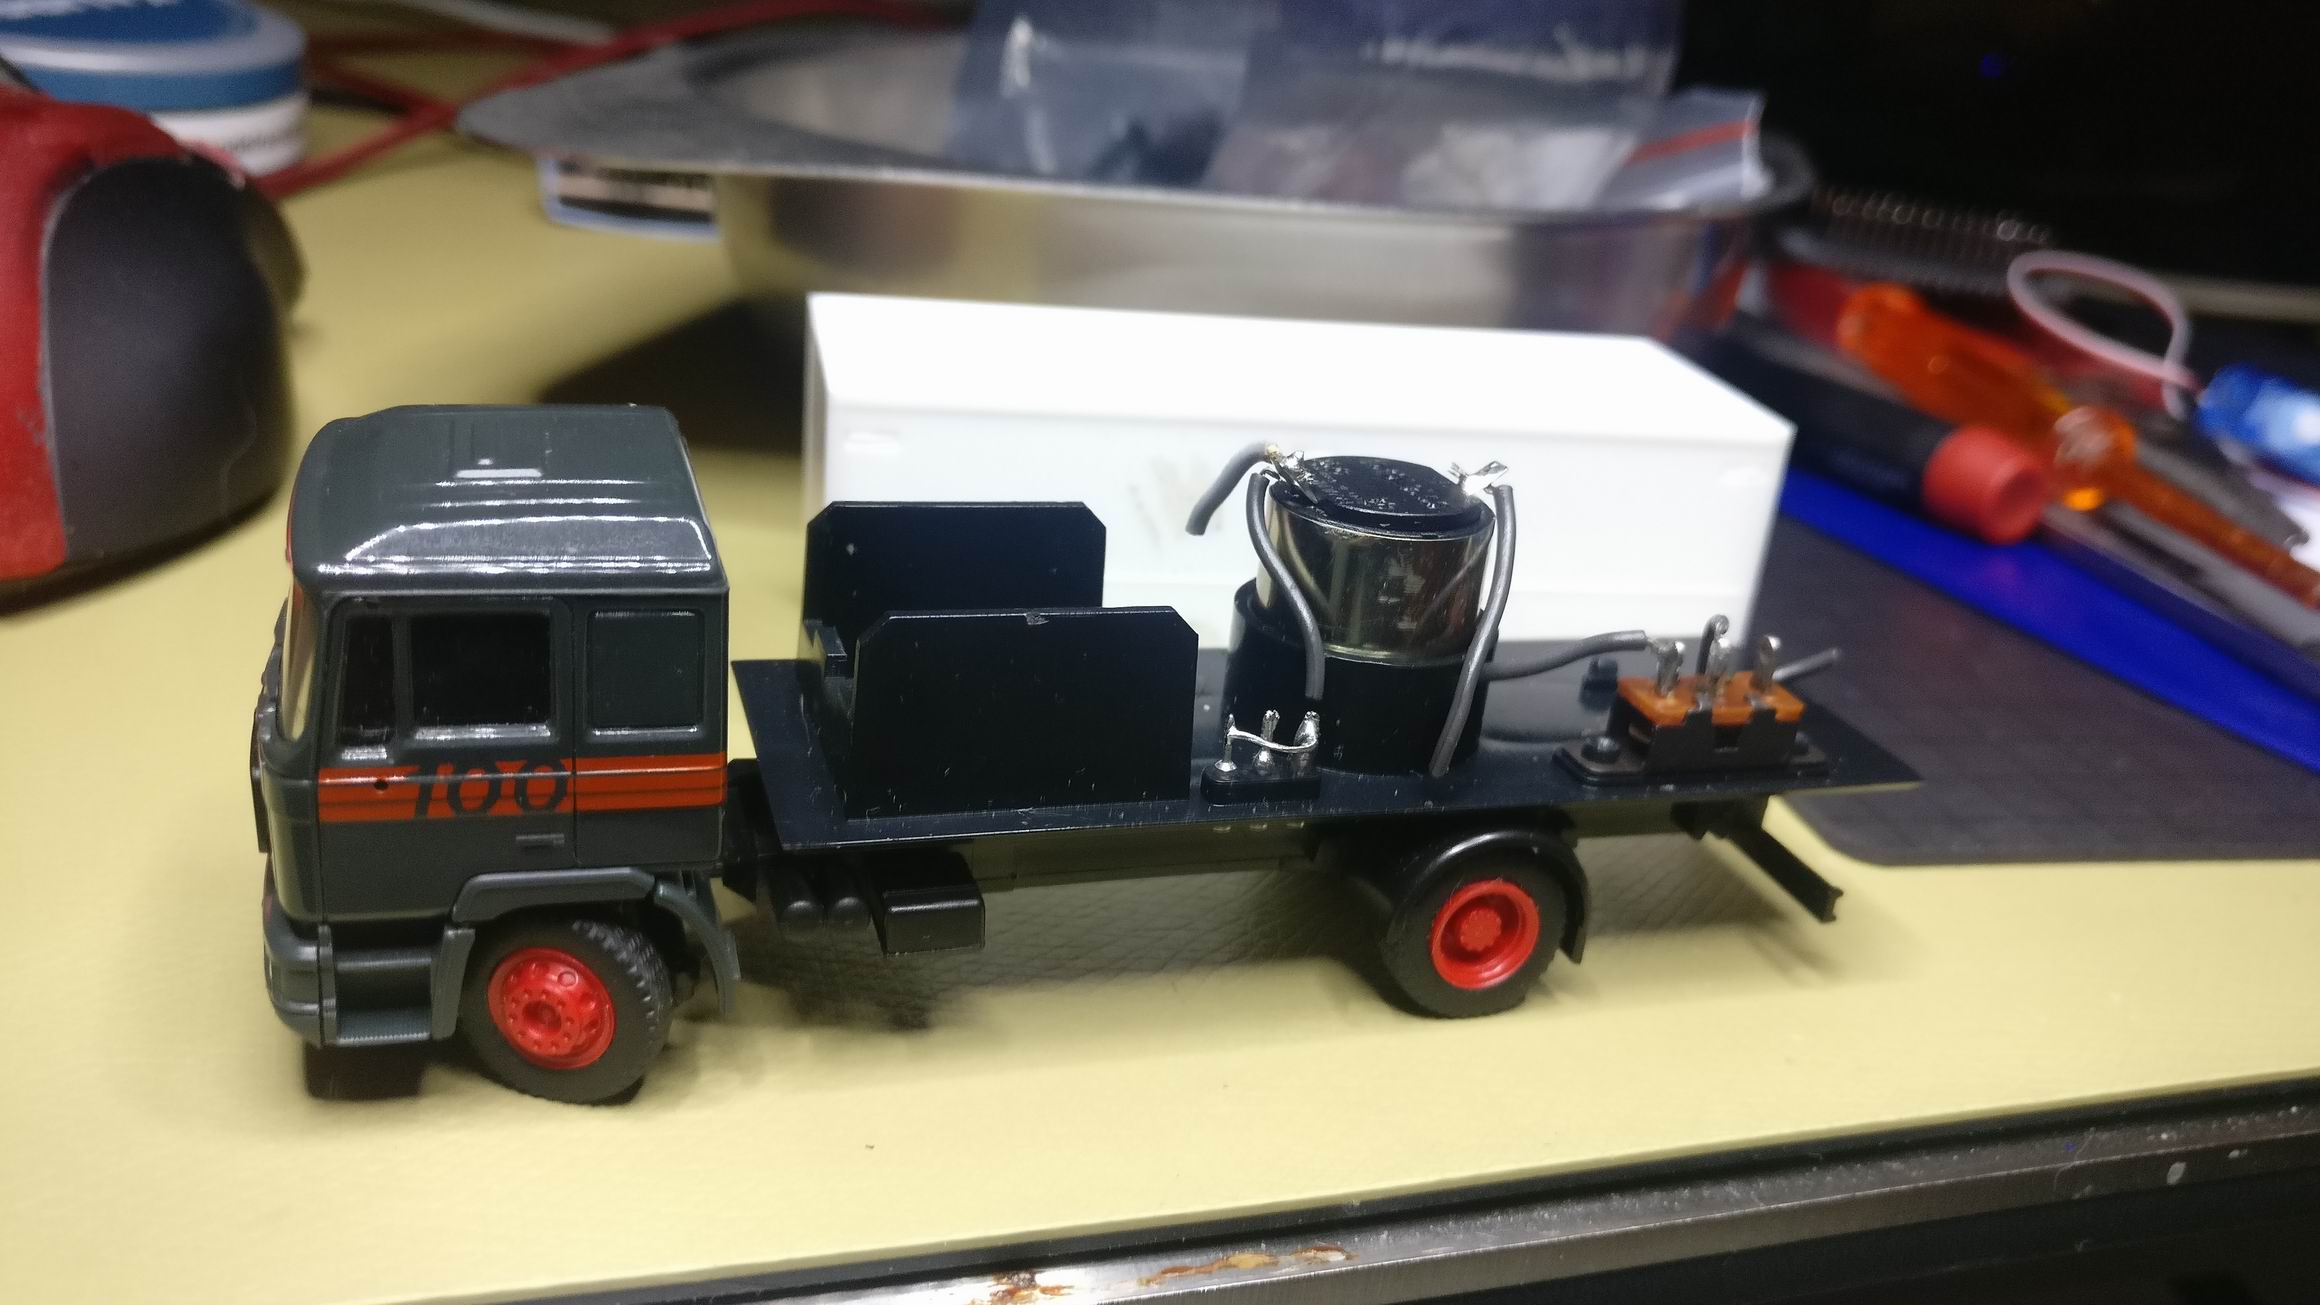
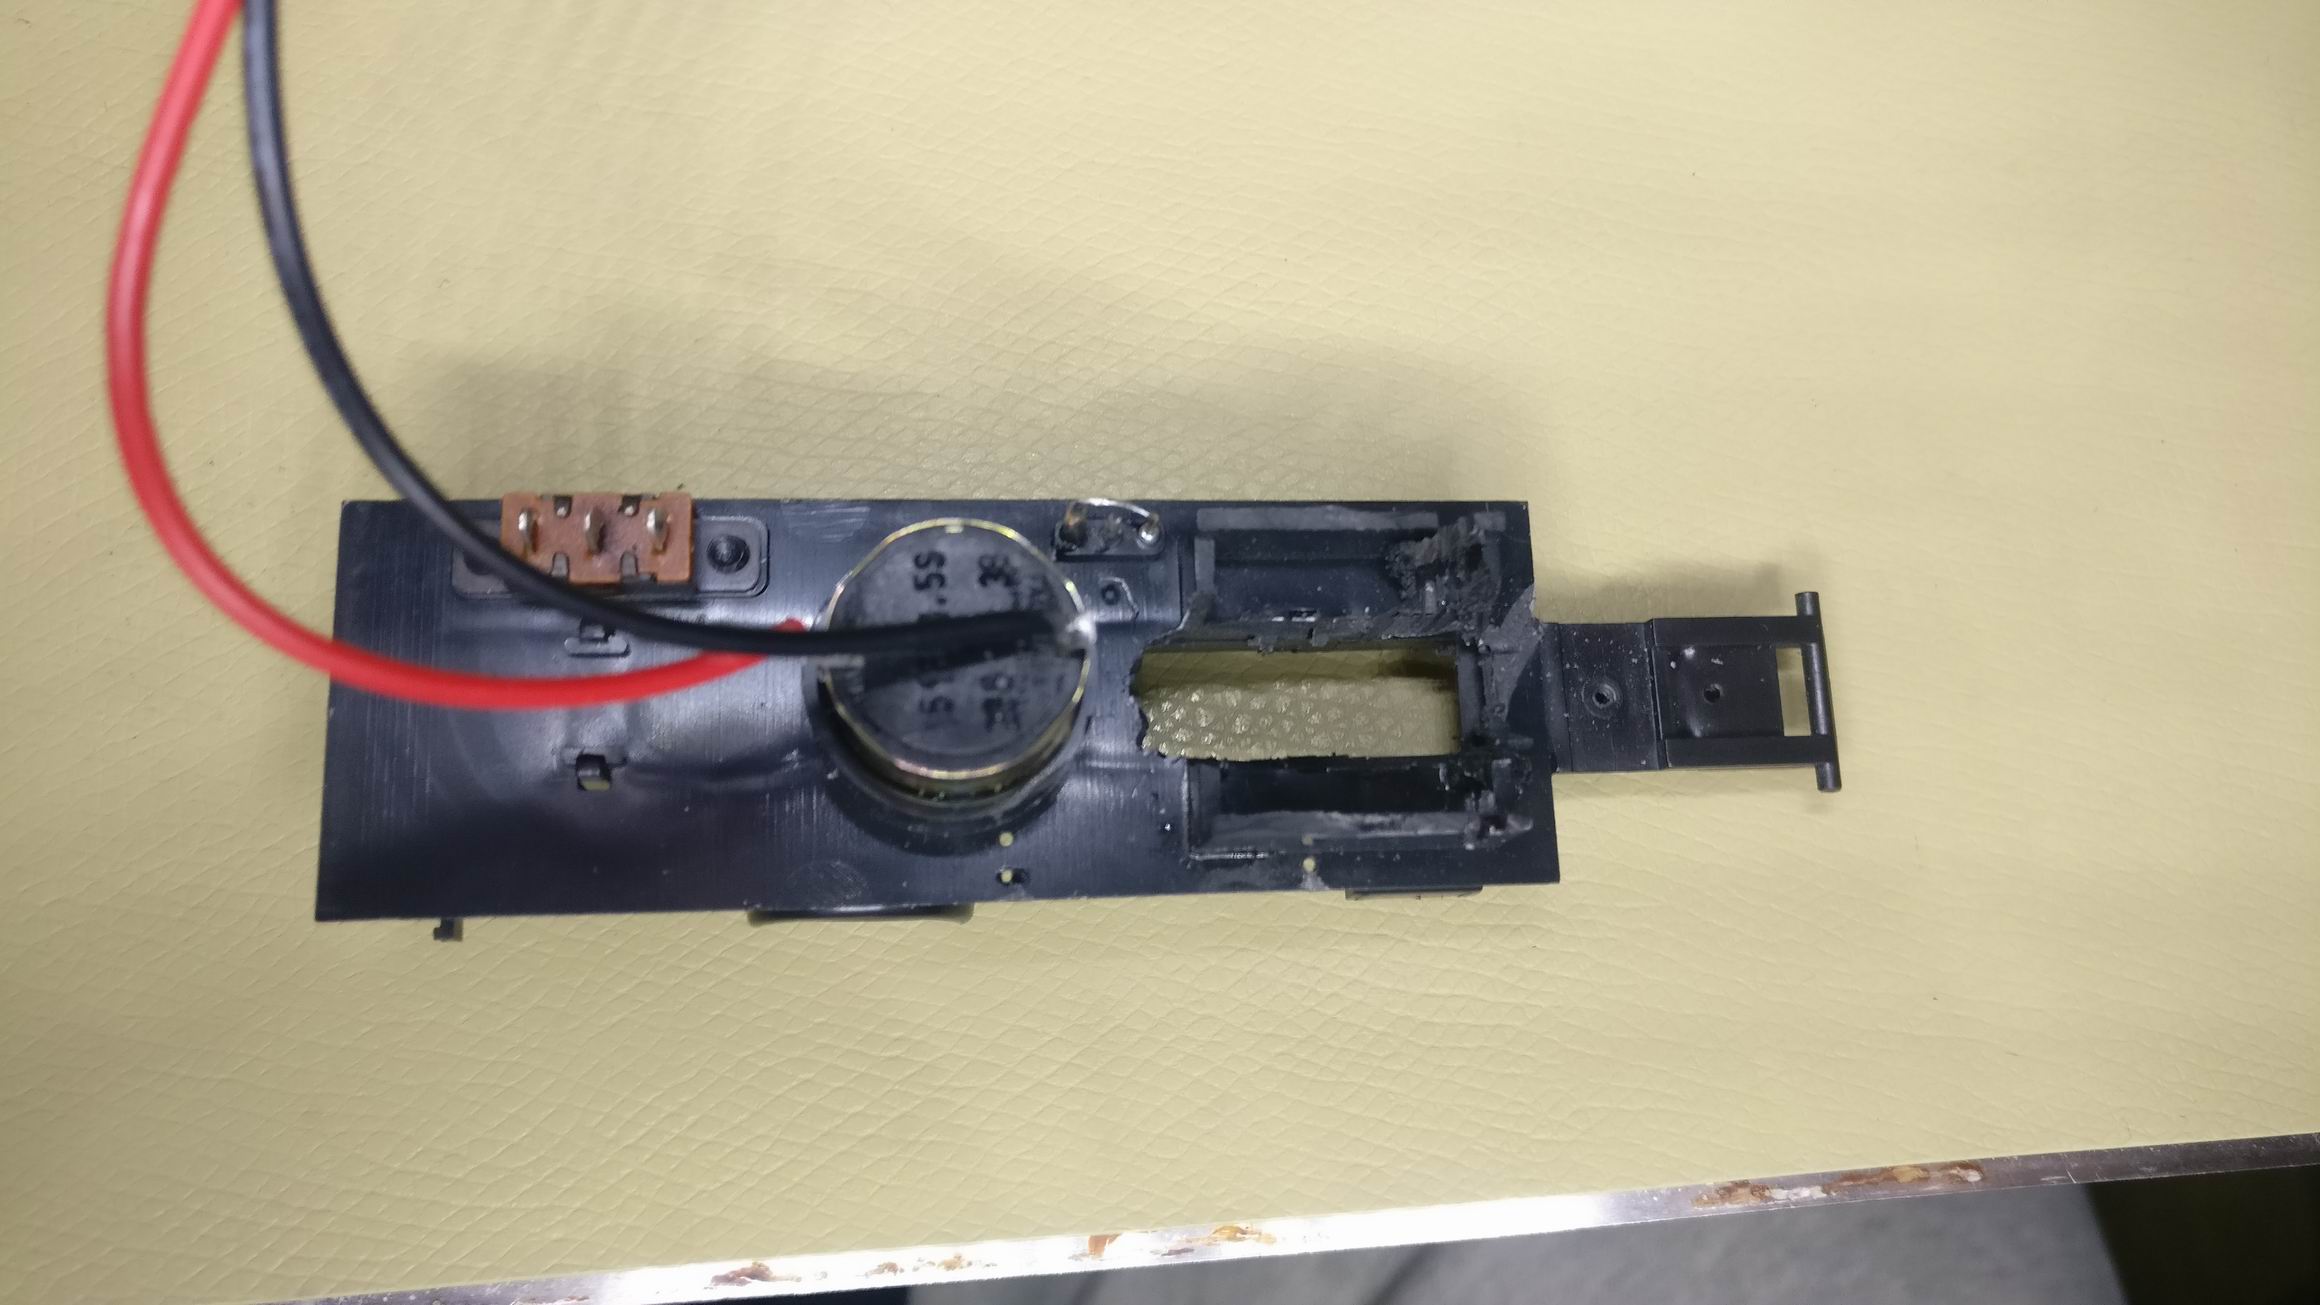
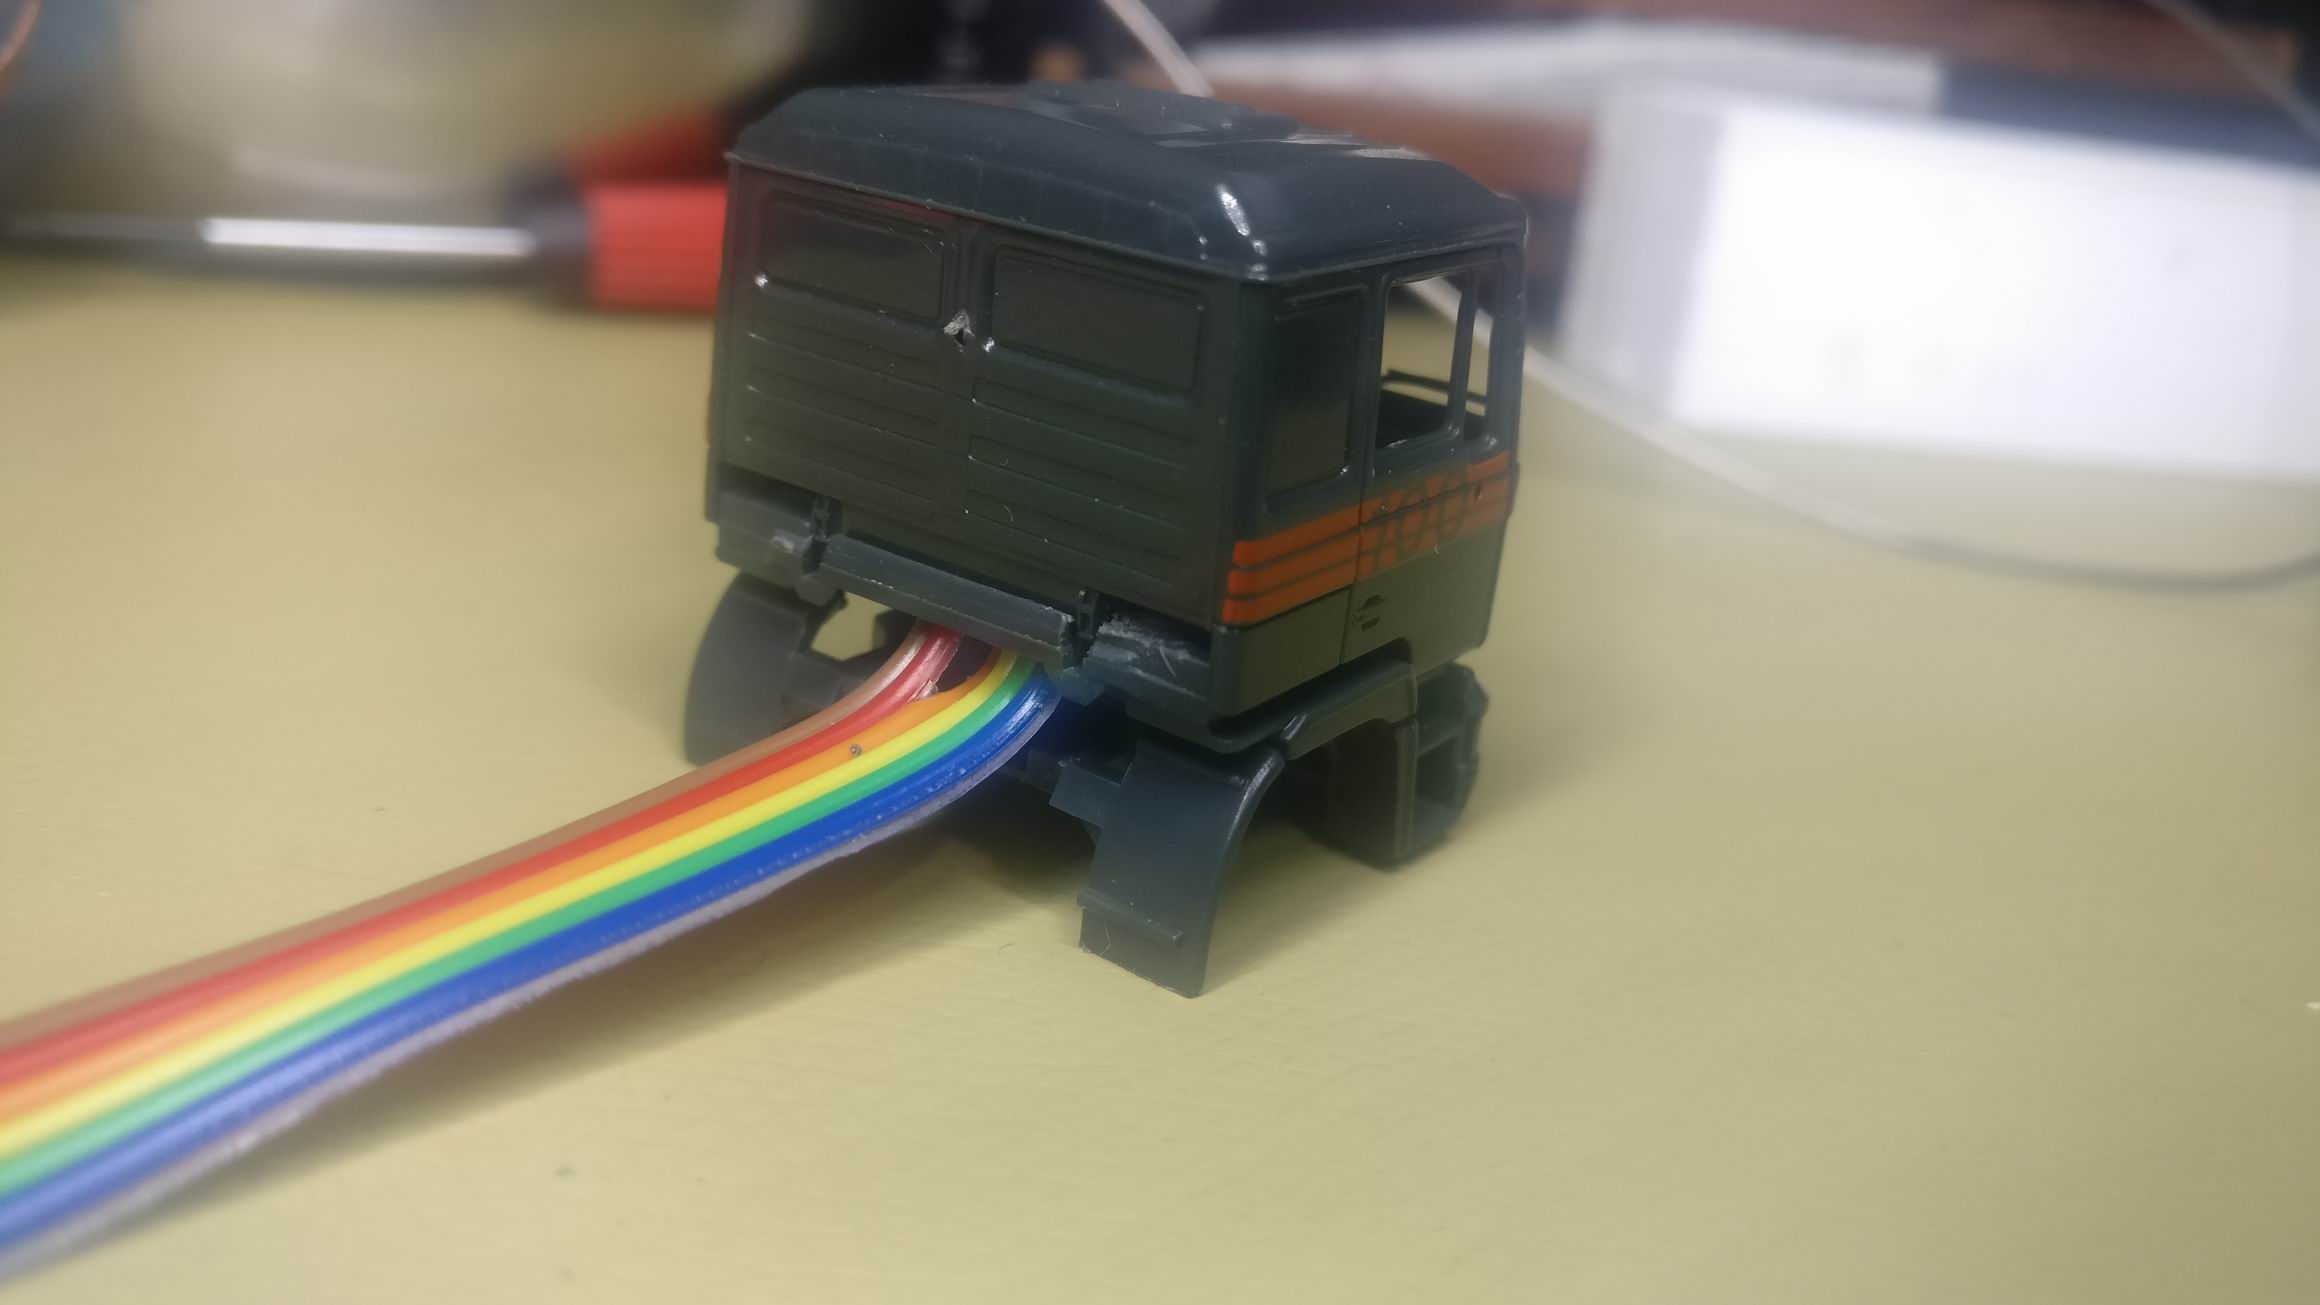
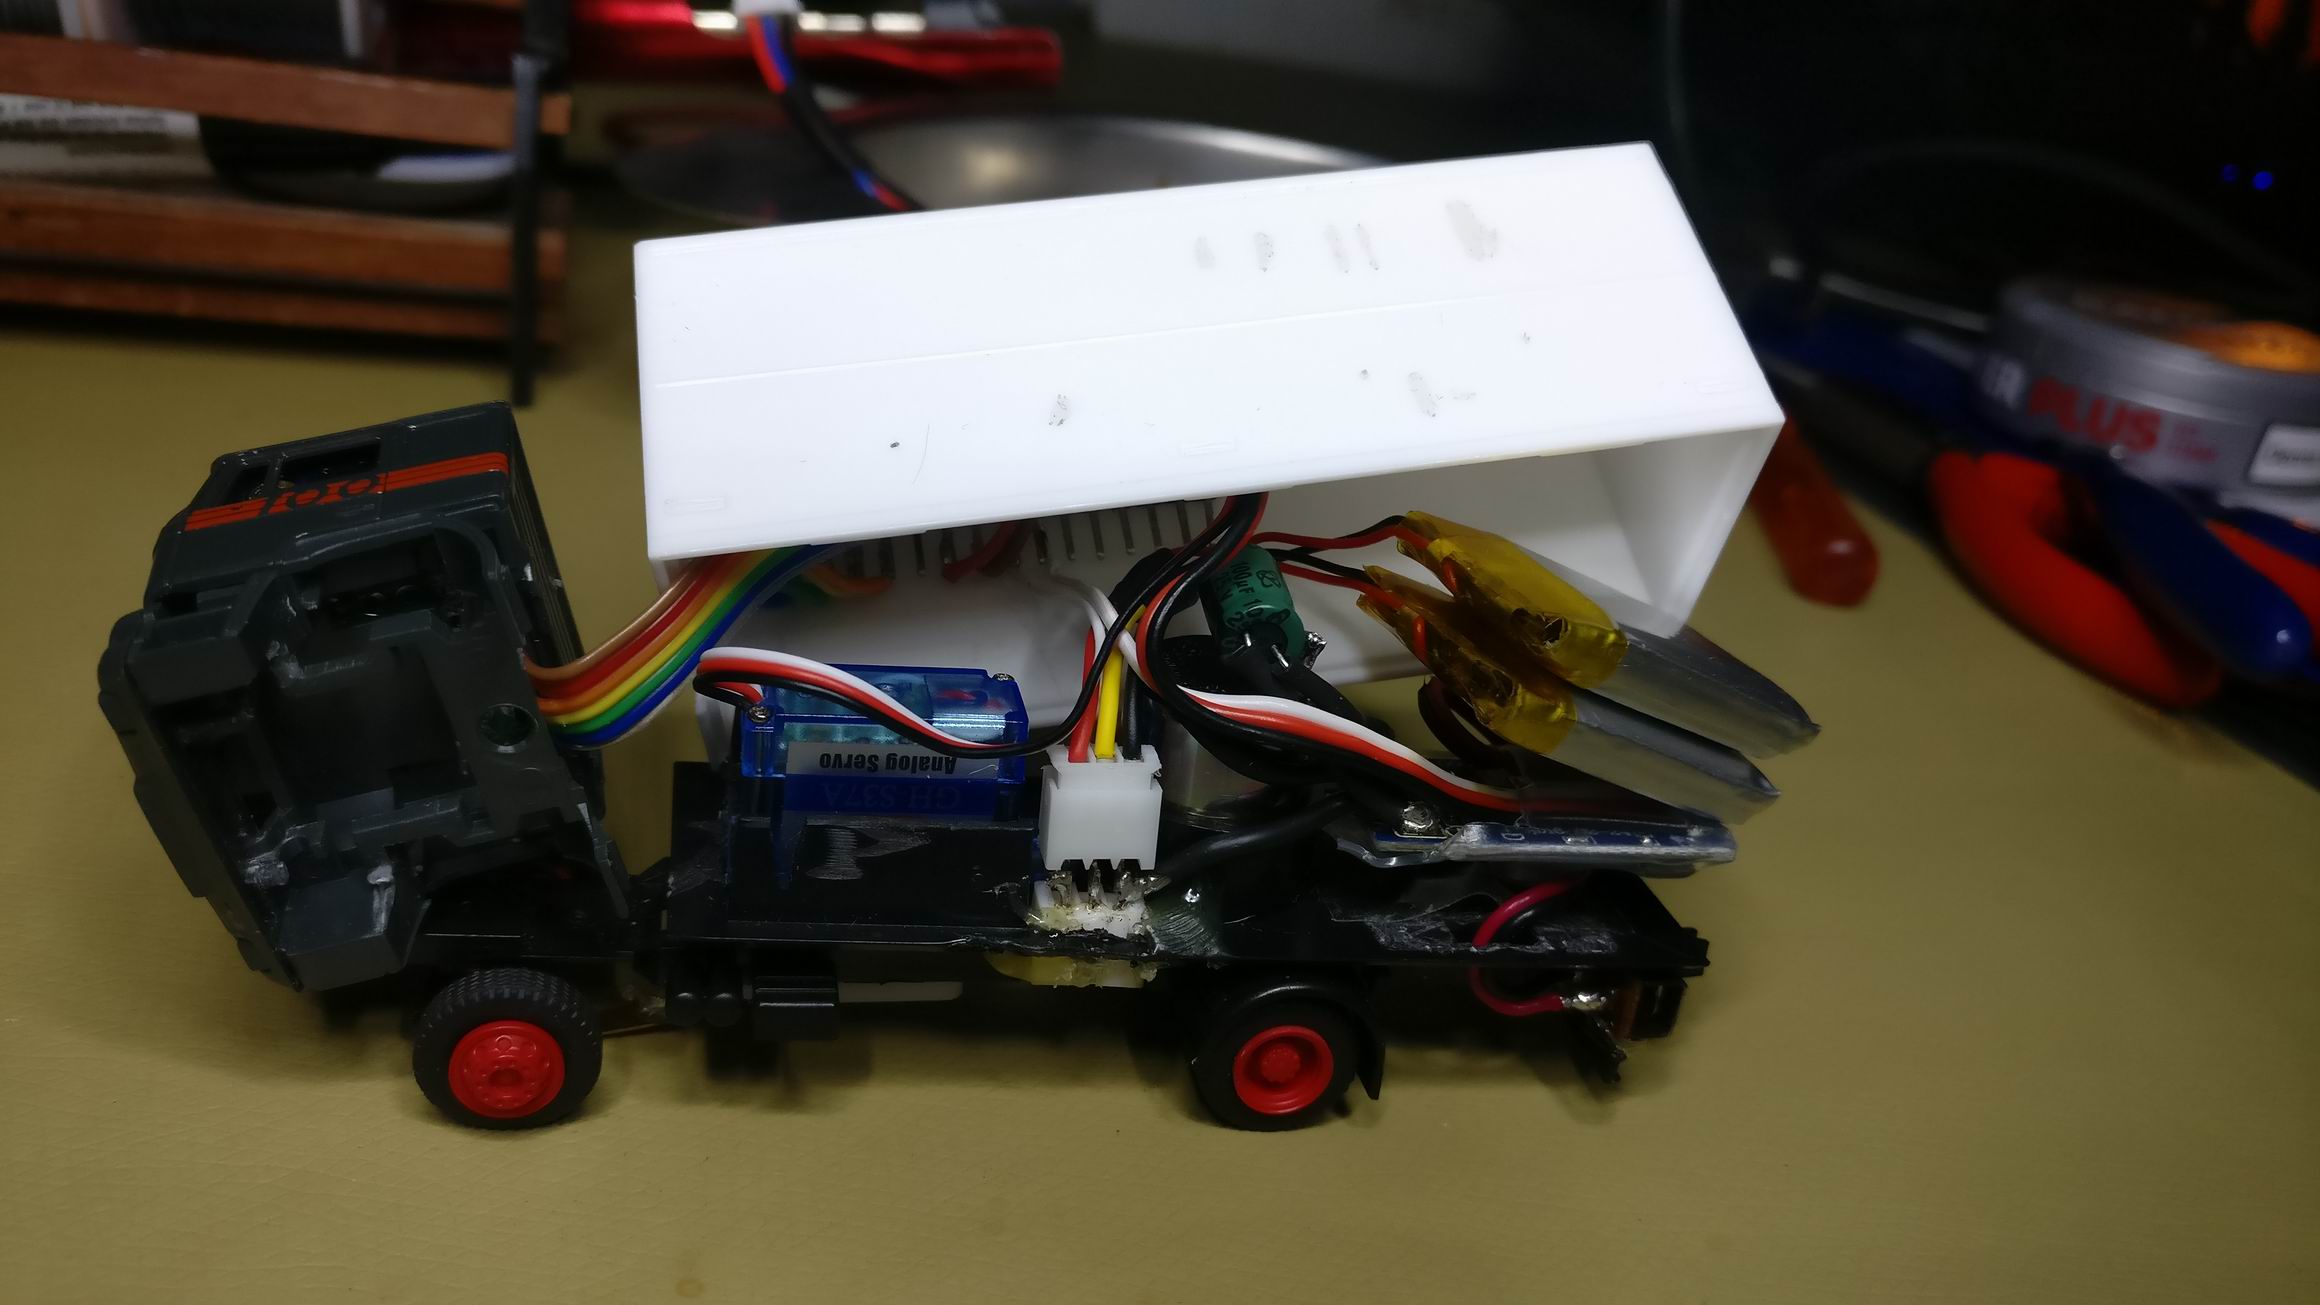
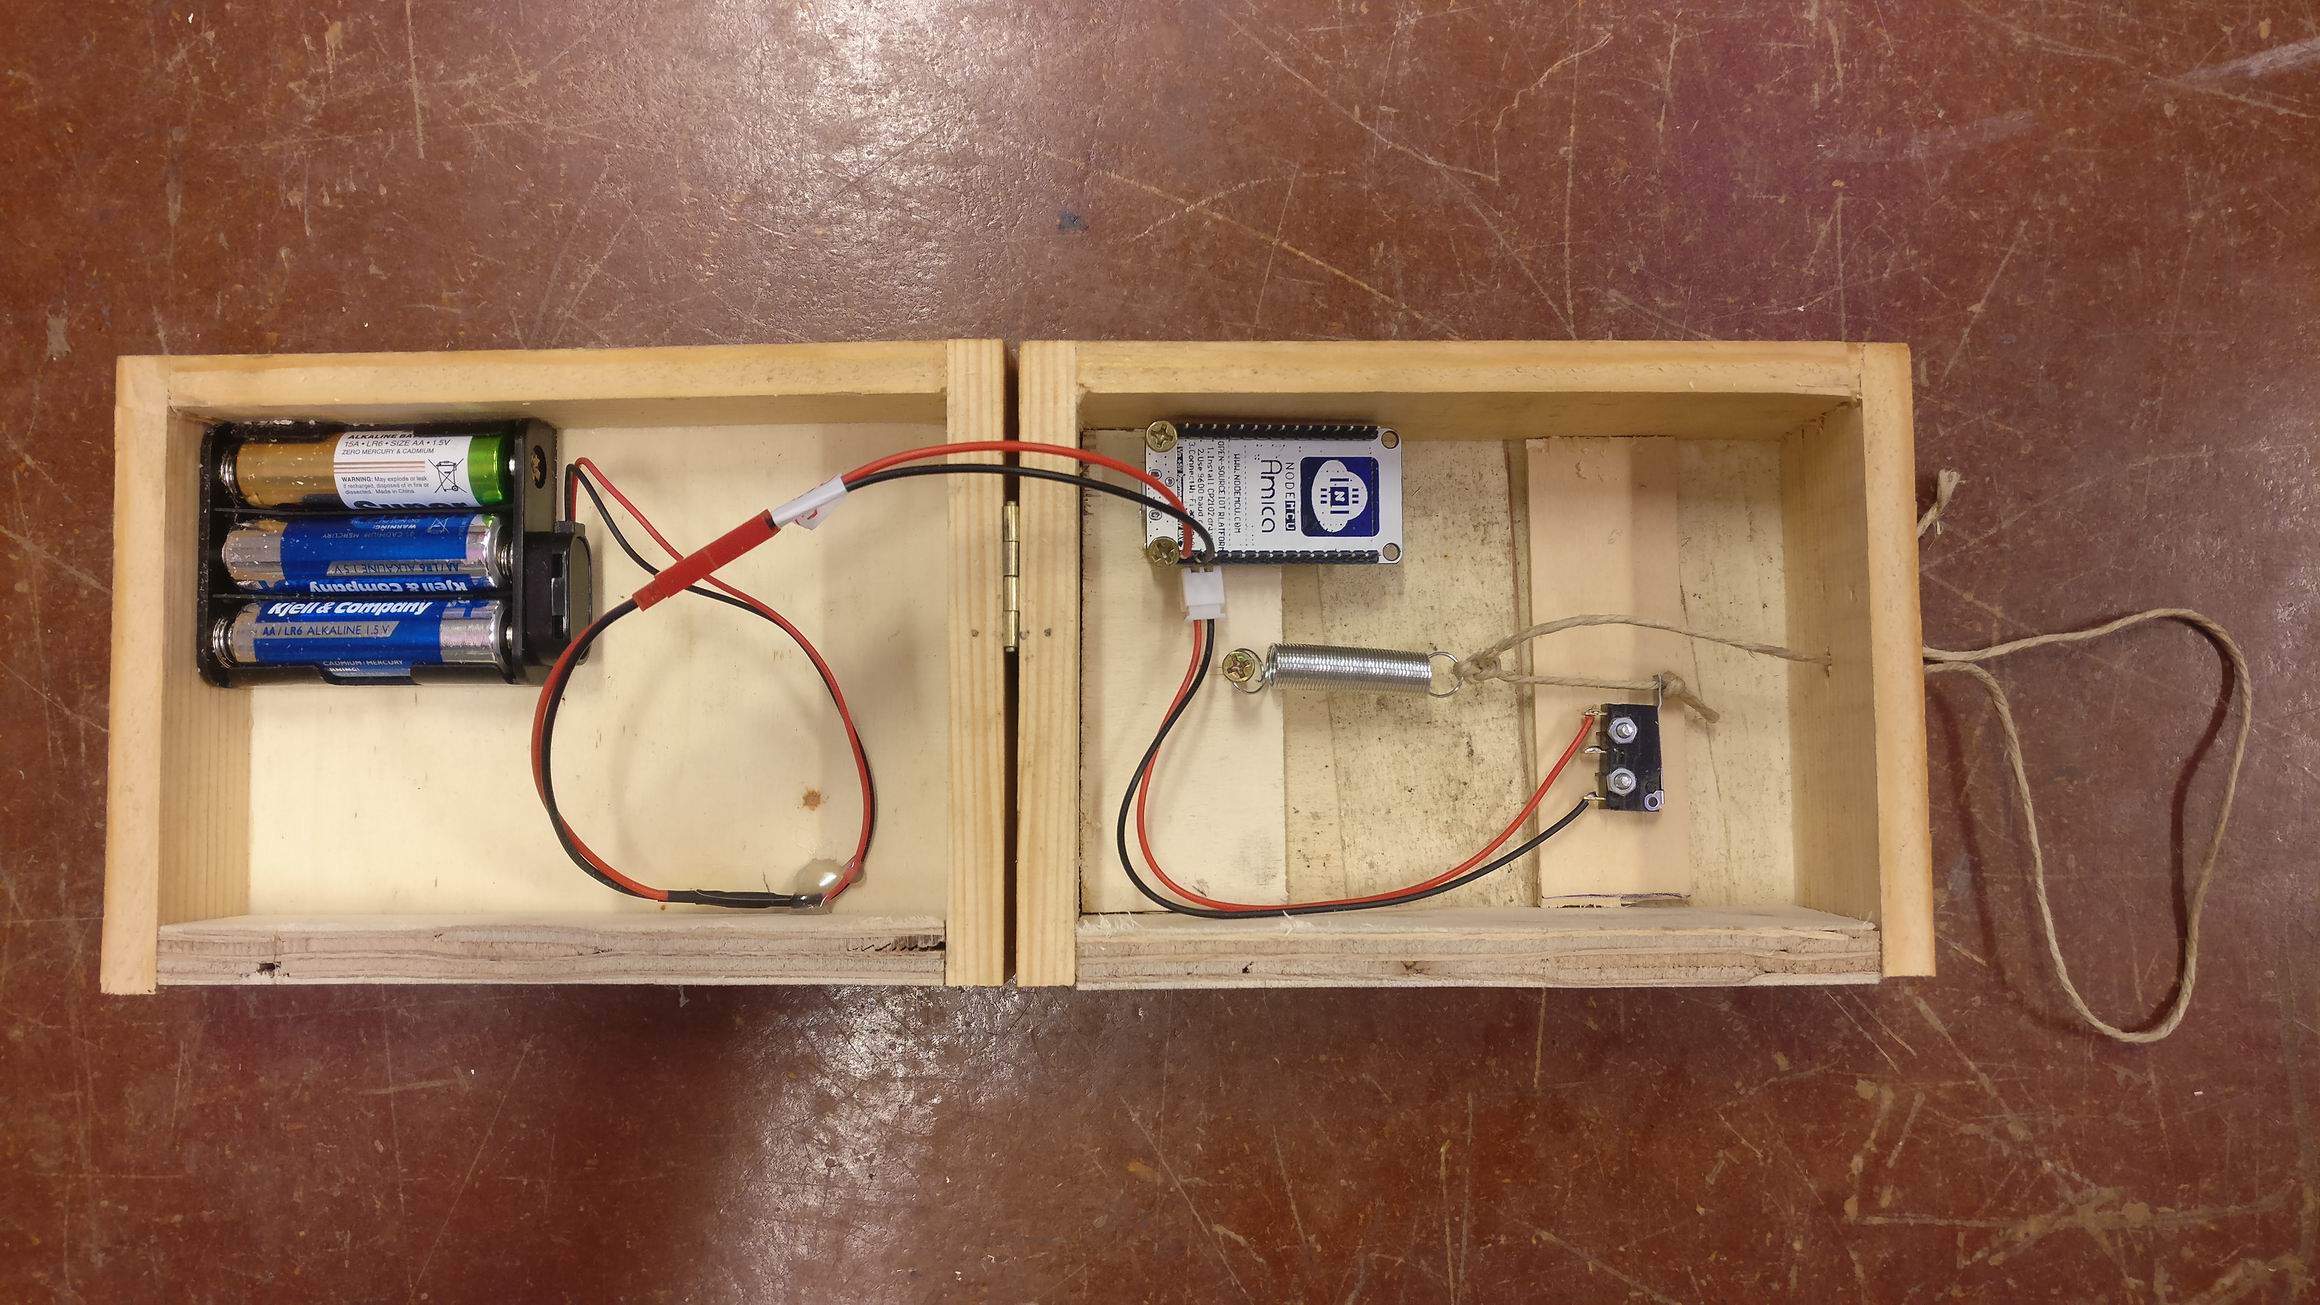
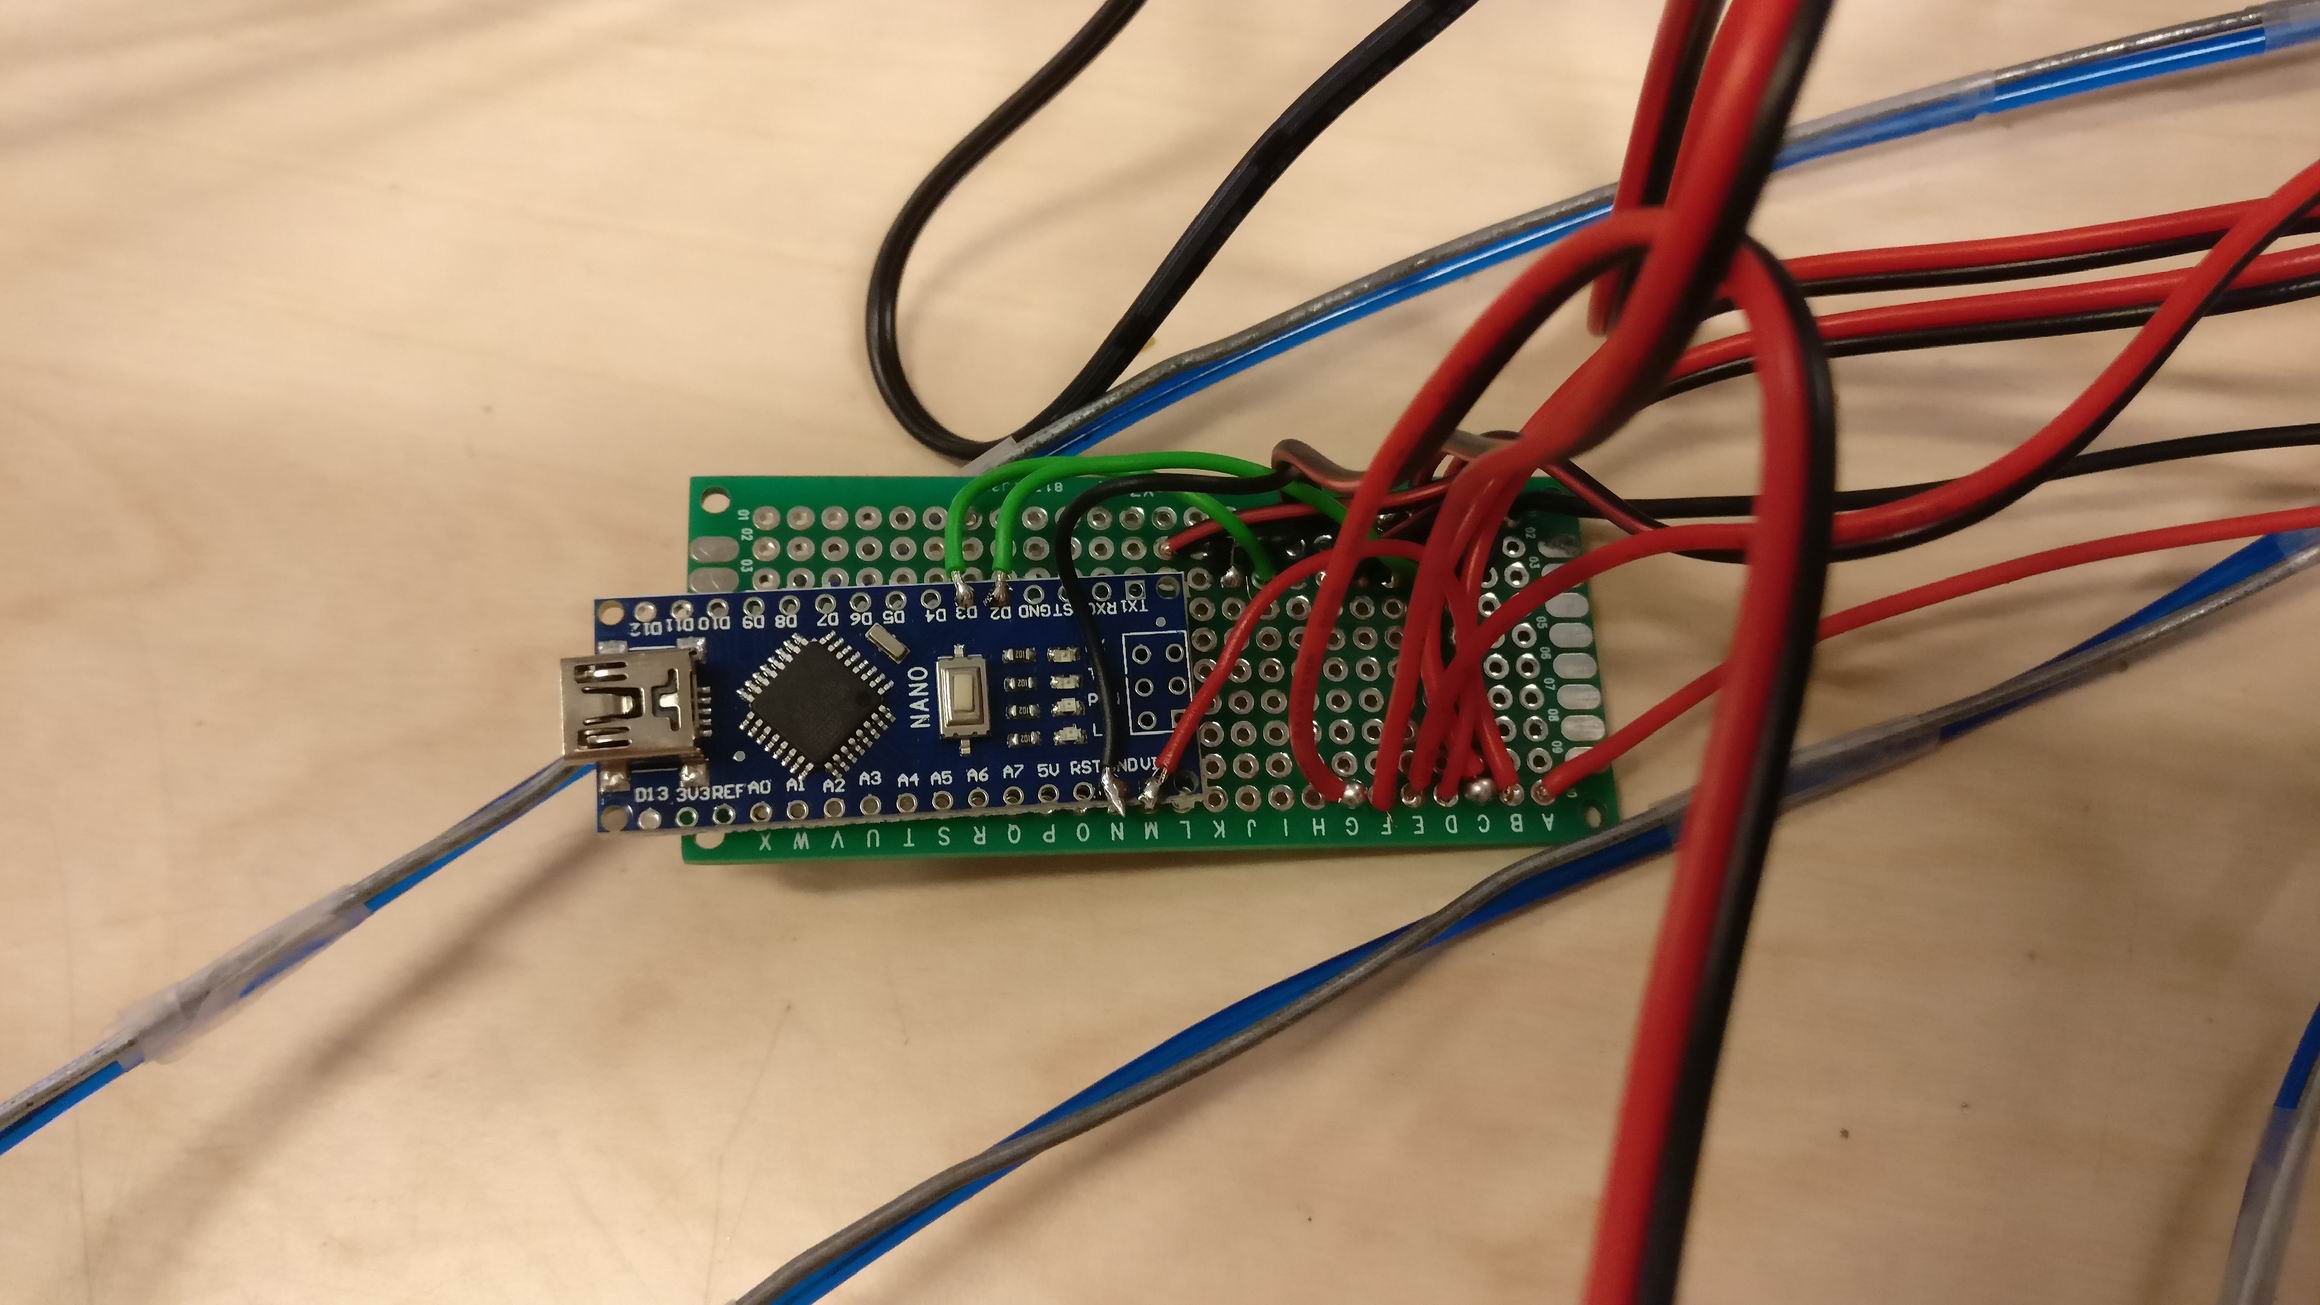
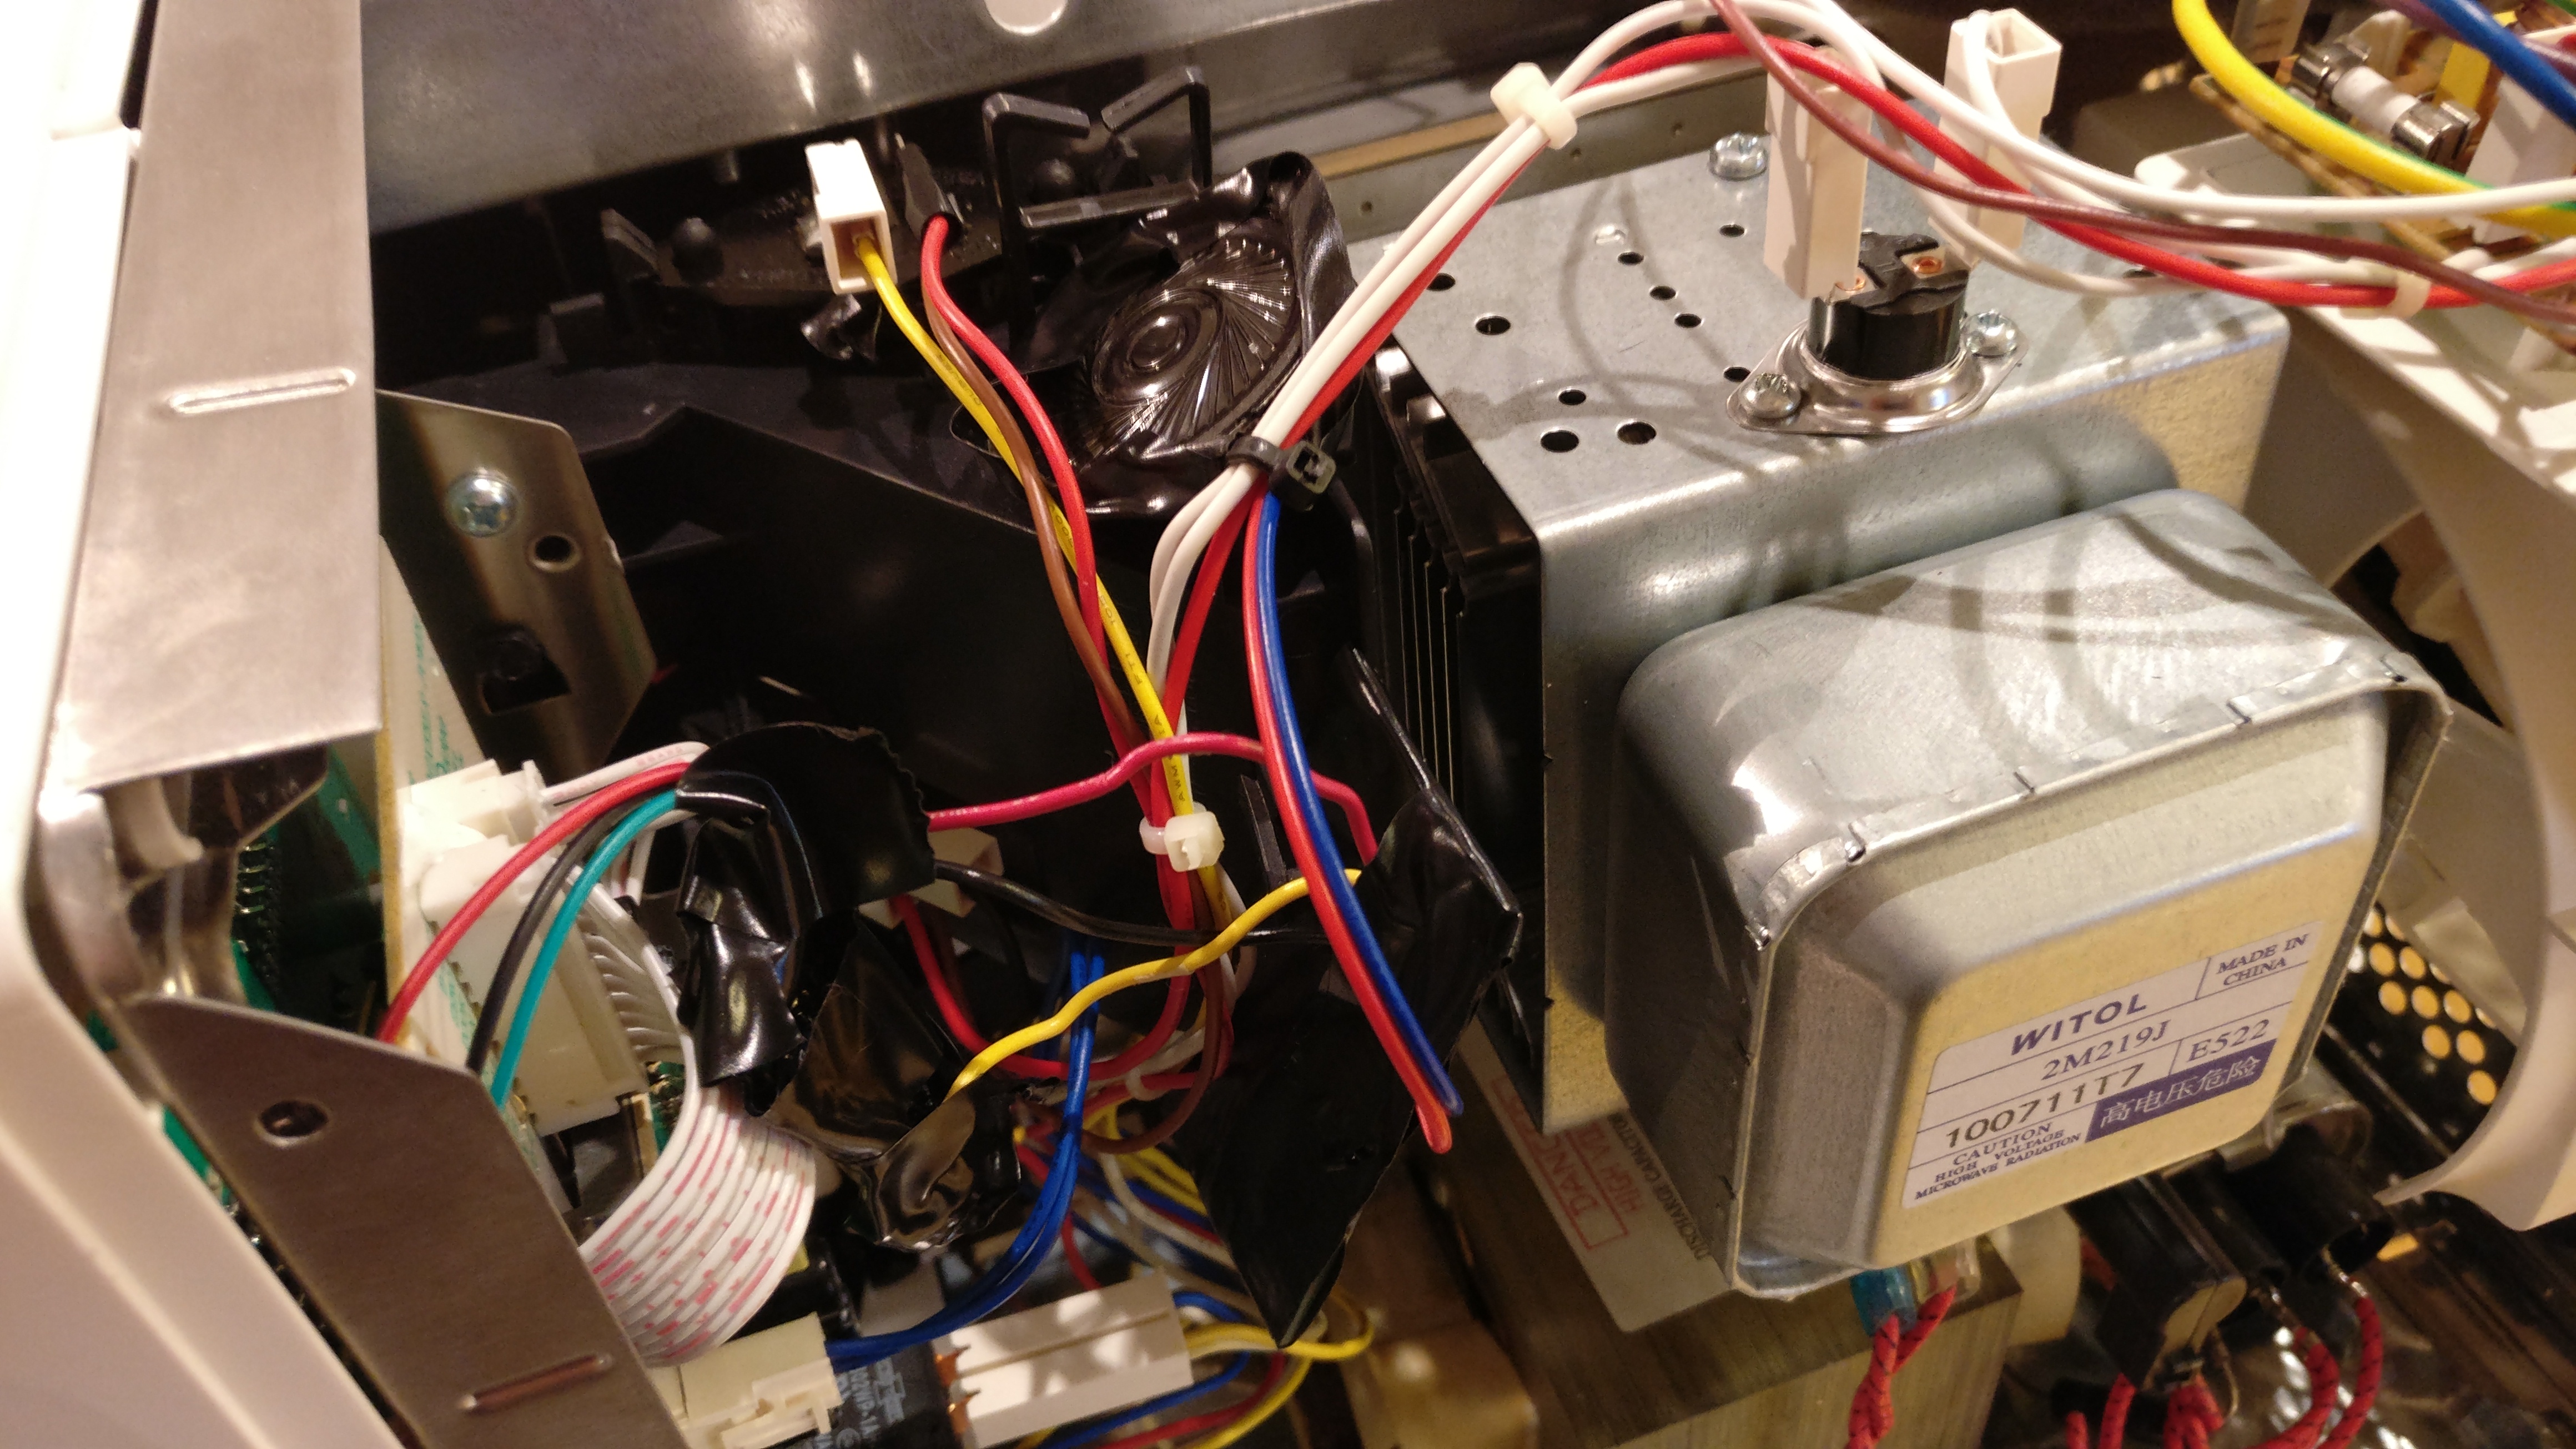
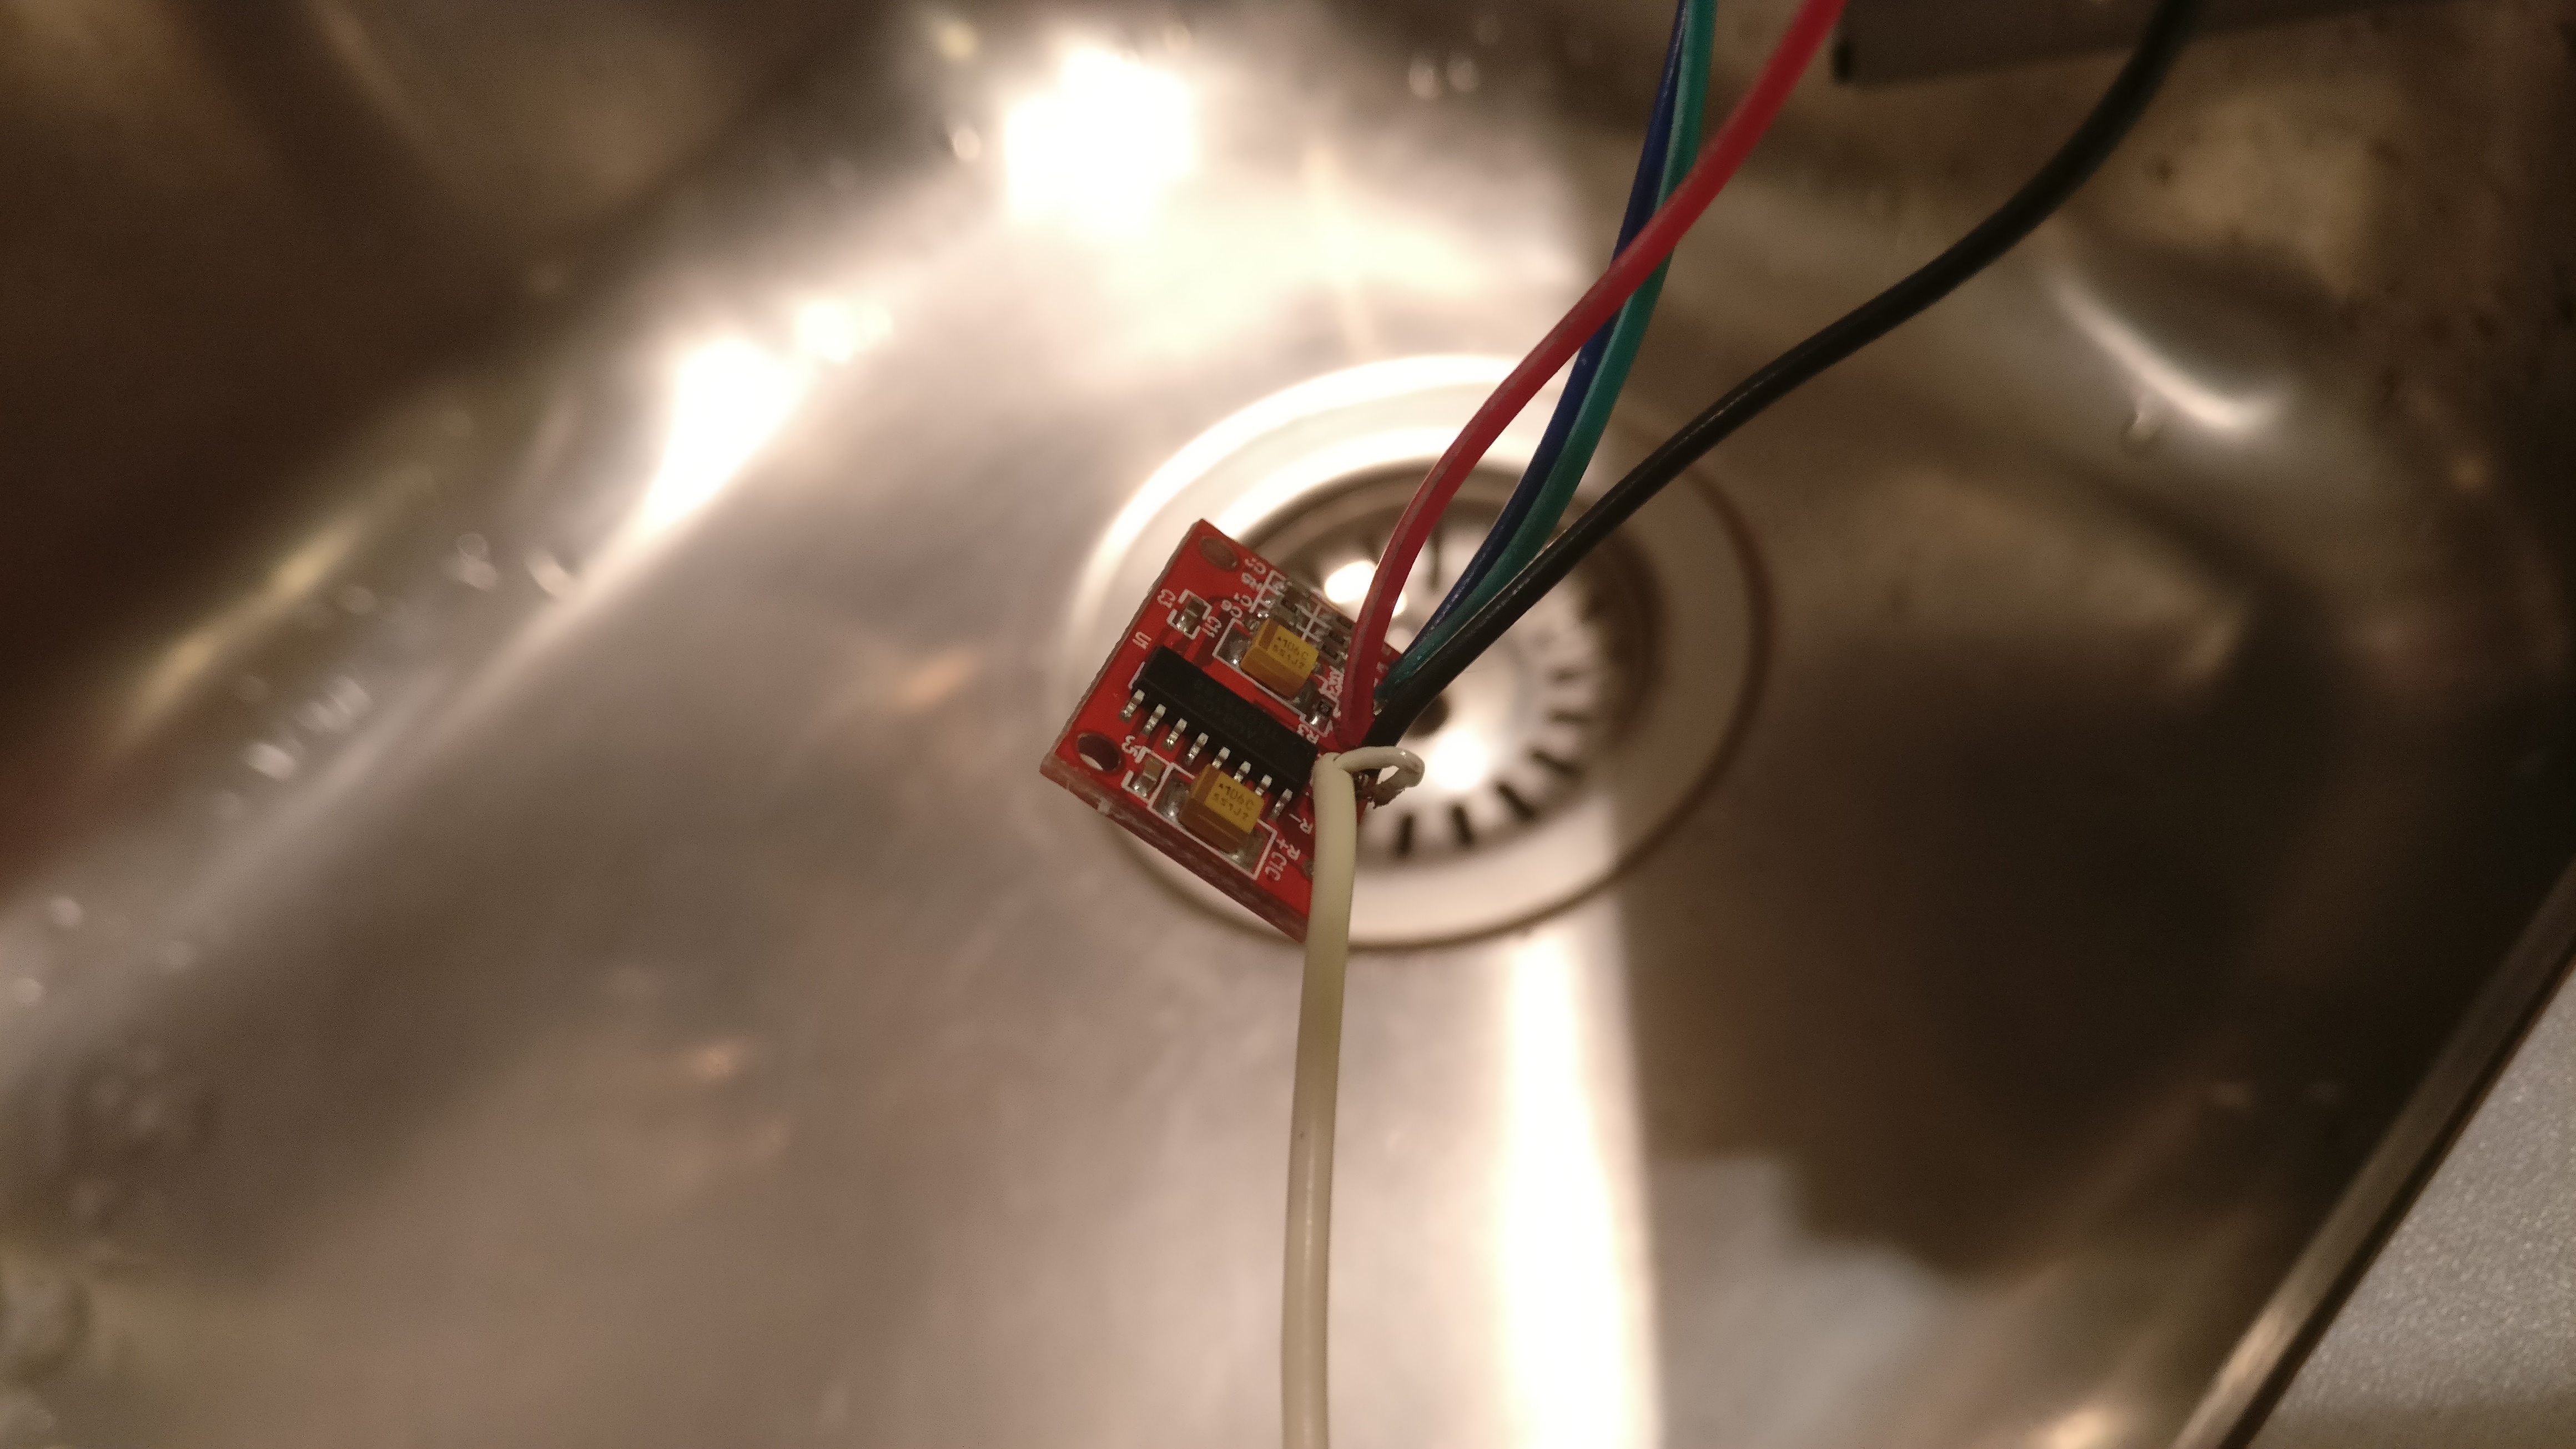
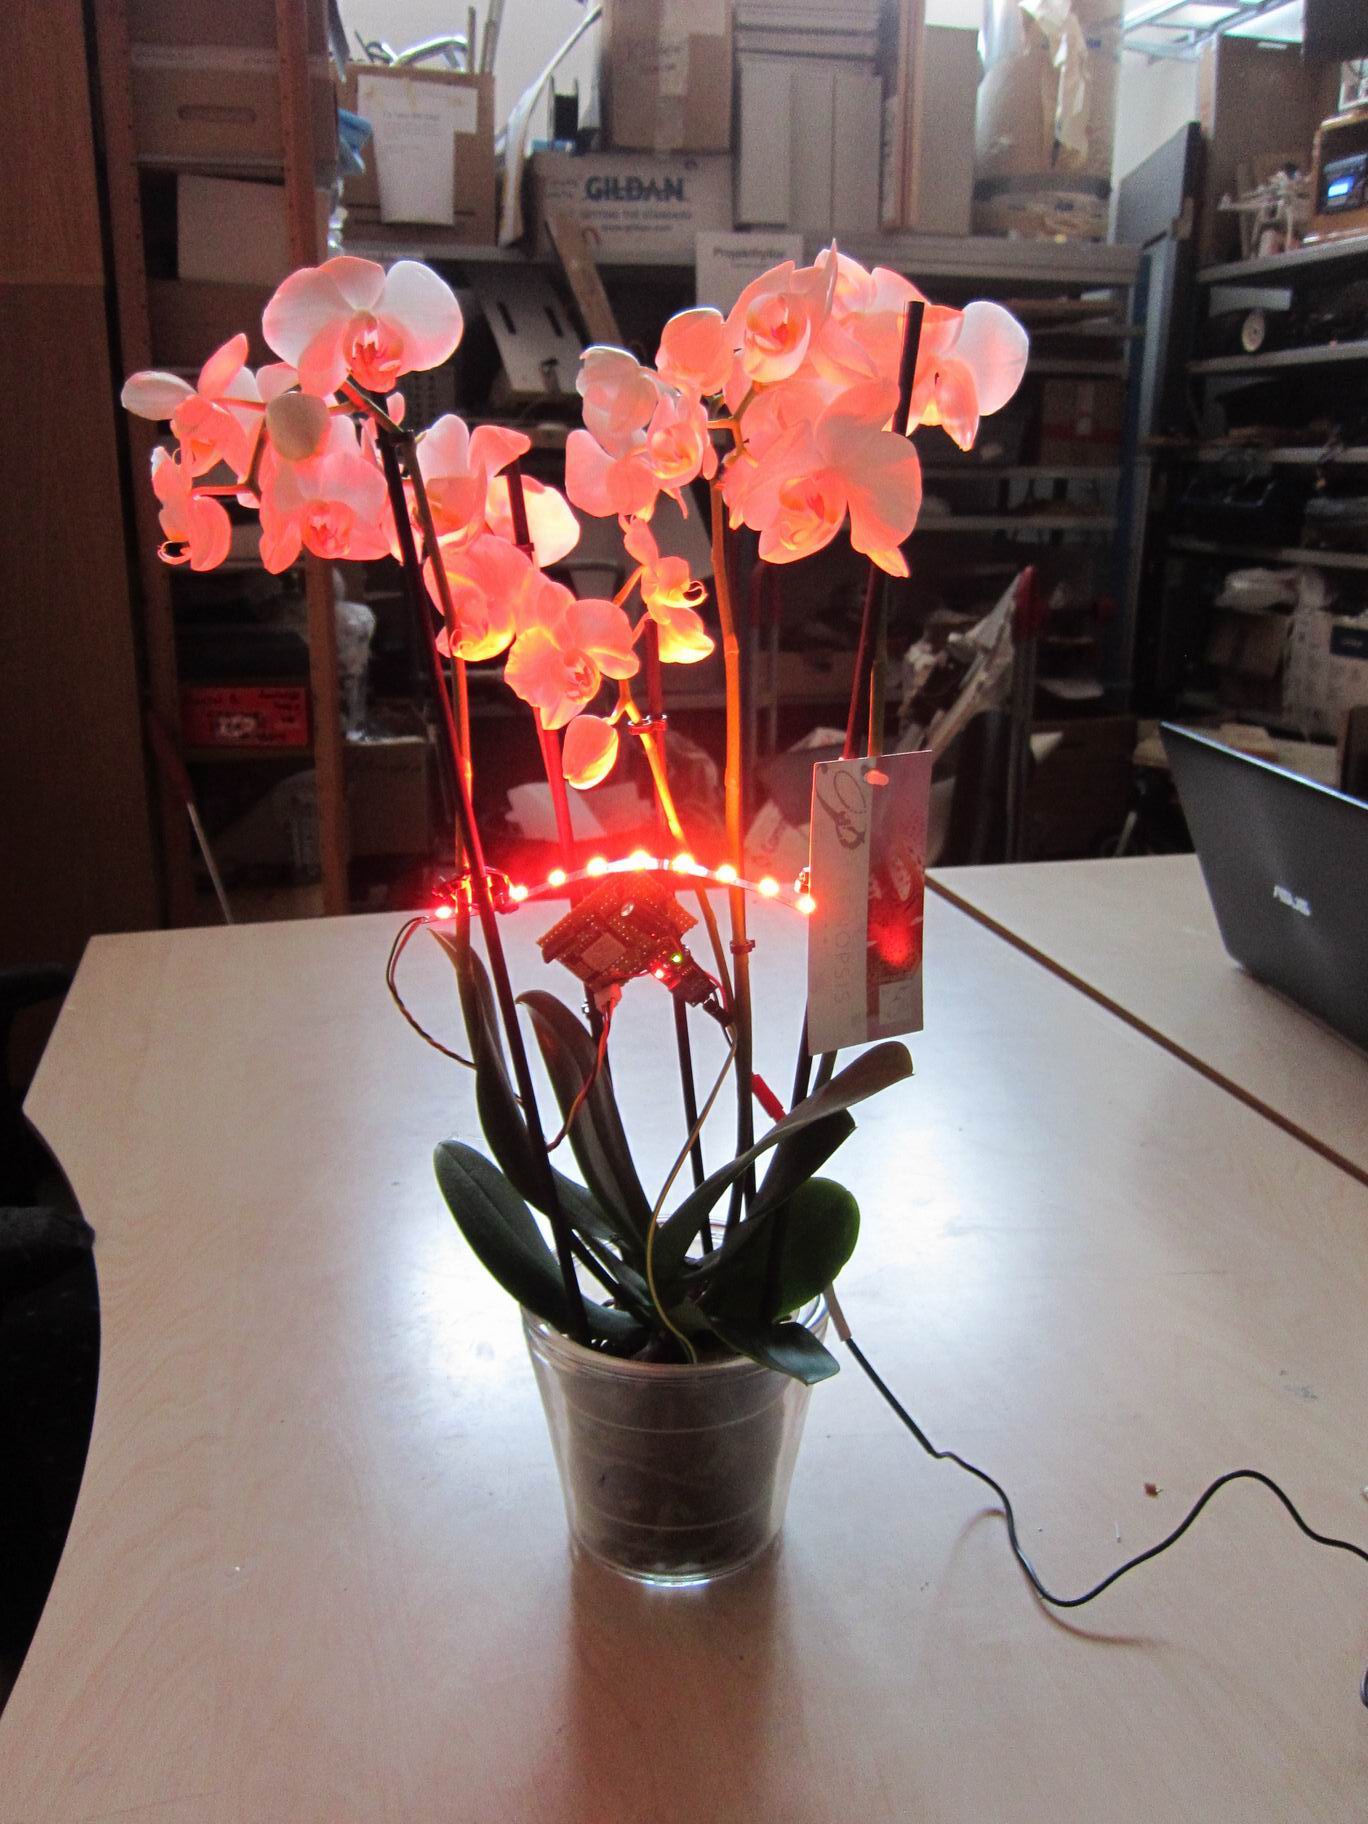
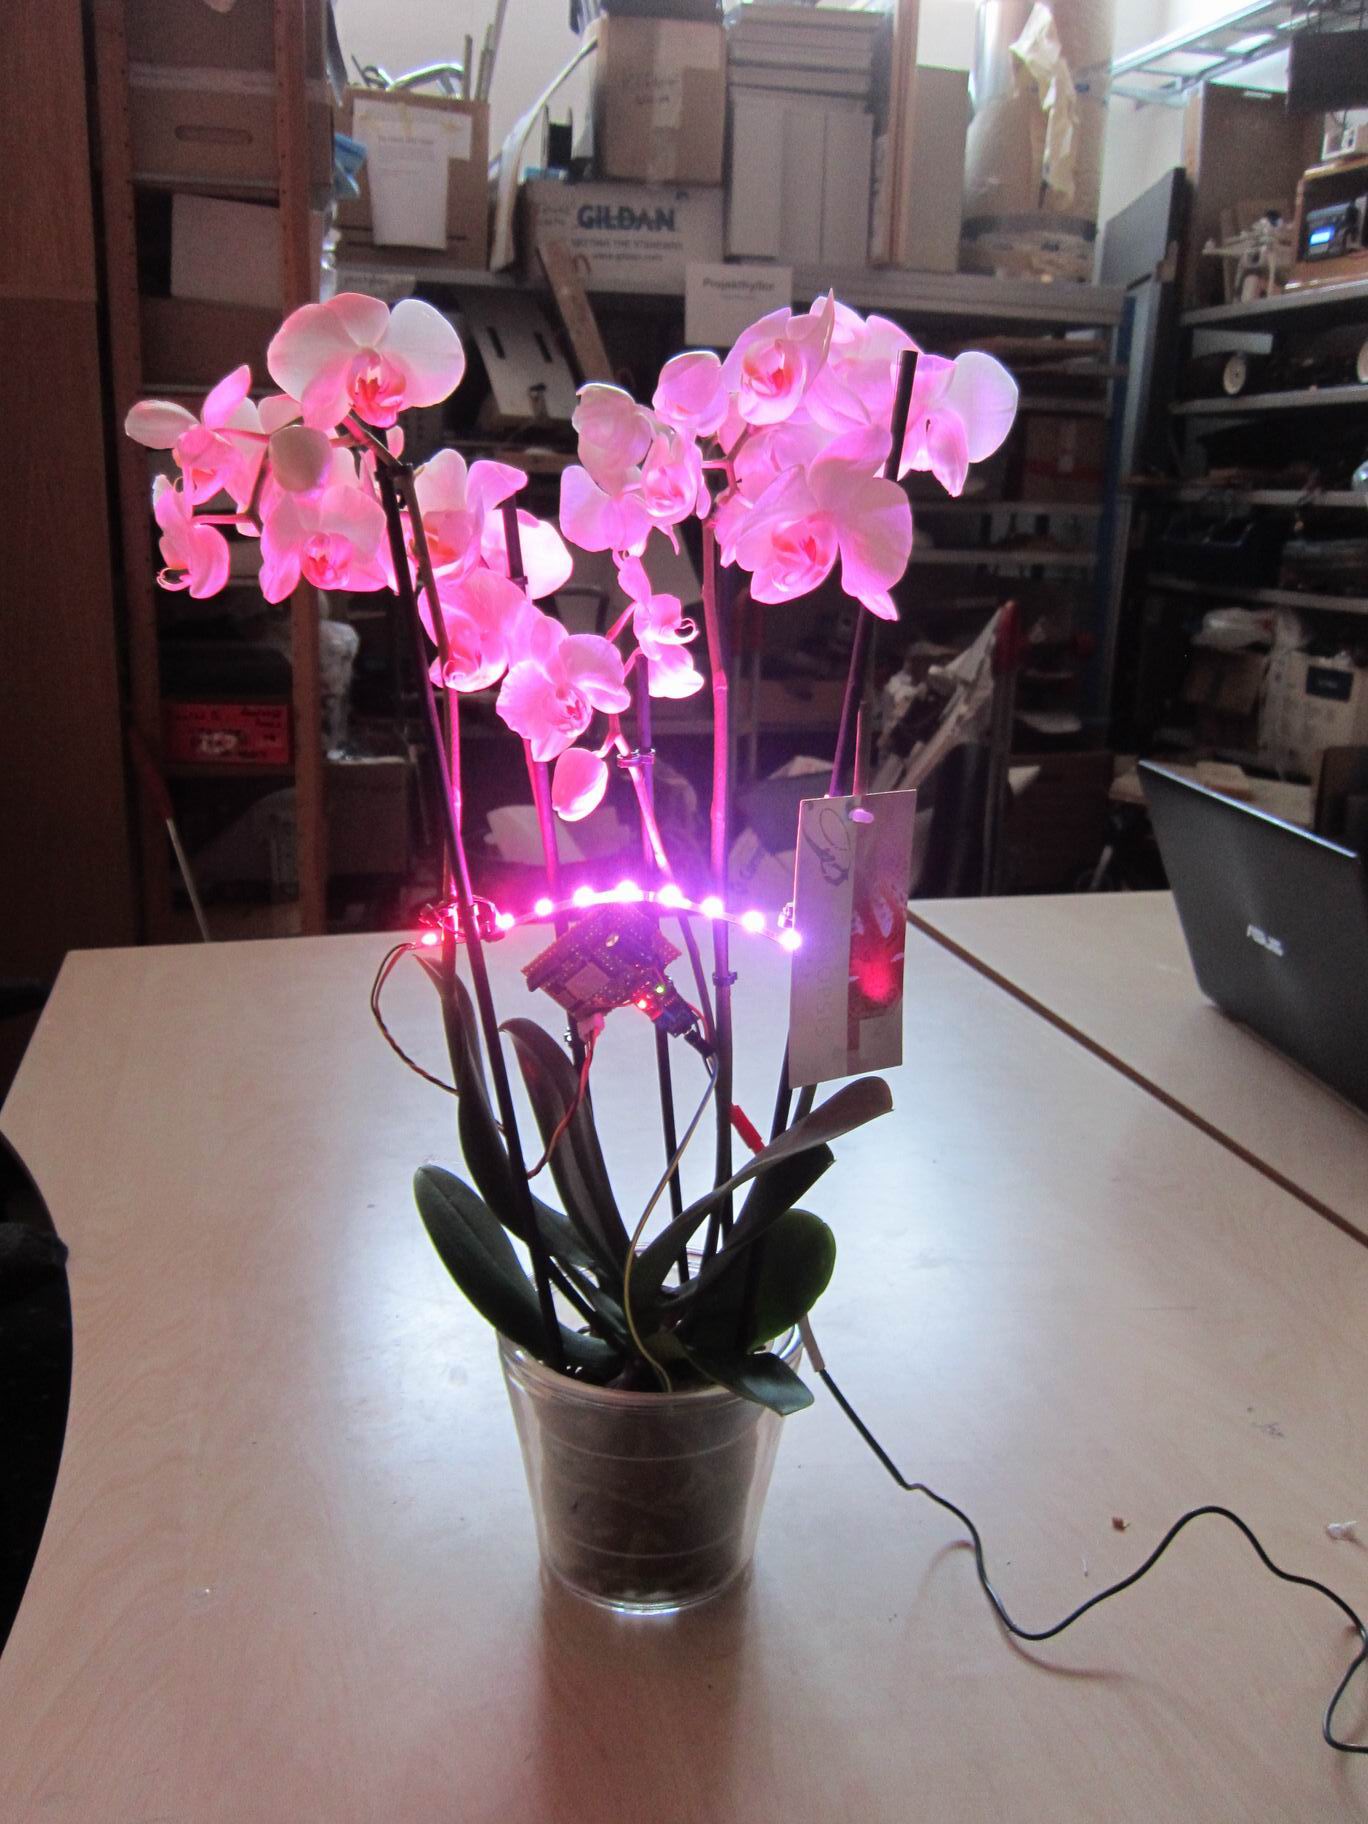
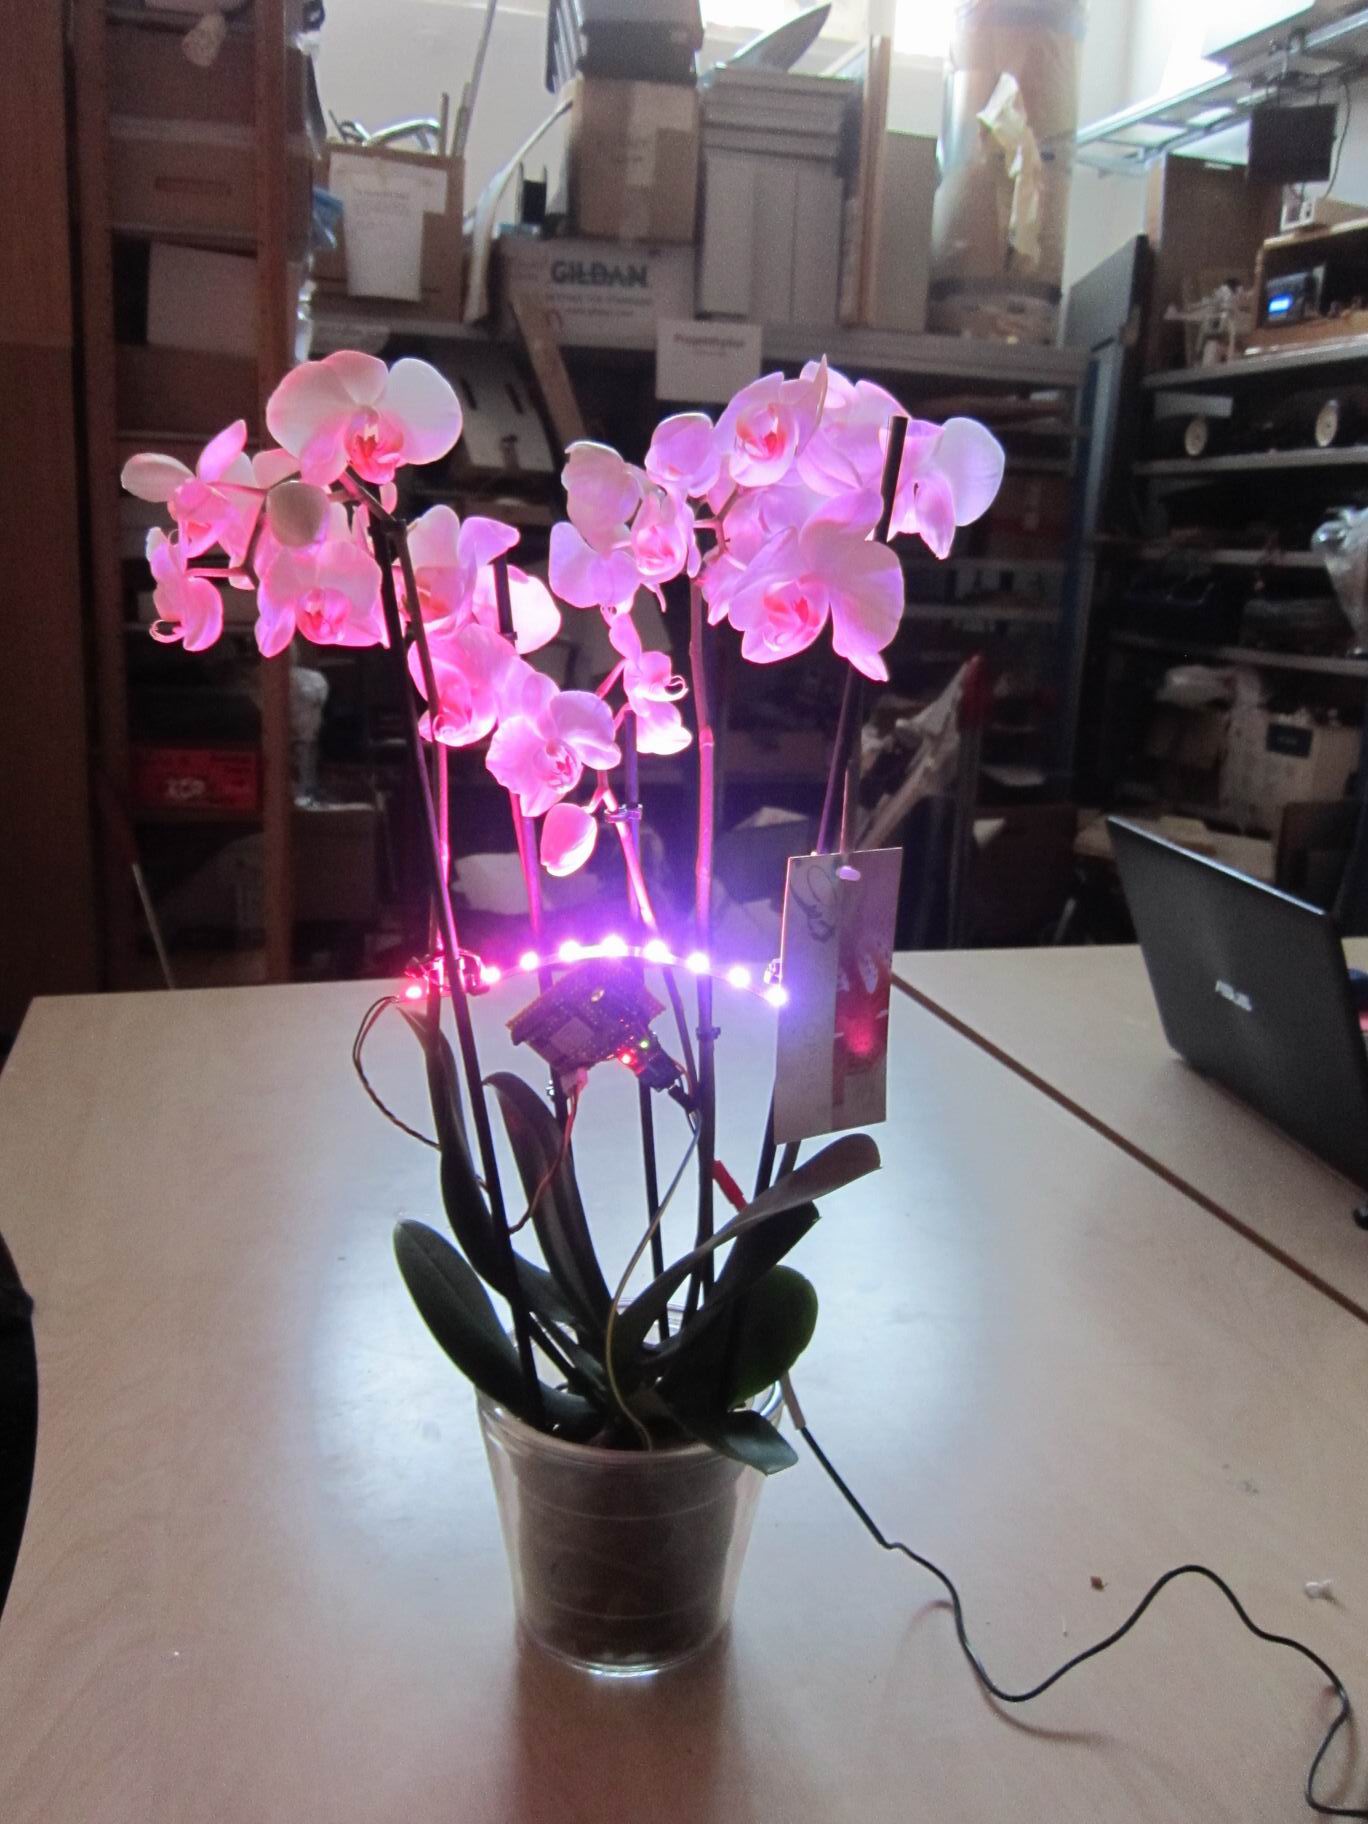
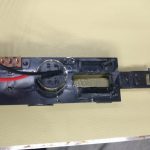
The space inside the truck bed is cramped, and I mean it. After fitting a small H-bridge, a couple of batteries and some cables together with a start module nothing more can fit.

As if the cramped space inside the truck bed was not a challenge big enough I choose to run Micro Python on the MCU.
It’s pretty nice and all, I could remotly upload new Python code to the flash and run my test scripts inside a Python interactive terminal.
You can find the code here: https://github.com/TimGremalm/Folkrace187

I found the challenges of the small form factor thrilling, it was a really fun adventure puzzling everything together and make it look pretty stock.
But there is room for many improvements! The Fuller Car system have a very nice steering system, and it’s very useful for a future design.
But Fullers drive train is a worm gear, it makes it strong but gives the drive train some momentum that makes the car slow in response when braking och switching between going forward and backwards. For future builds I would have to build my own drive train.

The cramped space inside the truck bed is due to a lot of premade modules and a lot of cables. A more effective way of doing it would be to make a PCB with a ESP8266, H-bridge and sensor bus built in.

Also I think I would abandon Micro Python for C and Free RTOS. The VL53L0X driver is very slow in Micro Python and it takes too long to read 3 sensors. The whole driver thing is pretty hard to fault find and gives great me a great hazzle.

Prop for Downton Abbey larp


For the larp 1912 we wanted to have servant bells like in Downton Abbey.


Carl Nordblom made a nice looking construction for the bells using leaf springs.


An ESP8266 is listening on some bell topics for messages. If a message is received it will swing the corresponding servo with a bell hooked up.


To trigger the bells we built a box with a auto returning string to pull. The strings is hooked up to a micro switch witch triggers the reset pin on a ESP8266.
When the ESP8266 starts it sends a message on the corresponding MQTT topic to ring, then enter heavy sleep mode.

Prop Interactive Water effecet lamp


For the larp Do Androids Pray? we wanted to recreate the companys corridor scene from Blade Runner 2049 where some beautiful water light seemed to follow the persons who walked up the stairs.

I thought that it would be doable using multiple water effect light and dim them up when movement was detected.


I purchased some cheap water effect lamps of eBay and took them apart to inspect. The LED was hooked up to some mosfets, så I just removed the resistor leading to the original MCU and hotwired some leads to my own MCU.


I drilled out a small cut out for a 3 pin header an glued it into place and put a PIR module in.


The whole assembly kind of look like it’s original except an exposed PIR module.

Prop Sign “Rund” for the larp Do Androids Dream?

IMG_20170204_023729IMG_20170204_023728
For the larp Do Androids Dream we needed a lot of small props to give a Blade Runner feeling of the scene.
Small lit up signs would give that Hong Kong look that is so common in Blade Runner. Carl Nordblom, the set designer, had some ideas about how the sign should look, and had found some sample pictures.

IMG_20170204_023730IMG_20170204_023756
From the sample pictures I got an idea of how to produce a design. And from that idea I started to make a CAD-design.
The finished design ended up being almost exactly like the CAD-design.
Here is the Drawing of the Round Sign (Do Androids Dream).pdf

IMG_20170204_023731
IMG_20170204_023732IMG_20170204_023733
Small wooden block for holding a aluminium plate in a slot.

IMG_20170204_023735
IMG_20170204_023736IMG_20170204_023737IMG_20170204_023738IMG_20170204_023739IMG_20170204_023740
IMG_20170204_023742
The wooden blocks attached on to a sheet of flexible PET plastic.
The sheet is bent around the round aluminum plate with the help of the slots.

IMG_20170204_023743
The PET ring is transparent with a blue tint which would not be fitting in a light fixture. So we painted the PET ring in black to make it opaque.

IMG_20170204_023744IMG_20170204_023745IMG_20170204_023746IMG_20170204_023747
Warm white 5050 LED strip was glued on to the aluminium plate.
9×6 strips with 54 LED’s on each side makes 108 LED’s in total
108 * 20mA = 2.16A
2.16A * 12V = 26W

IMG_20170204_023749
IMG_20170204_023748IMG_20170204_023750IMG_20170204_023751
The LED strips is driven by 12V that comes in from JST-connector.
But the sign is supposed to look like an old florescent light, so to give that look the light should look like it flicker occasionally.
I hooked up an N-channel MOSFET IRLML6344 and connected it to a Arduino Nano for timing the random flickering.

IMG_20170204_023752
A big steel angle attached to the heavy aluminium plate of the sign, this is used for screwing the signs to a wall. Also the JST power connector, hidden in black heat shrink tubing.

IMG_20170204_023755
IMG_20170204_023753IMG_20170204_023754
In the outer sides of the sign round white acrylic plates will be inserted. They will rest against the wooden blocks and hold back by small sprints.
Each side of the sign is mirrored, so one sign have two faces.
The light is powerful enough to project through the white acrylic plastic. And with opaque paint on top will make a huge contrast perfect for a sign.

Prop Dragon in Noodle Bar for the larp Do Androids Dream?

IMG_024056
For the larp Do Androids Dream we needed a lot of small props to give a Blade Runner feeling of the scene.
An iconic part of the movie is the dragon sign above the Noodle Bar. I thought i could be made out of el wire and it could, it even looked like neon. The light emitting from the el wire was really low doh, I would prefer to have stronger light.

IMG_024057
I started out by placing steel wire in the dragons shape by hand.

IMG_024058
Attaching el wire around the steel wire frame was quite easy, just a matter of placing some transparent tape around it.

IMG_024059
When trying out the outer shape I know I was on the right track, it looked great!

IMG_024060
IMG_024061IMG_024062IMG_024063
The dragons tongue is animated in the movie, it’s animated in segments. I was after the same look, so I created two segments for the tongue and had the idea the enabling each segment by turning on and off the high voltage el wire transformers.
I connected a couple of N-channel MOSFET IRLML6344 and connected it to a Arduino Nano.

IMG_024064IMG_024065IMG_024066

µMute – A microwave oven silencer


I’m tired of the buzzer in the microwave oven that is beeping constant up to a minute.
IMG_20170122_0001

IMG_20170122_0002IMG_20170122_0003
So I opened it up like any normal hacker would, found the buzzer and snapped it off.

IMG_20170122_0005
IMG_20170122_0004
Sure, the buzzer was irritating, but so would be not to hear when my food is cooked. So i quickly had a look at the PCB and find a very interesting pinout.

IMG_20170122_0007
IMG_20170122_0006
So I soldered on some pins and started to measure the voltage level.
VCC of 5V looked promising for a microcontroller.

IMG_20170122_0009
IMG_20170122_0008
I had a look at the buzzer signal, it was a 2kHz signal with an amplitude of 5VDC.

IMG_20170122_0010
I had a rough idea in mind about having a small tune play instead of the 2kHz tone, and it should only play once.
So I shuffled some code together to code to play a small tune from the flash of an Arduino Nano. The flash could only hold about 18k of samples and was played at 8kHz.
https://github.com/TimGremalm/MicroMute
(inspired by http://playground.arduino.cc/Code/PCMAudio)
In lack of a better choice i choose Windows XP’s startup sound.
I shuffled some more code around to sample the original buzzer signal from a GPIO. If the sound is playing at more than 2kHz for a certain time I would trigger the sound.
I applied some time based software filters to filter out some noice.
I build a small amplifier out of an MOSFET (IRLML6344) and a small 0.5W speaker element I found at my local hackerspace.

IMG_20170122_0011
I throw it all into the chassis of the microwave oven. There was plenty of space, but i took some precautions to electrically isolate the PCB and speaker.

Unfortunately the sound from the small 0.5W element was too low. It barely was distinguishable against the sound of the microwave ovens fan.

IMG_20170122_0014
IMG_20170122_0015IMG_20170122_0012IMG_20170122_0013
IMG_20170122_0017IMG_20170122_0018
So I upgraded the element for a 3W element that I found in an old PC speaker, and took some precautions and upgraded my amplifier as well for the more stable Class-D amplifier PAM8403.

MicroMuteSchematic.sch
Schematic PDF

The sound was much louder and you can clearly hear the “Done”-sound from the microwave oven.

Festivalljus – LED, Lens, Heatsink Assembly

Assembly Spotlight With Chassi 3D 1
One of the hardest things with this project is to solve the problem with the heating. 9 pieces of 3W LED tends to get very hot, 27W that have to be transferred to the air.

LED 3DLED Inverted 3D
If I bend the pins on the led I can make the LED’s go through the PCB. An alternative is to use a lot of small via’s under the LED to transfer the heat to the underside. But I think a direct contact with the heatsink will be more effective.

Assembly PCB with LEDs 3D Without Lens
Assembly PCB with LEDs BottomAssembly PCB with LEDs 3DAssembly PCB with LEDs SideAssembly PCB with LEDs Top

Assembly PCB with LEDs 3D With Heatsink Fan
Assembly PCB with LEDs 3D With Heatsink LensesAssembly PCB with LEDs 3D With Heatsink Side
A CPU cooler should be sufficient enough to transfer the heat out to the air. I don’t know if the fan is necessary.

The whole assembly will look something like this:
Assembly Spotlight With Chassi 3D 2Assembly Spotlight With Chassi 3D 3Assembly Spotlight With Chassi 3D 4

Optics Specification

Orkide Random – A IoT flower with pretty random power

A video posted by Tim Gremalm (@timgremalm) on


Probably the most random plant in the world, it fetches a “true” random signal and display pretty colors on a WS2812 addressable LED strip.
The seed is based on one of the best randomization generators; cosmic background radiation from random.org. Yet another Internet of Things device made out of the ESP8266, the dirt cheap powerful WiFi enabled microcontroller.
IMG_6704
IMG_6705IMG_6706IMG_6707

IMG_6708IMG_6709IMG_6710IMG_6712IMG_6713IMG_6714IMG_6711

IoT Nalle dances to Twitter feed

IMG_6683
An Internet of Things enabled teddy bear that dances at filtered Twitter statuses.

IMG_6684
IMG_6685IMG_6688IMG_6686IMG_6687
To move the teddy bears arms servos is used. It’s a pretty simple setup, some extenders for the arms that is going through the real arms of the teddy bear.
The servos is quite weak, so they bearly move the arms at all.

IMG_6689
IMG_6690
Mounting of the servos.

IMG_6691
IMG_6692
The electronic setups contains of a small cheap microprocessor called ESP8266. The ESP8266 have a small WiFI-antenna integrated in the breakout board and can hook up to any access point, or even create one.
I’m running the firmware NodeMCU , it’s a real time LUA interpreter. So the firmware is only programmed once on the flash. To write your own program you just transfer them over serial UART, and the firmware will save the script on flash.
The processor is running at 80MHz so it’s pretty fast.

IMG_6693
I’m using Twitters API to fetch the latest post on a specific search term. The API gives me a detailed formated JSON file containing the time and date of the post, as well as the post.
The Twitter API is quite messy to work with, a lot of headers and authentication is required. The ESP would likly handle both the SSL and the big JSON format, but it will steal some CPU-time and it’s hard to work with. I made a PHP-proxy for the twitter feed, parsing the time and date and presenting it in unix timecode. The message of the post is stored as an MD5 hash sum.
On the IoT Nalle i keep track of the already “danced” Twitter posts and only dnaces to new posts.

IMG_6695
IMG_6694IMG_6696IMG_6697
Final assembly, a lot of hot glue and screws was used.